1
Open the Configuration File
Open the sheet configuration file attached to your Risksheet document. You can edit it through the configuration editor or directly as an attachment.
2
Define the Column Entry
Add a new object to the 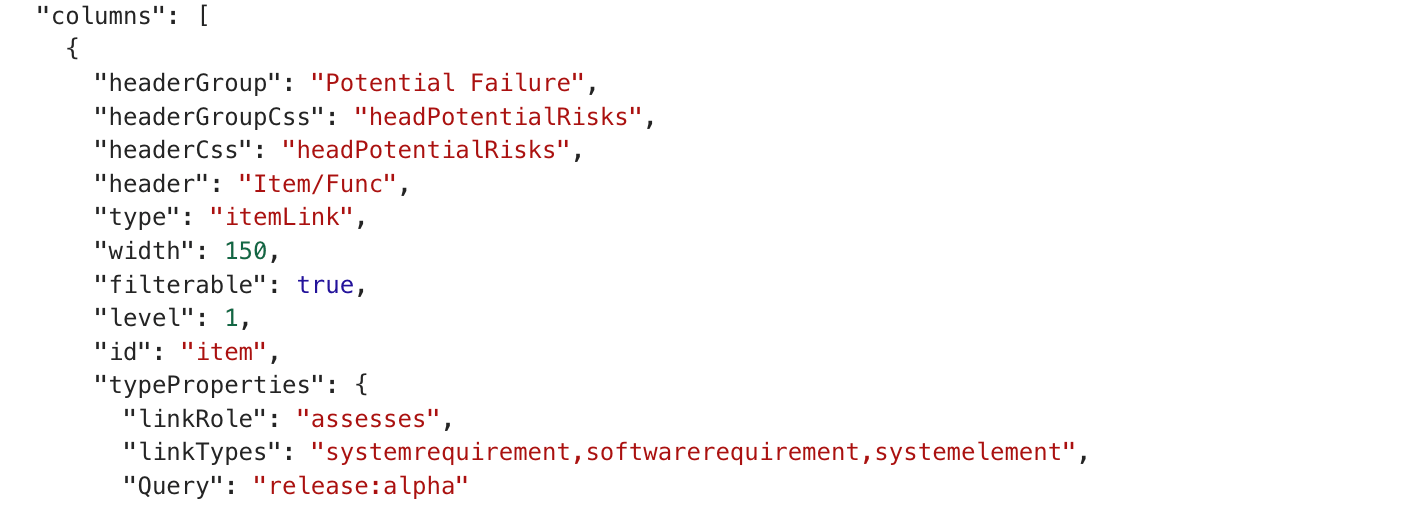
columns array in your configuration. Each column requires at minimum a bindings and header:3
Configure Column Properties
Set the properties that control column behavior: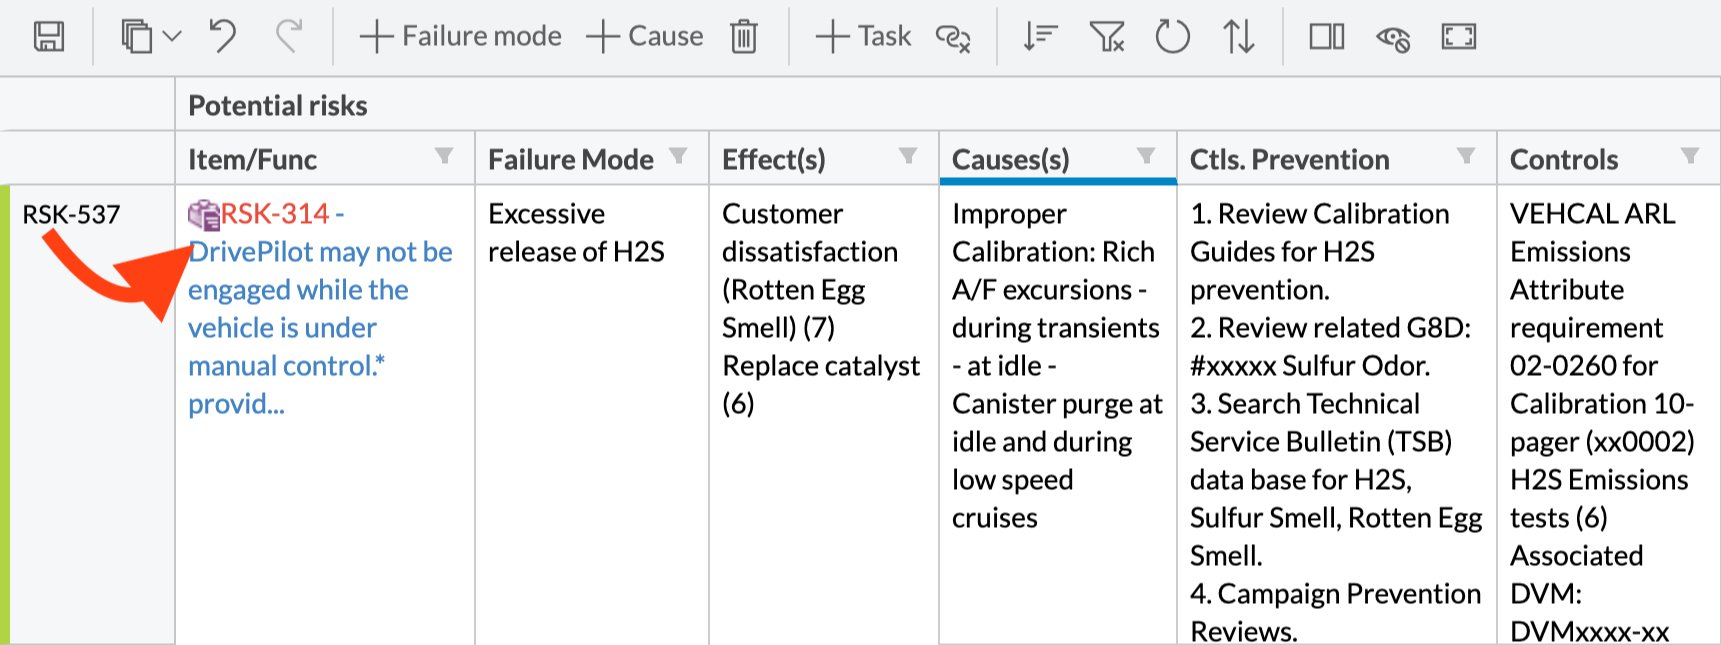
4
Group Related Columns
Use The group header height is controlled by
headerGroup to organize columns under a shared group header:headers.columnGroupHeader.height (default: 32 pixels).If you omit the type property, Risksheet automatically detects the type from the Polarion field definition. For standard Polarion fields like description, title, or severity, auto-detection works reliably. Explicitly set type when binding to custom fields or when you want to override the default rendering.5
Control Read-Only Behavior
Certain columns become read-only automatically:
- Columns with a
formulaproperty - Columns with a
serverRenderproperty - System fields:
id,status,type,project,outlineNumber - Fields where Polarion permissions deny modification
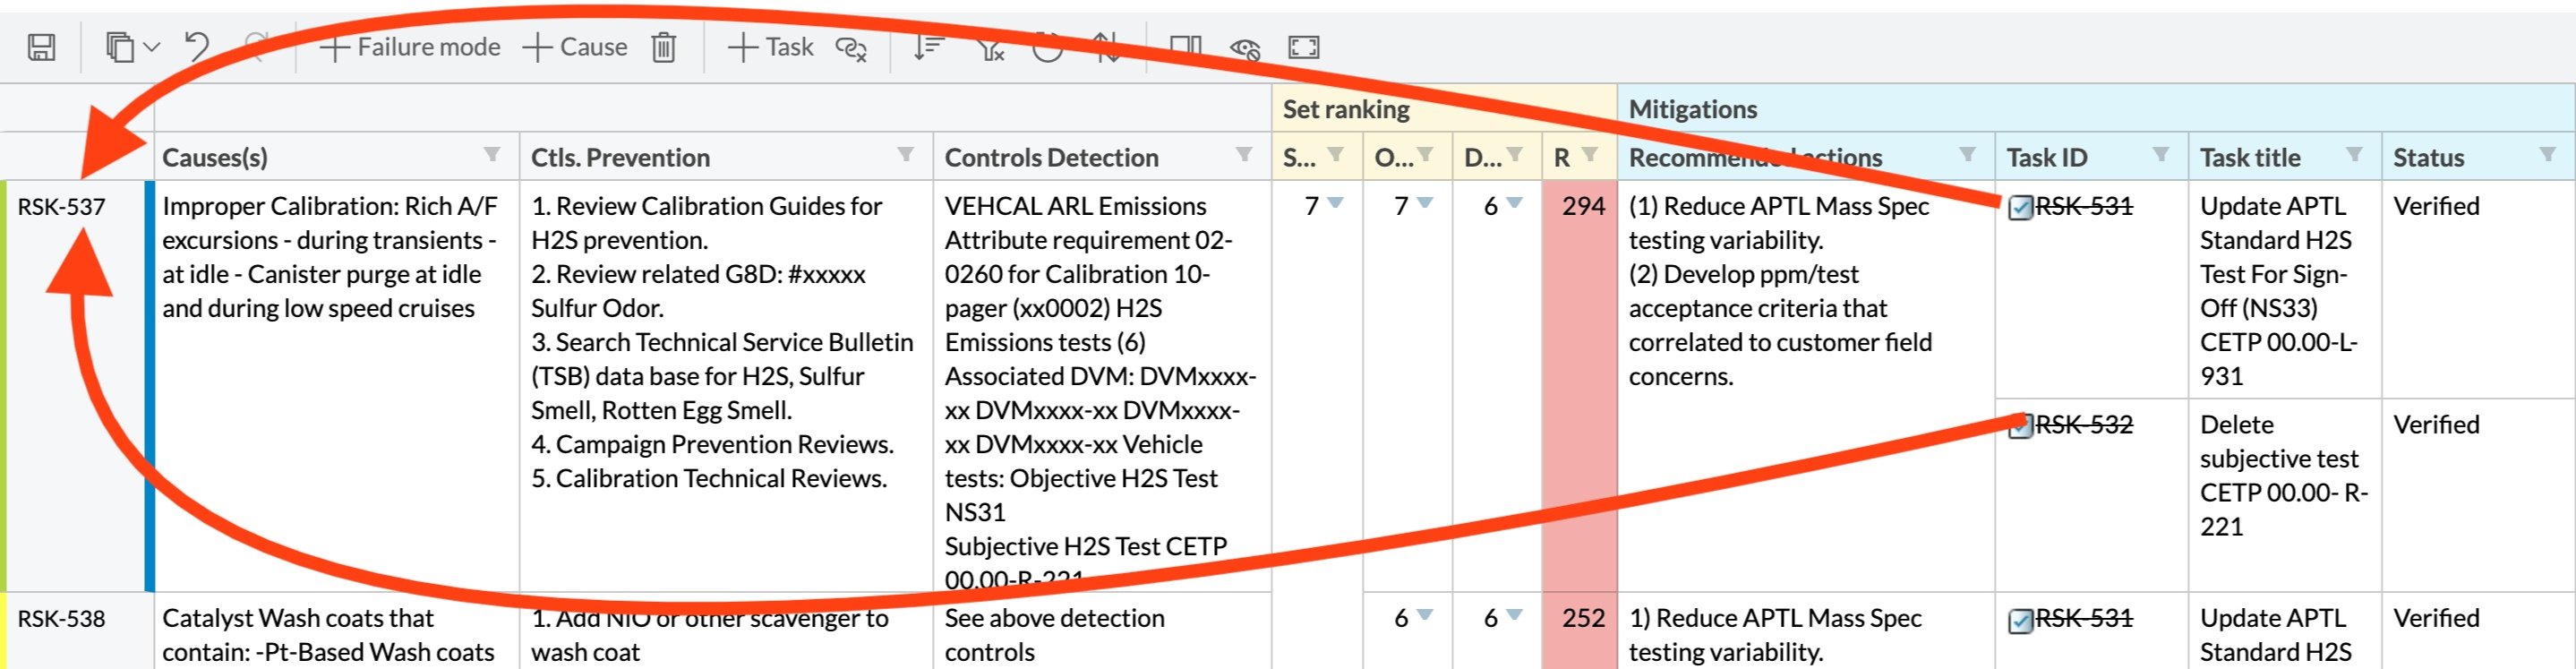
Verification
Reload your Risksheet page after saving the configuration. You should now see the new column in the grid with the specified header text. Click on a cell in the column to verify it is editable (unless markedreadOnly).
See Also
- Column Configuration — overview of all column configuration options
- Configure Calculated Columns — add formula-driven columns
- Control Column Visibility — show and hide columns
- Configure Enum Columns — set up dropdown columns
- Add Header Tooltips — add descriptions to column headers