

Open them from Administration → Nextedy SCHEDULER, then select Setup or License.
Both pages need Polarion administrator access.
Setup
The page is headed Nextedy SCHEDULER Setup and is read top to bottom in five parts: the install banner, the update check, a section about existing projects, the demo project environment, and the help cards.The install banner and plugin version
The page opens with an information banner reading The Nextedy SCHEDULER add-on is installed successfully, followed by Plugin Version and the build number of the plugin currently running. That banner is the single quickest installation check available: it renders only when Polarion has loaded Scheduler’s web application, so seeing it confirms both that Scheduler is deployed and that the configuration cache was rebuilt on the last startup.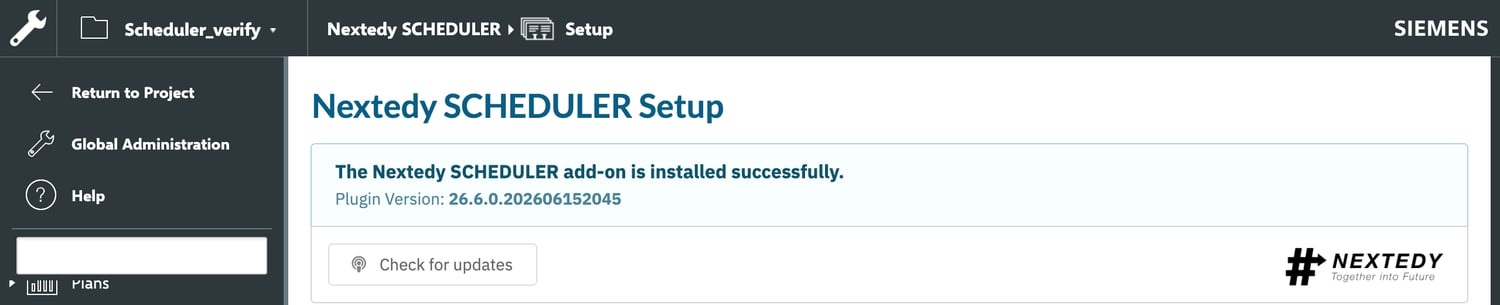
If the Nextedy SCHEDULER section is missing from Administration altogether, or this page loads without content, Scheduler was not picked up.
See Installation for the deployment sequence, including the configuration-cache deletion that this most often comes down to.
Check for updates
Below the banner sits a Check for updates button. Selecting it retrieves the latest published build number and replaces the button with:
Compare Currently Available Version with the Plugin Version in the banner above it.
If they differ, download the newer archive and repeat the deployment procedure — an update is the same sequence as a fresh install, and it includes deleting the configuration cache again.
The check reaches out to Nextedy over the internet.
On a server with no outbound access the available version cannot be retrieved; compare Plugin Version against the download page from a machine that does have access.
Setup Scheduler in Existing Projects
A section headed Setup Scheduler in Existing Projects sits between the update check and the demo environment. It does not yet carry instructions. Nothing on this page is required to use Scheduler in a project you already have. A board is created by placing the Scheduler widget on a Polarion page in that project and pointing it at a work-item query:- Add the Scheduler Widget — the full procedure
- Widget Parameters — every parameter with its out-of-the-box value
Demo Project Template
The next section, Or Install Demo Project Environment, provisions a ready-made project with sample Scheduler pages. It is optional, and it exists to give you a configured board to look at without building one first. Its first part, Demo Project Template, installs the template itself into your Polarion repository:
The template is uploaded to:
Create Demo Project
The Create Demo Project section stays inactive until a template is installed. Once it is active, it lists the five steps to follow — they run in Polarion’s own project-creation wizard, not on this page: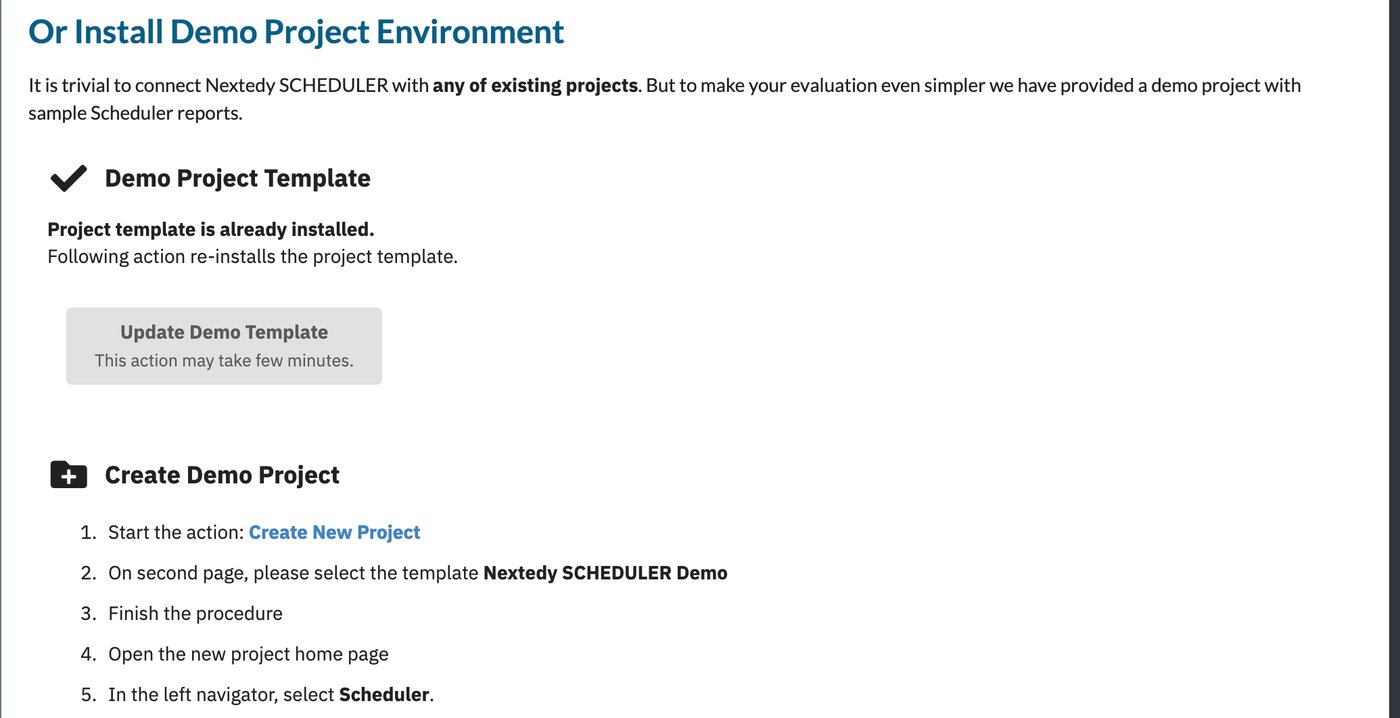
Or Install Demo Project Environment on a server where the template is already installed, so the button reads Update Demo Template and Create Demo Project is active.
1
Start Create New Project
Select the Create New Project action linked in the first step.
Polarion’s project-creation wizard opens.
2
Select the template
On the wizard’s second page, select the template Nextedy SCHEDULER Demo.
3
Finish the wizard
Complete the remaining wizard pages to create the project.
4
Open the new project
Open the new project’s home page.
5
Open the board
In the left navigator, select Scheduler.The page that opens already hosts a configured Scheduler widget, filled with the template’s sample work items — rows, task bars, load markers and a populated Unplanned sidebar.
Need Help?
The page closes with a Need Help? row of three cards. Each card’s button opens a Nextedy resource in a new browser tab:
The Support Tickets card also gives
support@nextedy.com as an alternative to the portal.
License
The page is headed Nextedy SCHEDULER License and has three parts: a status banner, the licence details, and a footer menu.The status banner
The banner at the top states the licence status in words, and its colour reflects that status — informational when the licence is in order, and warning or negative when it is not. Under a valid licence the banner reports the two numbers that decide whether your licence is big enough:
Read them together.
The licence is sized correctly while the second number stays within the first; when the count of role holders passes what the licence covers, that is the point to talk to Nextedy about a larger licence.
The
users role is a Polarion role, and it is Polarion that decides who holds it.
Scheduler only counts the holders — adding or removing the role is done in Polarion’s own user administration.The licence details
Below the banner, the page prints the installed licence itself, so you can read what was issued without opening the licence file on the server: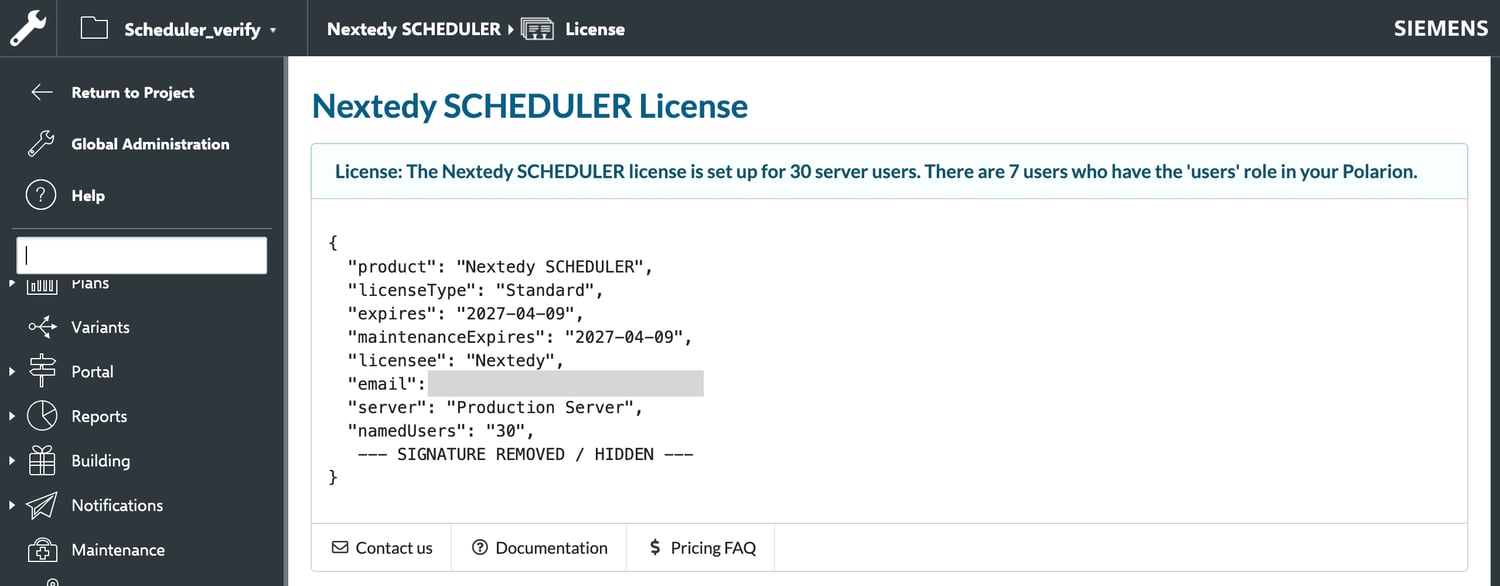
The License page under a valid licence: the status banner with its two user numbers, the licence details with the signature replaced by a placeholder, and the footer menu.
When no licence is installed
With no production licence file in place, the details block is replaced by a short notice instead:- It reports that no production licence was found.
- It links to an article on installing a licence.
- It states that the evaluation version can be used for 30 days.
This notice is conditional.
It appears only when no production licence is found, so on a licensed server you will never see it — the licence details take its place.
The footer menu
The page ends with three links:What each page answers
See Also
- Installation — deploying Scheduler, and the verification steps that use both pages
- Add the Scheduler Widget — putting a board into a project of your own
- Widget Parameters — everything configured per board rather than per server
- Frequently Asked Questions — shorter answers to the questions these pages raise