

What you will achieve
By the end of this tutorial, you will have taken a work item out of the Unplanned sidebar, dropped it onto a resource row, moved it to a different date, and sent it back to the sidebar again. Along the way you will see the three things that surprise people most on a first pass: where the duration comes from, that there is no Save button, and that unplanning an item does not delete it.Prerequisites
- A working Scheduler board on a Polarion page (see Your First Board)
- At least one unscheduled work item in the Unplanned sidebar
- Permission to edit those work items in Polarion
1
Find an item in the Unplanned sidebar
- If the sidebar is not visible, switch it on with the toolbar’s Show unscheduled items in sidebar button
- Type a word from the item’s title into the sidebar’s Search… box, or pick a saved query from the funnel menu, until you can see the card you want
21 out of 28 work items reflecting your filter.2
Drop the item onto a resource row
Drag the card out of the sidebar and drop it on the row of the person who should do the work, on the day it should start.Two things happen in one gesture: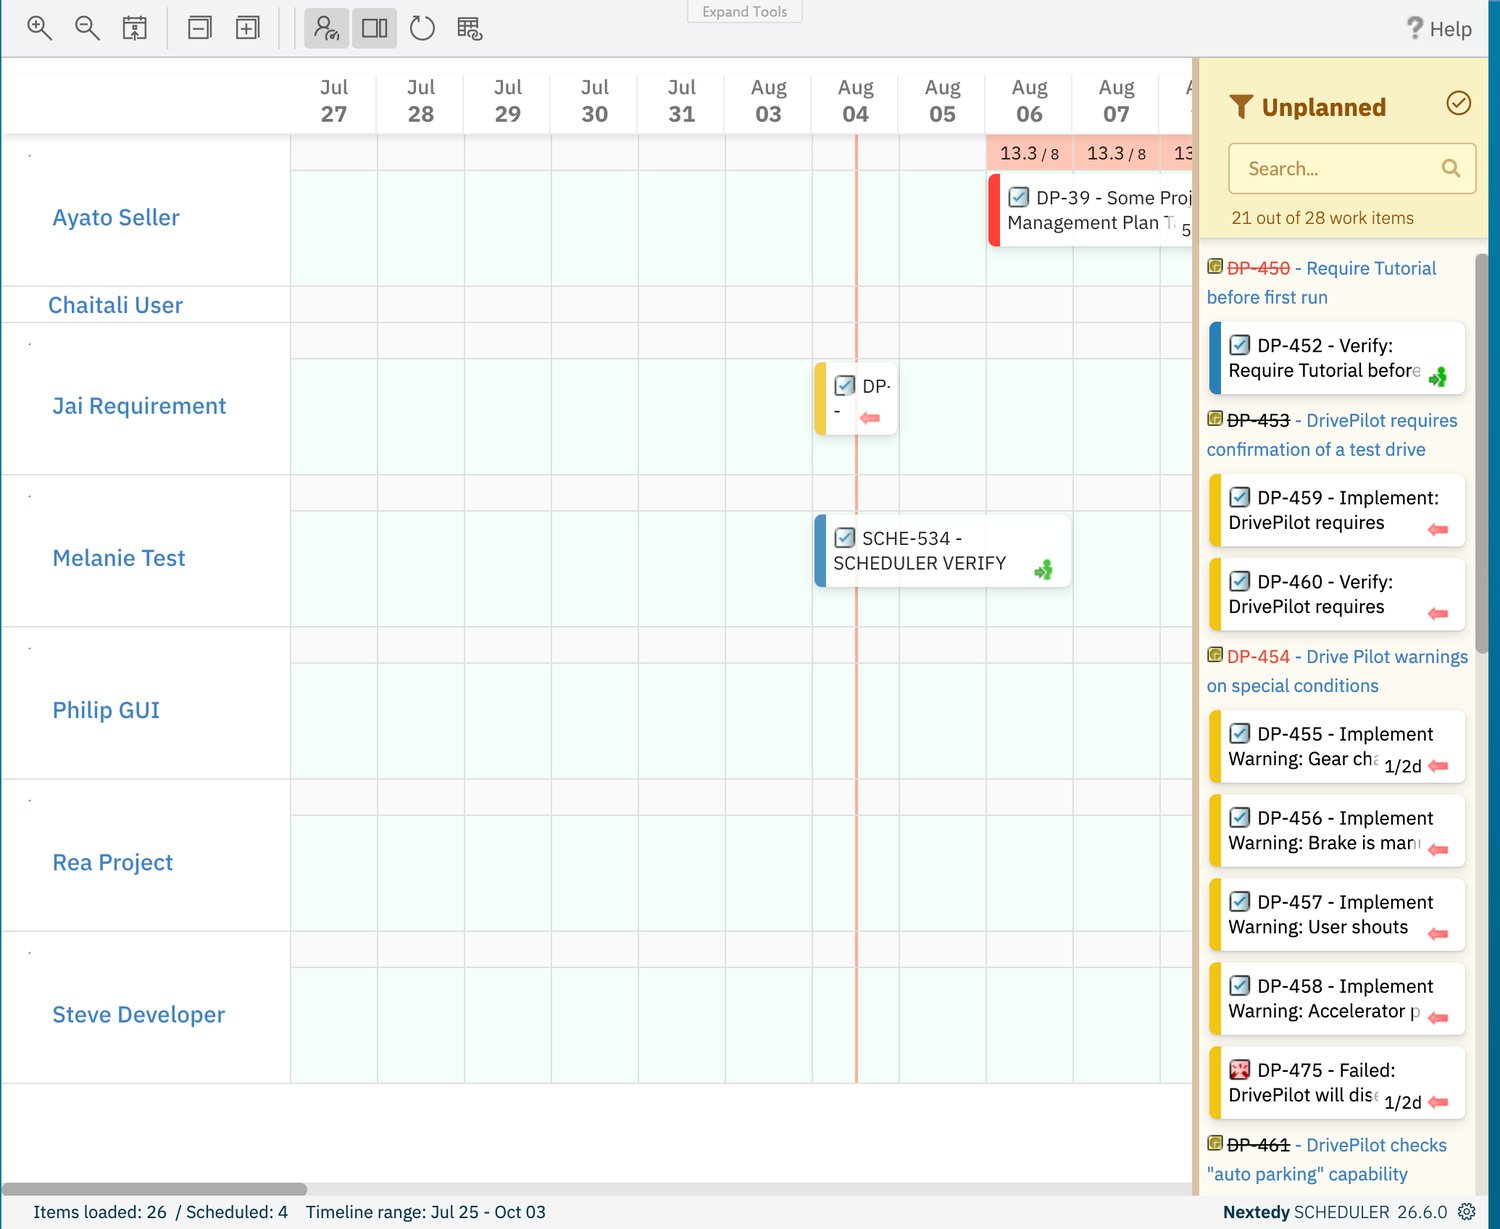
- The work item is scheduled, starting on the day column you dropped it on
- The work item is assigned to that row’s resource — with the default assignee swimlanes, that means the row’s user becomes the item’s assignee
What you should see: the card leaves the sidebar and appears as a bar on the row you dropped it on. The footer’s Scheduled count goes up by one, the sidebar count goes down by one, and the load markers on that row recalculate to include the new work.
Which field counts as effort
Which Polarion field the board reads as effort is set by the widget’s Plans Type parameter — Initial Estimate, Remaining Estimate, or Remaining Estimate + Time Spent. See Dates, Duration and Effort.
3
Move the task to a different date
Drag the bar sideways to another day, or onto a different row.What you should see: the bar lands on the new dates, the load markers on both the old and the new row recalculate, and nothing else is required of you.
There is no Save control
The board has no Save button. Every drop is written back to Polarion immediately, so the dates and the assignee on the work item are updated as soon as you release the mouse. If you want to confirm what was written, reload the page — the bar stays where you put it.
4
Check the work item behind the card
Click the body of the card.What you should see: Polarion’s **Work Item Properties **sidebar opens for that work item, where you can read the fields the board just wrote — the dates and the assignee.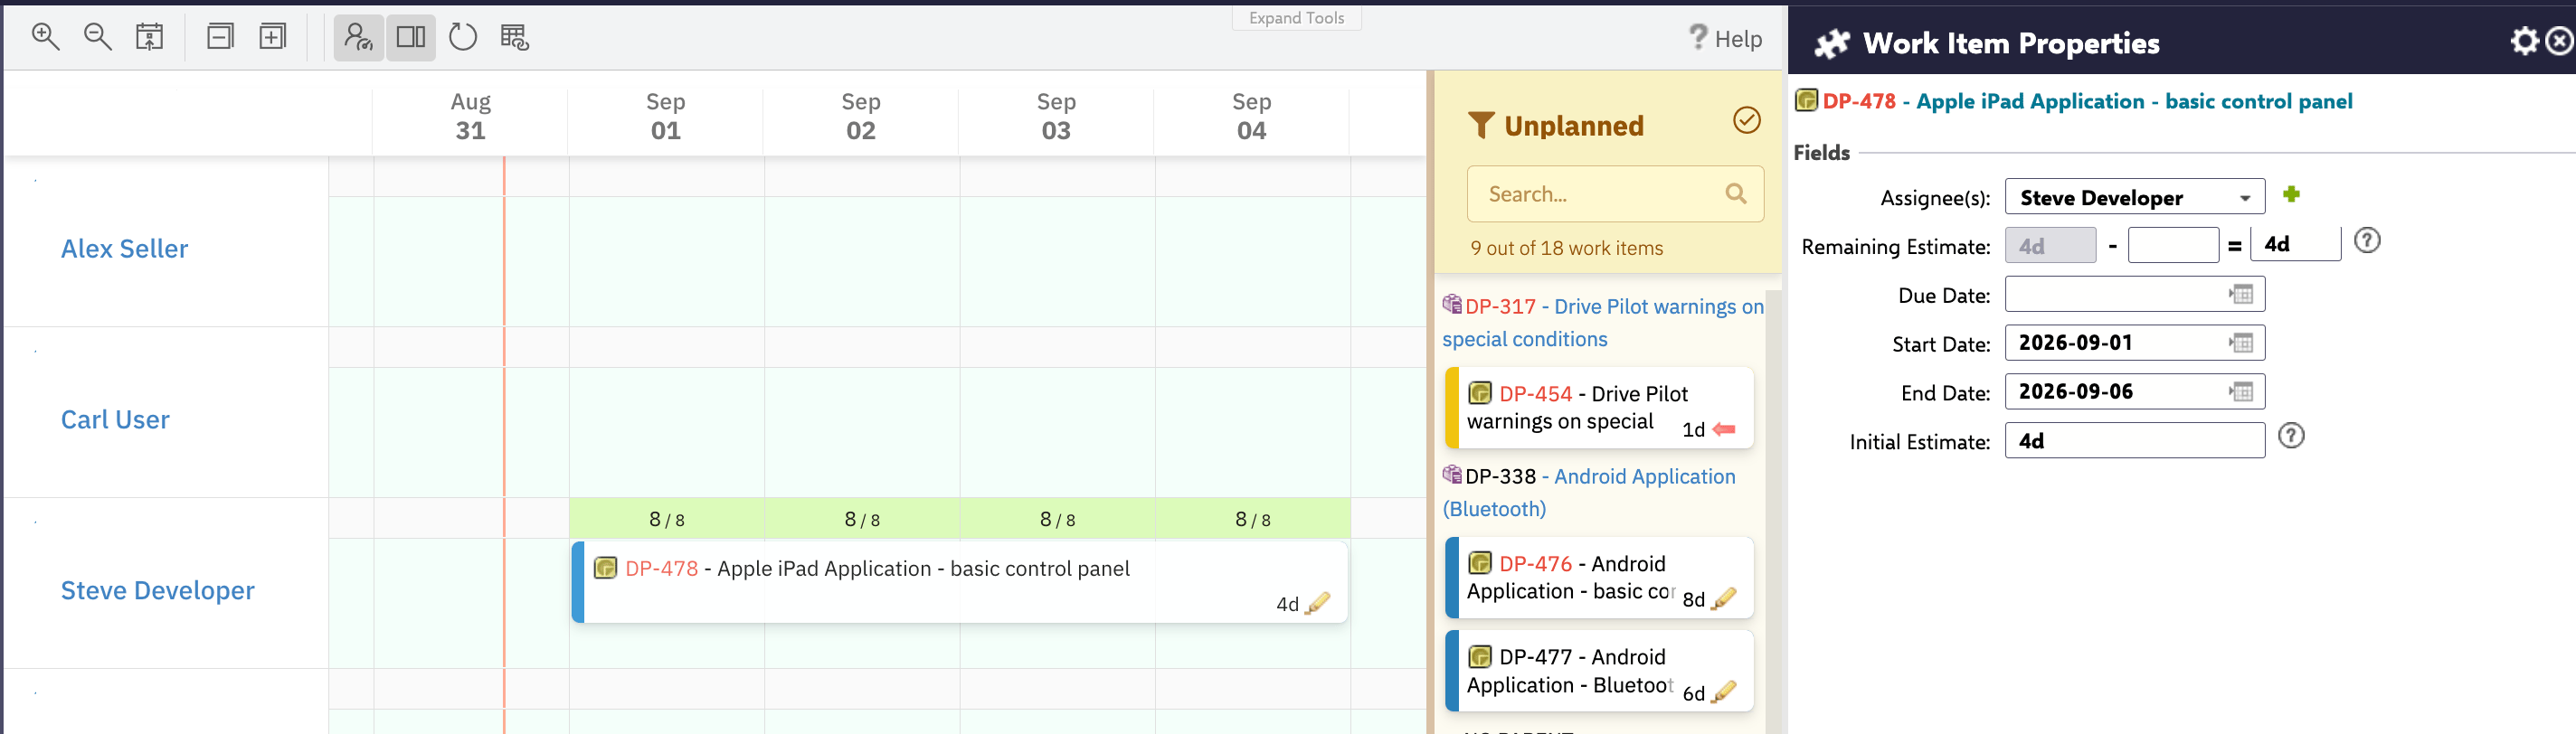
5
Send the task back to the sidebar
- Hover the card — two small handles appear on the right of it: a chain for Add Link and a calendar-with-a-cross for Unplan item
- Click Unplan item
Resolved items are read only
A work item that has a Resolution set is drawn grey and read-only on the board: it cannot be dragged and it shows no Unplan item handle. Reopen the work item in Polarion if you need to reschedule it.
Next steps
You can now move work on and off the timeline. Continue with:- Schedule and Reschedule Tasks — the full set of scheduling gestures and what each one writes
- Create Tasks on the Timeline — create brand-new work items directly on the grid
- Dates, Duration and Effort — how the mapped fields and Plans Type decide a bar’s position and length
- Capacity and Load — why a row turns red when you drop too much on it
- Link Task Dependencies — use the Add Link handle you saw on the card
- Colours and Load Thresholds — what each card colour means