Before you start

  • You must be in edit mode on the Polarion LiveDoc or Wiki page that contains the Planningboard widget.
  • Expand the Tools panel in the Polarion rich page editor, then click the Edit button on the widget to open the configuration dialog.
Planningboard supports only one widget instance per Polarion page. Multi-team dashboard layouts that require multiple independent boards must use separate pages — one Planningboard per page.

Parameter groups

The configuration dialog is organized into five groups. The sections below cover each in turn.
Widget Configuration Dialog with its five parameter groups: Work Items, Plans, Queries, Swimlanes, and New Plan, each mapped to its configuration options

1. Work Items

These parameters define which work items are loaded onto the board and how they appear.
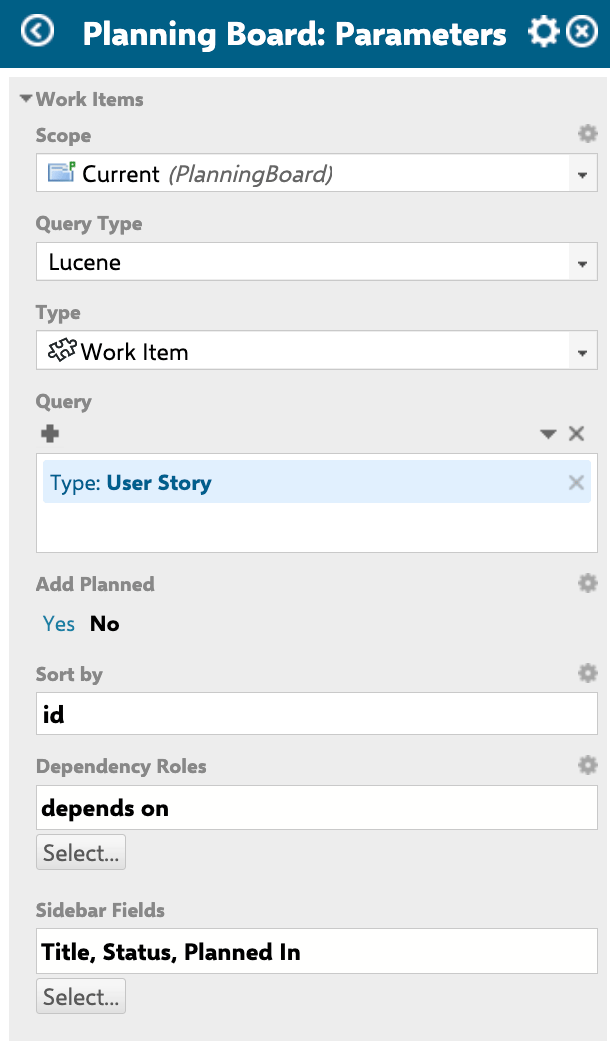
Users can further personalize sidebar fields using the gear icon (Select Fields button) in the sidebar. Those additions apply only to that user and to all work items of the same type — they do not affect the widget’s Sidebar Fields default.
Work Items parameters panel

Configuration example

A Scrum team tracking Stories and Tasks with effort estimates:
  • Query: type:story OR type:task
  • Sort by: priority
  • Dependency Roles: depends on
  • Sidebar Fields: Title, Status, Planned In, Estimate

2. Plans (Columns)

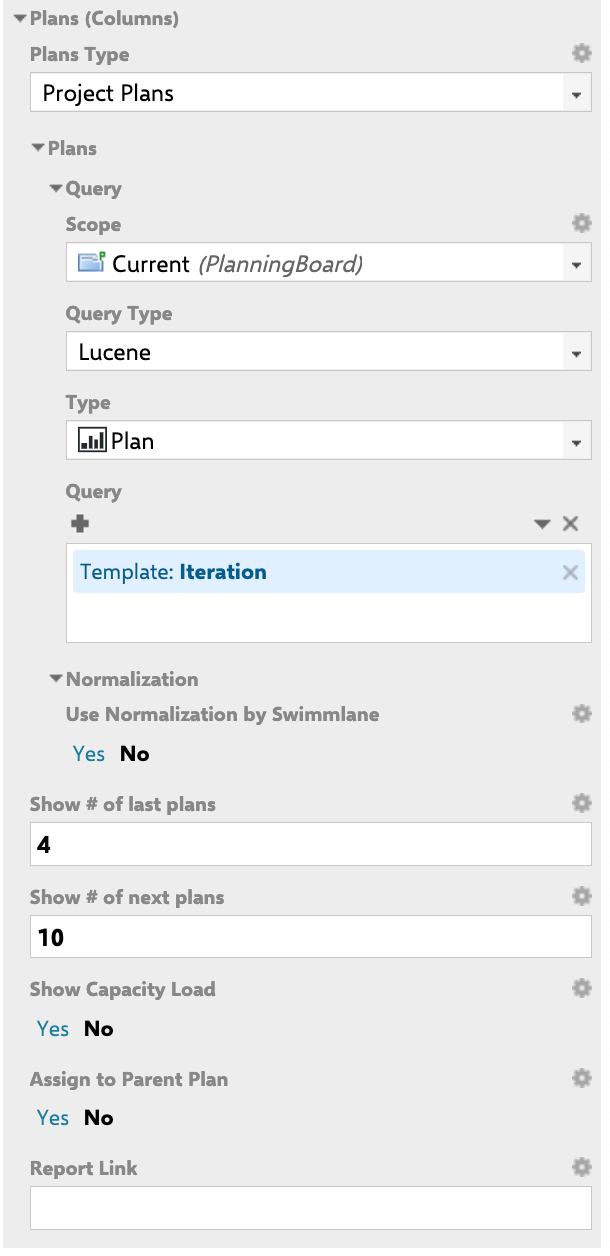
These parameters control which Polarion Plans appear as columns and how capacity is displayed.
If you need a SAFe plan type (SAFe Sprints, Program Increments), contact Nextedy support to assist with the configuration — these modes require Polarion SAFe Solution to be present.
With Assign to Parent Plan disabled: dragging a card into Iteration 4 plans it only in Iteration 4. With it enabled: the card is also planned in Version 1.0 (Iteration 4’s parent Plan) automatically.
Plans parameters panel

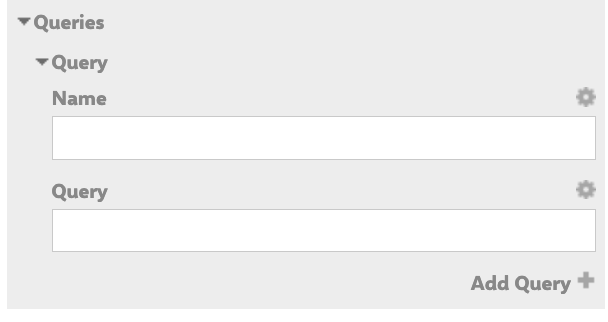
3. Queries (Unplanned Sidebar Filters)

The Queries group lets you define named filters that appear in the unplanned section’s filter menu. Use this to give planners fast access to subsets of the backlog — for example, items with a specific status, type, or component — without changing the main board query. Example: Create a query named Reviewed with value status:reviewed. It surfaces all reviewed cards under the unplanned section when the filter is enabled.
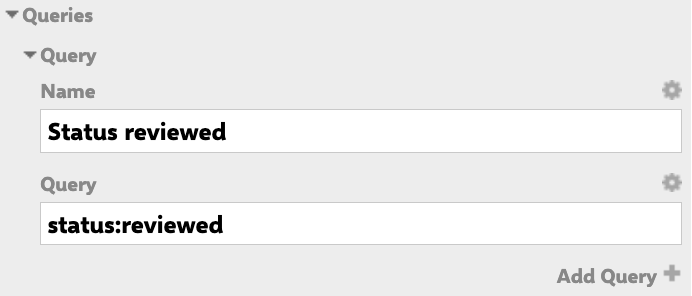
Queries widget parameter section showing a query named Status reviewed with the Lucene query status:reviewed
Queries configuration example

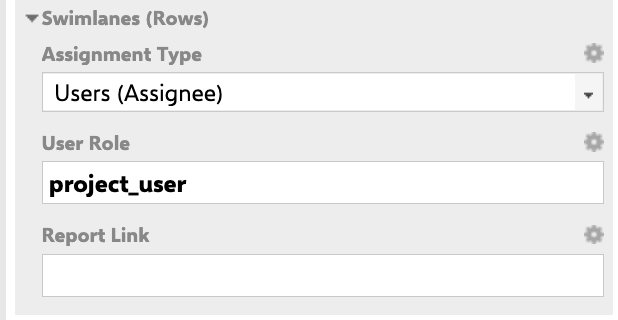
4. Swimlanes (Rows)

These parameters control how work items are grouped into horizontal rows.

Assignment modes

Polarion page parameters ($pageParameters.xxx) are accepted in swimlane configuration as string values only — manual text entry is required; no enum picker dropdown is available. For multi-team deployments where string-entry is not sufficient, create a separate Planningboard page per team and configure swimlanes statically using link roles.
Planningboard swimlane configuration requires Nextedy’s standard Team work item type (with its specific custom fields). Custom team work item types are not supported. If your project uses a custom team structure, consider using Nextedy GANTT (25.5.0+), which added support for custom team types.
Swimlanes parameters panel

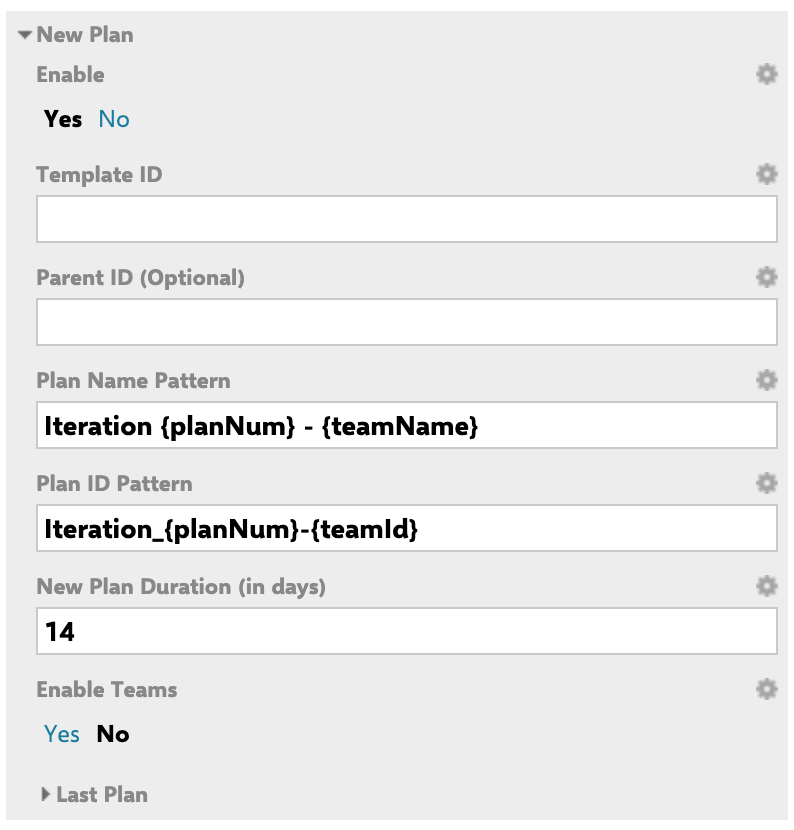
5. New Plan

When enabled, adds a plus (+) button to the board toolbar so users can create new Plans directly from the board.
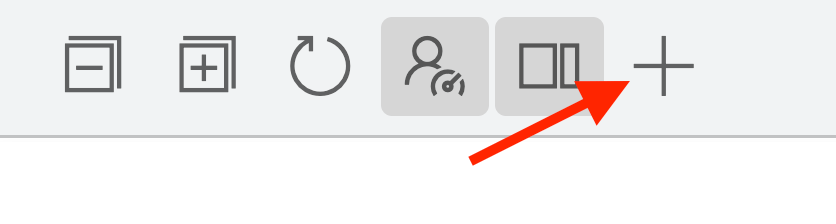
Planningboard toolbar with arrow pointing to the plus button that appears when New Plan creation is enabled
When Enable Teams is on, the Plan Name Pattern and Plan ID Pattern fields are pre-populated for team-based naming. If you are not using Teams, remember to update these patterns to match your project’s naming conventions — the pre-filled defaults assume Teams are present.
During Planningboard setup, you may encounter a template zip file in the plugin distribution. This file does not need to be imported via the Polarion Administration UI. Follow the standard installation steps instead; importing the zip is not part of the setup process.

Example: New Plan without Teams

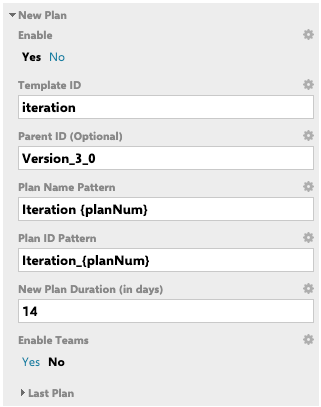
New Plan widget parameter section showing Template ID, Parent ID, Plan Name Pattern, Plan ID Pattern, New Plan Duration, and Enable Teams fields
Configure new iteration plans under a specific parent version:
  • Template ID: iteration
  • Parent ID: Version_3_0
  • Plan Name Pattern: Iteration ${lastPlan.counter + 1}
  • Plan ID Pattern: iteration_${lastPlan.counter + 1}
  • New Plan Duration: 14d
  • Enable Teams: disabled
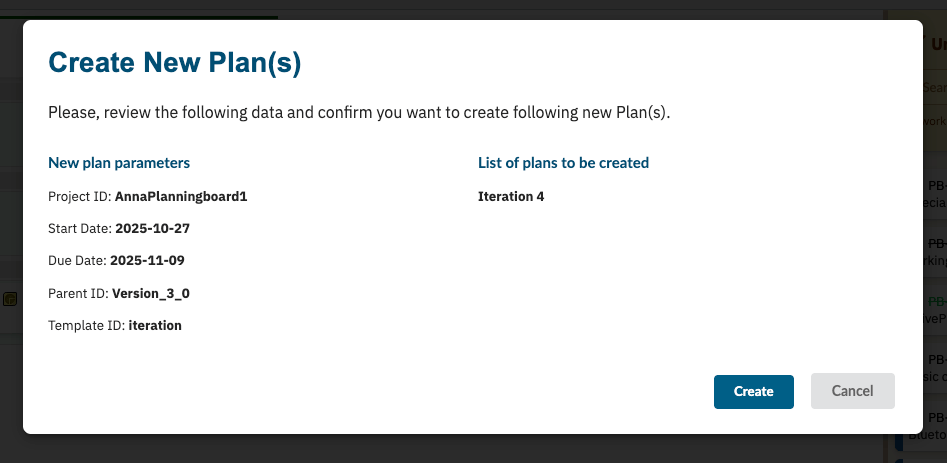
When the + button is clicked, a confirmation window shows the resolved values before the Plan is created.
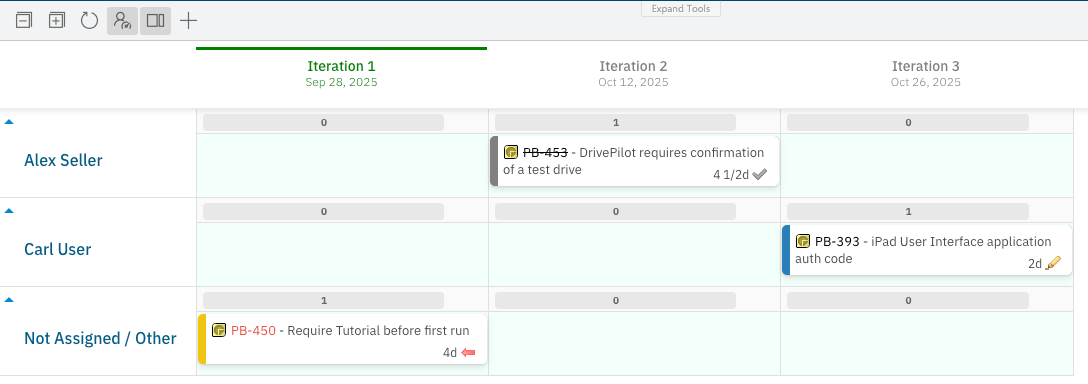
Planningboard showing Iterations 1, 2, and 3 under Version 3.0 with the plus button visible in the toolbar
Create New Plan confirmation dialog showing new plan parameters including project ID, start date, due date, parent ID, and template ID alongside the list of plans to be created
New Plan configuration example

Verification

After saving the widget configuration, refresh the page. You should now see:
  • Cards matching your Query loaded into the board
  • Columns corresponding to the Plans selected by your Plans query and count settings
  • Swimlane rows reflecting the chosen Assignment Type
  • The capacity bar visible in each Plan column header (if Show Capacity Load is enabled)
  • The unplanned section populated with cards not yet assigned to any Plan
If the board appears empty, check that your Query is not NOT *:* (the default — intentionally loads nothing) and that at least one Plan exists in the selected project scope.
Hover over the capacity bar in any Plan column header to see a detailed tooltip with capacity figures. This is only available when Show Capacity Load is enabled in the Plans parameters.

See also

Last modified on July 10, 2026