

What you will achieve
By the end of this tutorial you will be able to:- Orient yourself in the Planningboard layout (board area and unplanned section)
- Drag cards from the unplanned backlog onto a Plan
- Click a card to open and edit its details in the sidebar
- Use card quick actions (Show Links, Add Link, Unplan)
- Control board display with the toolbar (collapse swimlanes, refresh, toggle views)
- Read a capacity bar tooltip to check a Plan’s load
Prerequisites
- Planningboard is installed and a Planningboard page exists in your Polarion project. If not, follow Installation and Create Your First Planningboard.
- You have a valid Planningboard license. Unlicensed users can view the board but cannot drag cards, open the sidebar, or access the unplanned section.
- At least one Plan and some unplanned work items are visible on the board.
The board layout
When you open the Planningboard page, the screen is divided into two sections: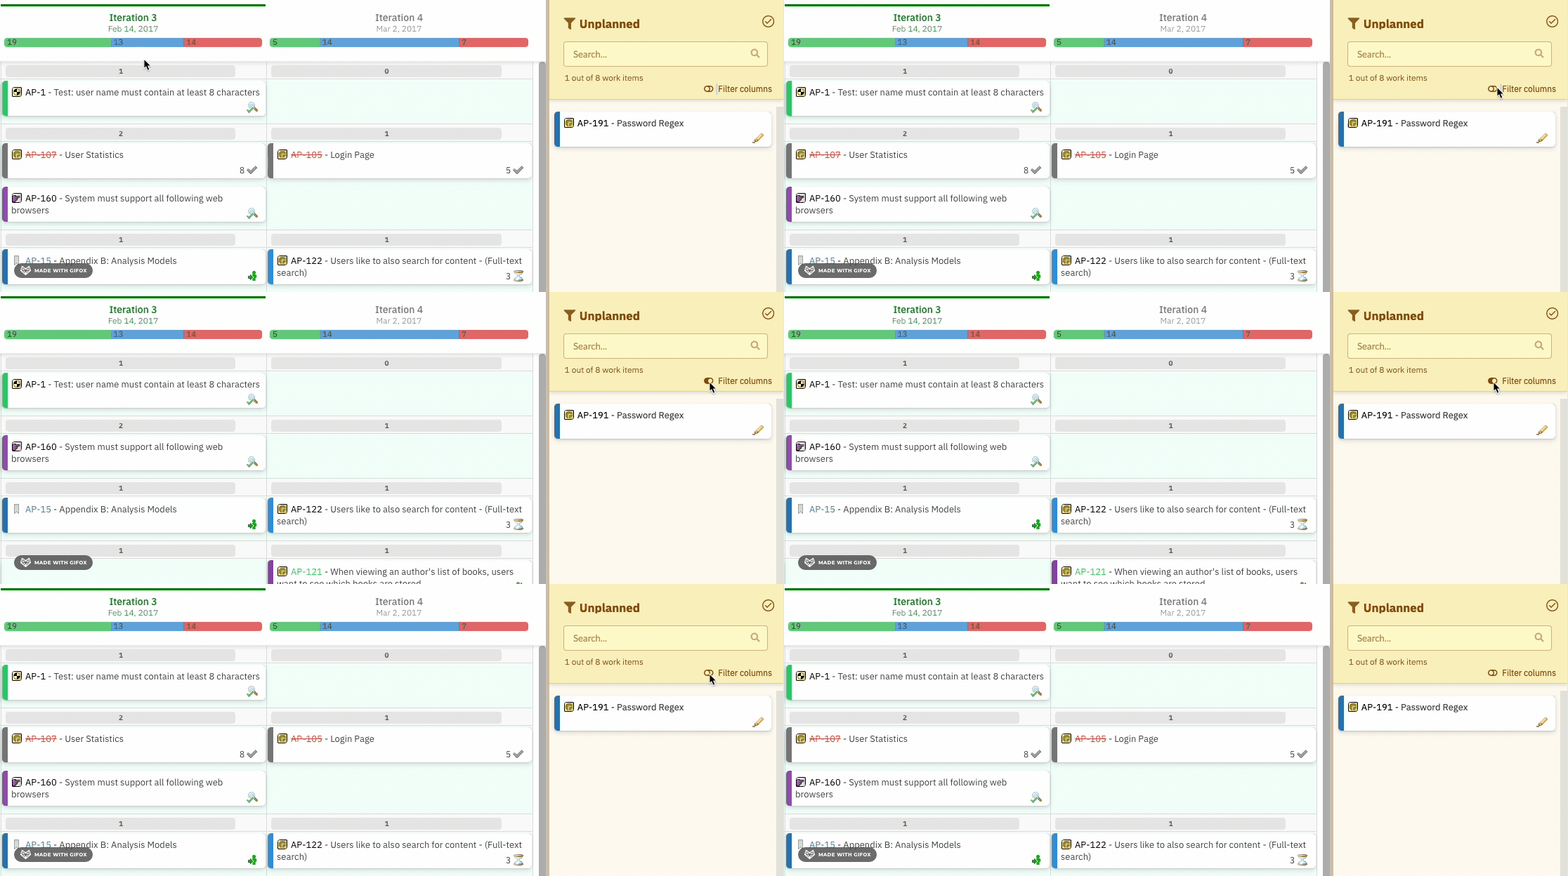

- Board area (left): Cards are arranged in a grid of columns (Plans) and rows (swimlanes). In a typical setup, columns are iterations or sprints and rows are assignees or teams — this is configurable via widget parameters.
- Unplanned section (right): Cards here are not yet assigned to any Plan. This is your backlog.
1
Filter the unplanned section
Before moving cards, narrow the unplanned list to the items relevant to you.
- Click the funnel icon in the upper area of the unplanned section.
- A filter panel opens. You can filter by assignee, by team, or by a predefined Query configured in the widget parameters.
- Select the filter that matches your focus (for example, your own name as assignee).
2
Drag a card onto a Plan
- Locate a card in the unplanned section.
- Click and hold the card, then drag it to the target cell in the board area — the intersection of the Plan (column) and swimlane (row) where you want to schedule it.
- Release the card. Planningboard saves the assignment immediately.
3
Open a card and edit work item fields
- Click any card on the board (not drag — just a single click).
- The Work Item Properties sidebar opens on the right side of the screen.
- Review the fields shown. The set of fields is configured by the board administrator via widget parameters (Sidebar Fields).
- Edit any editable field and click Save.
4
Use card quick actions
When you hover over any card, three quick-action icons appear in its upper-right corner.
What you see after Show Links: The board dims all unrelated cards. Only the selected card and its directly linked cards remain visible, making dependencies easy to trace.
5
Use the toolbar
The toolbar sits in the upper-left corner of the board area. Use it to control the overall board display.
You can also collapse or expand a single swimlane by clicking its row header directly.
Show Dependencies (toolbar) and Show Links (card hover) serve different purposes. Show Links is scoped to one card; Show Dependencies reveals all inter-card links across the entire board at once. Show Dependencies requires the feature to be enabled via widget parameters.
6
Read a capacity bar tooltip
If capacity tracking is configured on your board, each Plan column shows a capacity bar below its header.
- Hover over the capacity bar of any Plan column.
- A tooltip appears with a detailed capacity breakdown for that Plan.
Verify in applicationCapacity tooltip content depends on your widget parameter configuration. If the tooltip does not appear, capacity tracking may not be configured for this board. Ask your board administrator to check the
capacityLoad and related parameters.Next steps
You can now perform the fundamental planning interactions on a Planningboard. To go deeper:- Concepts — Understand Plans, swimlanes, capacity bars, and how Planningboard maps Polarion data to the board view.
- Guides — Task-oriented guides for swimlane configuration, capacity setup, card customization, and prioritization.
- Reference — Complete widget parameter reference with default values and configuration examples.
- FAQ — Answers to common questions about board behavior and configuration.