

Overview
Planningboard lets you add Plans (sprint iterations, releases, or other plan types) to your board on the fly. The New Plan feature must be enabled and configured via widget parameters before the toolbar button appears. Once enabled, a single click opens a confirmation dialog, auto-numbers the new Plan, and appends it as a new column — with optional team expansion for multi-team setups.
Prerequisites
- Planningboard is embedded in a Polarion LiveDoc or Wiki page.
- You have write permission to create Plans in the target project.
- The New Plan section is configured in the widget parameters (see Step 1 below).
1
Enable and configure the New Plan feature
Open the widget parameters for your Planningboard instance and locate the New Plan section. Set the following fields:
Save the widget parameters. The plus (+) button now appears in the Planningboard toolbar.
2
Create a Plan without Teams
This workflow creates one Plan at a time.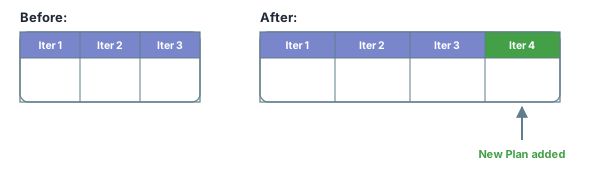
- Ensure Enable Teams is off in the widget parameters.
- On the Planningboard, click the plus (+) button in the toolbar.
- A confirmation dialog appears showing the resolved values — name, ID, start date, and due date.
- Review the values, then confirm.
- Planningboard creates the Plan and refreshes the board. The new Plan appears as a new column.
Date calculationIf
nextStartDate is not set, Planningboard calculates the start date automatically based on the due date of the last plan found by the Last Plan Query. If no tail plan is found, it falls back to the parent plan’s start date.3
Create Plans with Teams (one Plan per team)
When Enable Teams is on, clicking the plus (+) button creates one Plan per configured team in a single transaction. All Plans are created or none are created — the operation rolls back automatically on failure.With
- Enable Enable Teams in the widget parameters.
- Configure the
Teamslist with each team’s name and ID. - Verify
Plan Name Patternincludes{teamName}andPlan ID Patternincludes{teamId}. - Click the plus (+) button in the toolbar.
- The confirmation dialog shows the full set of Plans that will be created (one per team).
- Confirm. Planningboard creates all Plans and refreshes the board.
Plan Name Pattern = PI-{planNum} {teamName} and Plan ID Pattern = PI-{planNum}-{teamId}, clicking the button creates:4
Verify the result
After creation, the board refreshes automatically. You should now see:
- The new Plan column(s) appearing in the board header.
- Cards can be dragged into the new column from the Unplanned section or from other Plan columns.
- If capacity tracking is enabled, the capacity bar for the new Plan is visible when hovering over the column header.
Auto-numbering logic
Planningboard determines the next plan number using this sequence:- If
nextNumberis set explicitly in the configuration, use it. - Otherwise, query for existing plans matching
Template ID+ project ID (+Last Plan Queryif set). - Sort results by
Last Plan Sort(default:dueDatedescending). - Extract
{planNum}from the last matching plan’s ID using thePlan ID Patternas the extraction template. - Increment by one. If no plans match, start from
1.
Assign to Parent Plan
When the Assign to Parent Plan widget parameter is enabled, planning a work item into a new Plan also automatically plans it into that Plan’s parent. For example, dragging a work item intoIteration 4 (child of Version 1.0) also assigns it to Version 1.0.
Common pitfalls
See also
- Widget Parameters Overview — full reference for all widget parameters
- Configure Plans (Columns) — configure which Plans appear as columns
- Bulk Plan Creation — create multiple Plans in one operation via scripting
- Use Plan Templates — pre-defined plan structures for consistent setup
- Drag and Drop Planning — assign work items to Plans after creating them
- SAFe Planning Workflows — configure Planningboard for SAFe hierarchies
- SAFe Plan Naming Conventions — naming patterns for SAFe Plans and version requirements