

Prerequisites
- A Risksheet document with a valid sheet configuration
- A target LiveDoc page where the risk table should appear
- Polarion editing permissions for the LiveDoc page
1
Open the Target LiveDoc Page
Open the LiveDoc in edit mode and place the cursor where the risk table should appear — typically inside the chapter that describes the analysis.
2
Insert a Wiki Content Block
From the document toolbar’s insert menu, choose Wiki Content.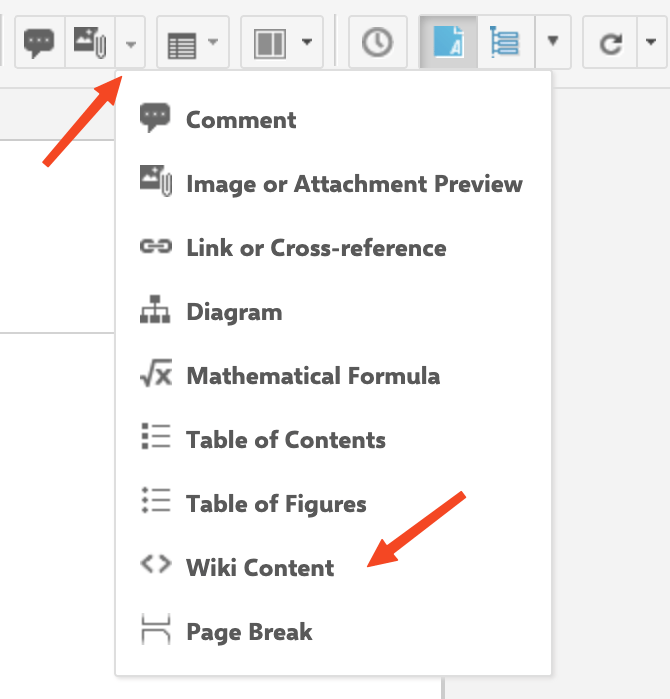
3
Enter the Renderer Call
Polarion opens the Wiki Content dialog. Enter this single Velocity call and confirm with OK: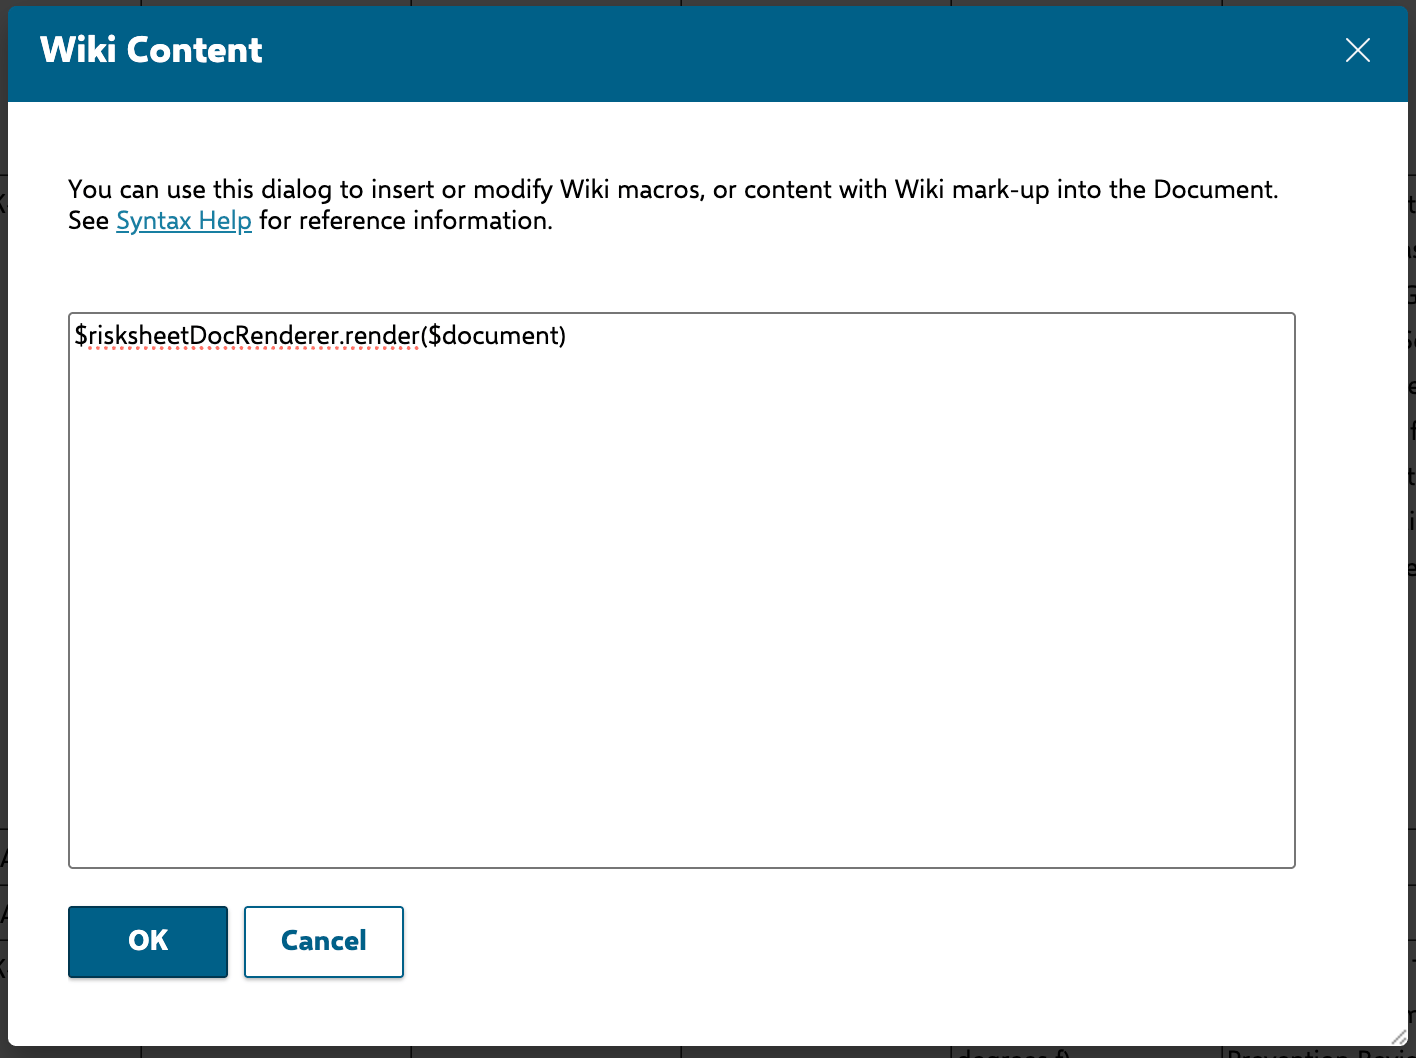
$risksheetDocRenderer is the renderer Risksheet contributes to Polarion’s LiveDoc rendering context, and $document is Polarion’s standard reference to the document being rendered. The block therefore always renders the risk table of the document it sits in — there is nothing to parameterise, and no change to the sheet configuration.4
Save and Verify
Save the LiveDoc. The risk table is rendered in place of the Wiki content block, with the sheet’s columns as table headers and one row per risk and task work item.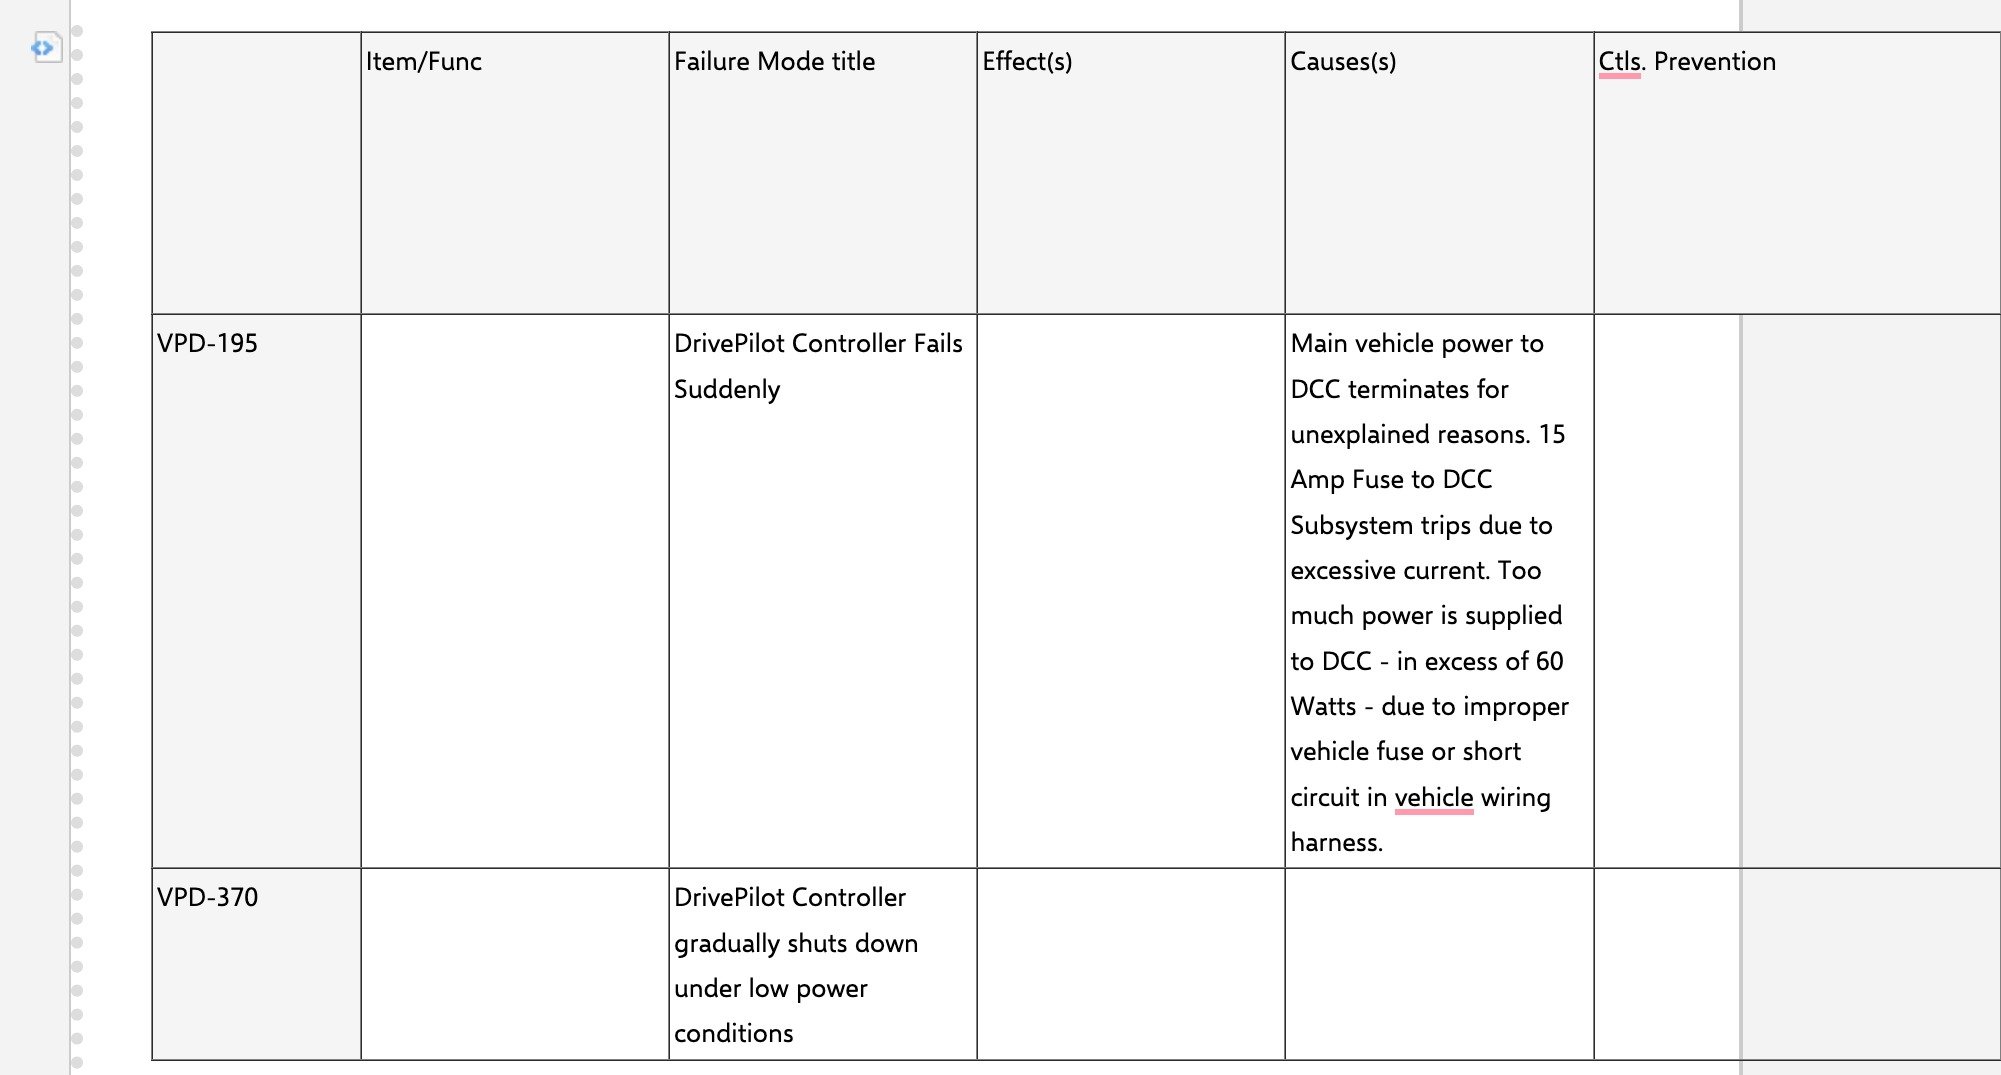
What the Inline Render Carries
The rendered table is built for reading, printing, and document export — it is not a second copy of the interactive grid:Alternative: Link to the Interactive View
When the reader needs to work in the grid rather than read a snapshot, put a link in the LiveDoc that opens the Risksheet view for the same document — either instead of the rendered table or next to it. Navigate to Risksheet from LiveDoc covers that pattern, including how the link carries the document revision so a baselined document opens the matching read-only risksheet.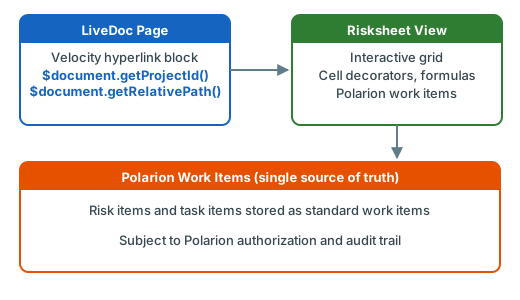
Alternative: PDF for Static Distribution
If you need a self-contained snapshot that keeps the grid’s full visual formatting — for an external auditor, a customer deliverable, or a controlled archive — export each artifact to PDF and combine them externally:- Open the Risksheet view and use the Export to PDF function to produce a styled PDF of the grid, including cell decorators and headers.
- Export the LiveDoc to PDF separately from Polarion.
- Merge the two PDFs with an external tool.
Working with Templates
Configuration changes scale best when they live on a LiveDoc template:- Template approach: Attach the sheet configuration to a LiveDoc template. Documents created from that template inherit the configuration, and updates to the template propagate.
- Polarion Reuse: Nextedy does not recommend using Polarion’s Reuse function for risksheet documents — it duplicates the configuration attachment and complicates updates.
See Also
- Navigate to Risksheet from LiveDoc — open the interactive grid from a LiveDoc link
- Export to PDF — produce a styled PDF for distribution
- Configure Downstream Traceability Columns — scope linked tasks to a specific document
- Set Up Global Templates — template-based configuration management
- Override Template Configuration — per-document configuration overrides