Prerequisites
- Polarion administrator access
- Risksheet plugin installed on the server
- The Nextedy demo project installed via Administration > Nextedy Risksheet > Setup
Do not use Polarion’s built-in document Reuse function to clone a Risksheet document into another project or location. Reuse creates unnecessary duplication of the sheet configuration attachments and breaks the link between a document and its template. To share configuration across projects or documents, use template inheritance through the
templateDoc custom field instead (see Step 3).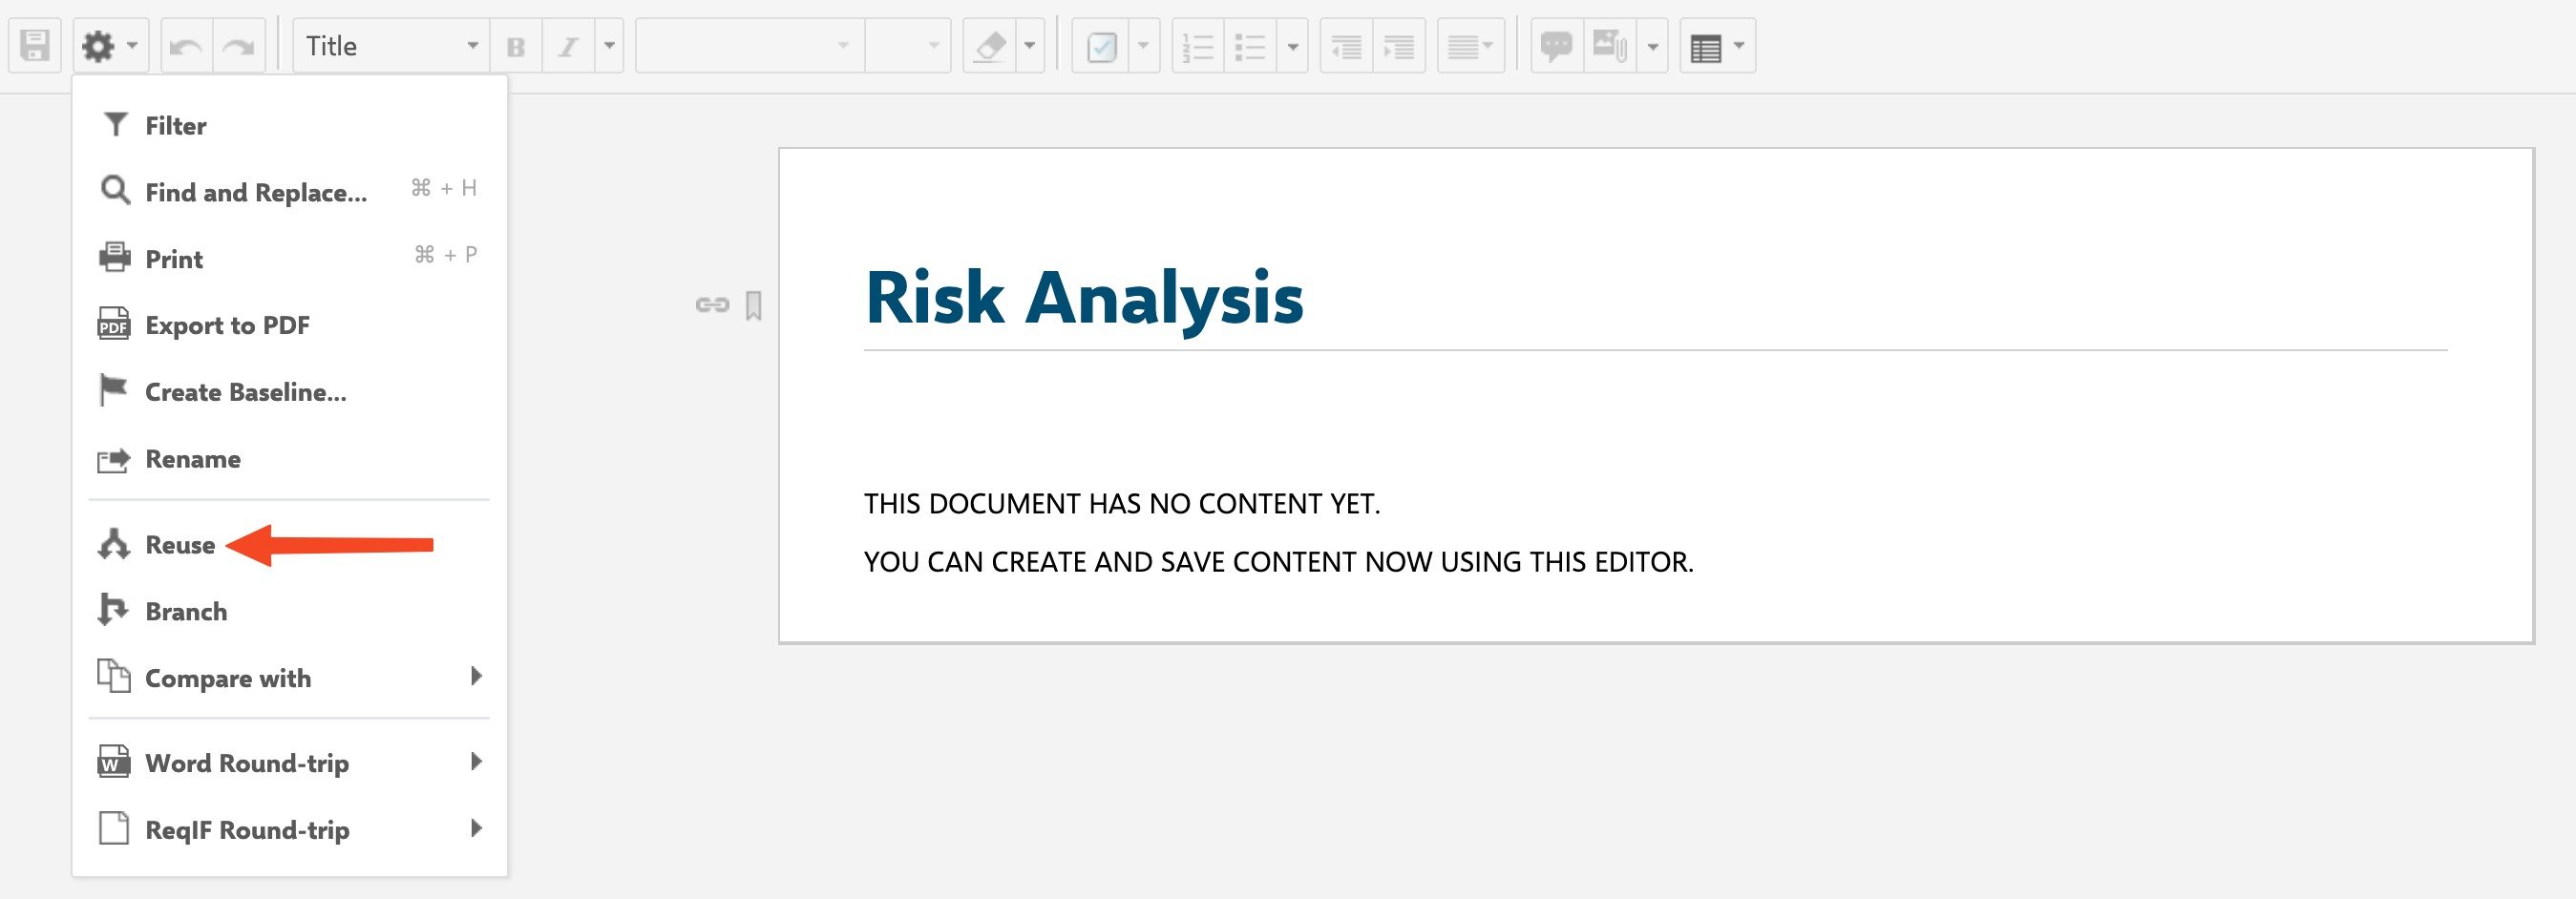
1
Install Demo Templates
- Navigate to Administration > Nextedy Risksheet > Setup.
- Click the install button to deploy the default Risksheet templates.
- Verify the templates (
risksheet_templateandrisksheet_templateHara) are listed.
2
Configure Work Item Types
Ensure your project has a work item type for risk items. Risksheet does not require specific fields or work item types — it is fully configurable for any work item type.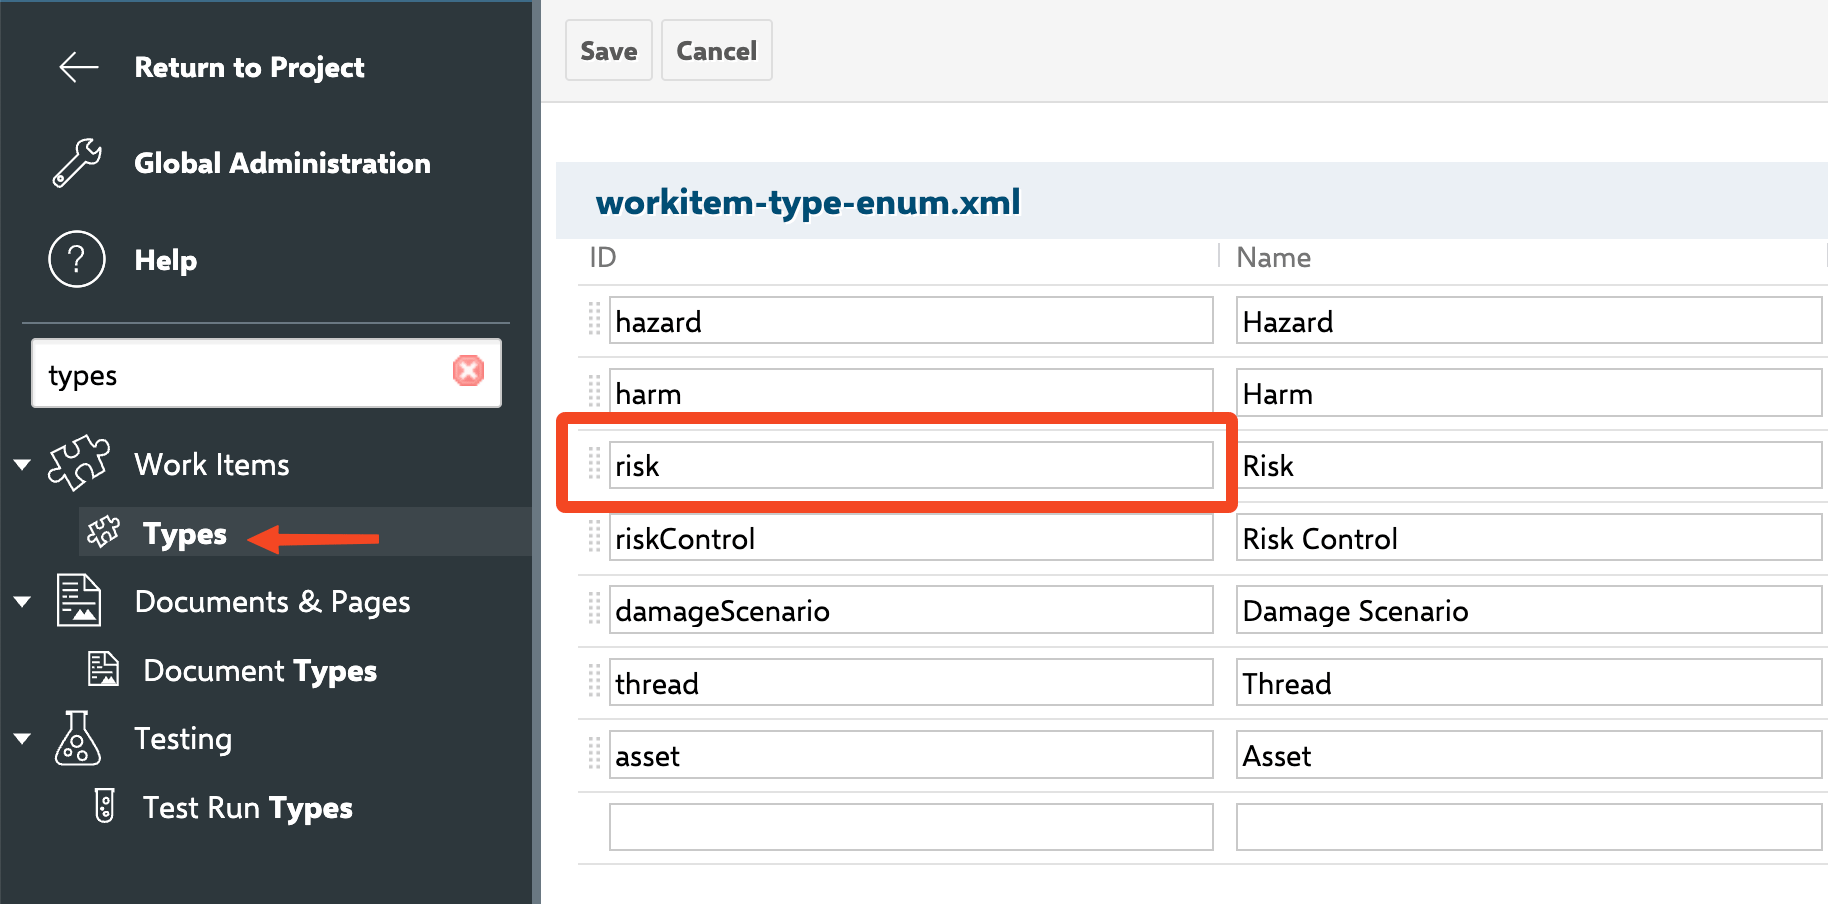
- Navigate to Administration > Work Items > Types in your project.
- Verify you have a risk-related work item type (for example,
risk,failureMode, or any custom type). - If needed, create a new work item type for risk items.
3
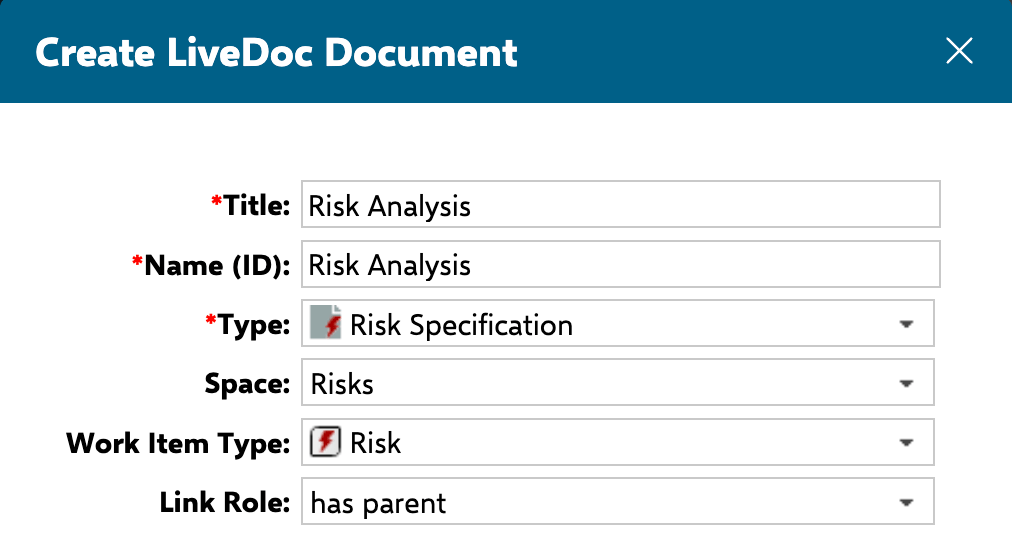
Configure the Document Type and templateDoc Field
Set up a document type with the Risksheet property, and configure the 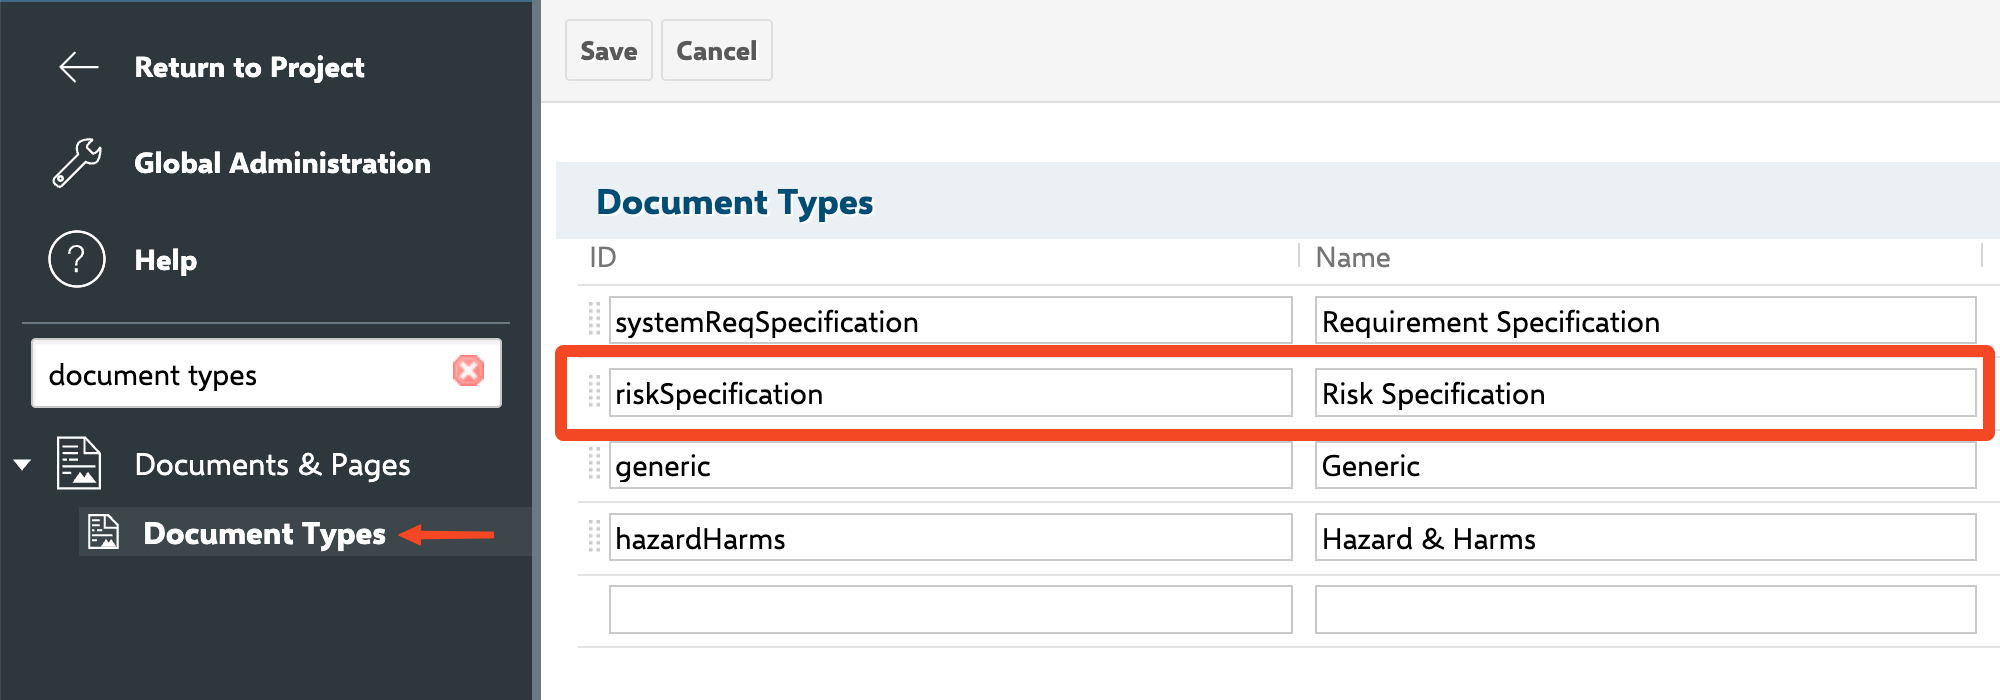
templateDoc custom field that connects each document to its template:- Navigate to Administration > Documents & Pages > Document Types in your project.
- Create or edit a document type (for example,
riskSpecification). - Add the Polarion configuration property
nextedy.risksheet.riskDocumentTypeand set its value to your document type. - Add a
templateDoccustom field to the document type with field typeenum:@document— Polarion’s built-in document-reference enumeration. This field holds the connection between a Risksheet document and the template document it inherits its sheet configuration from.
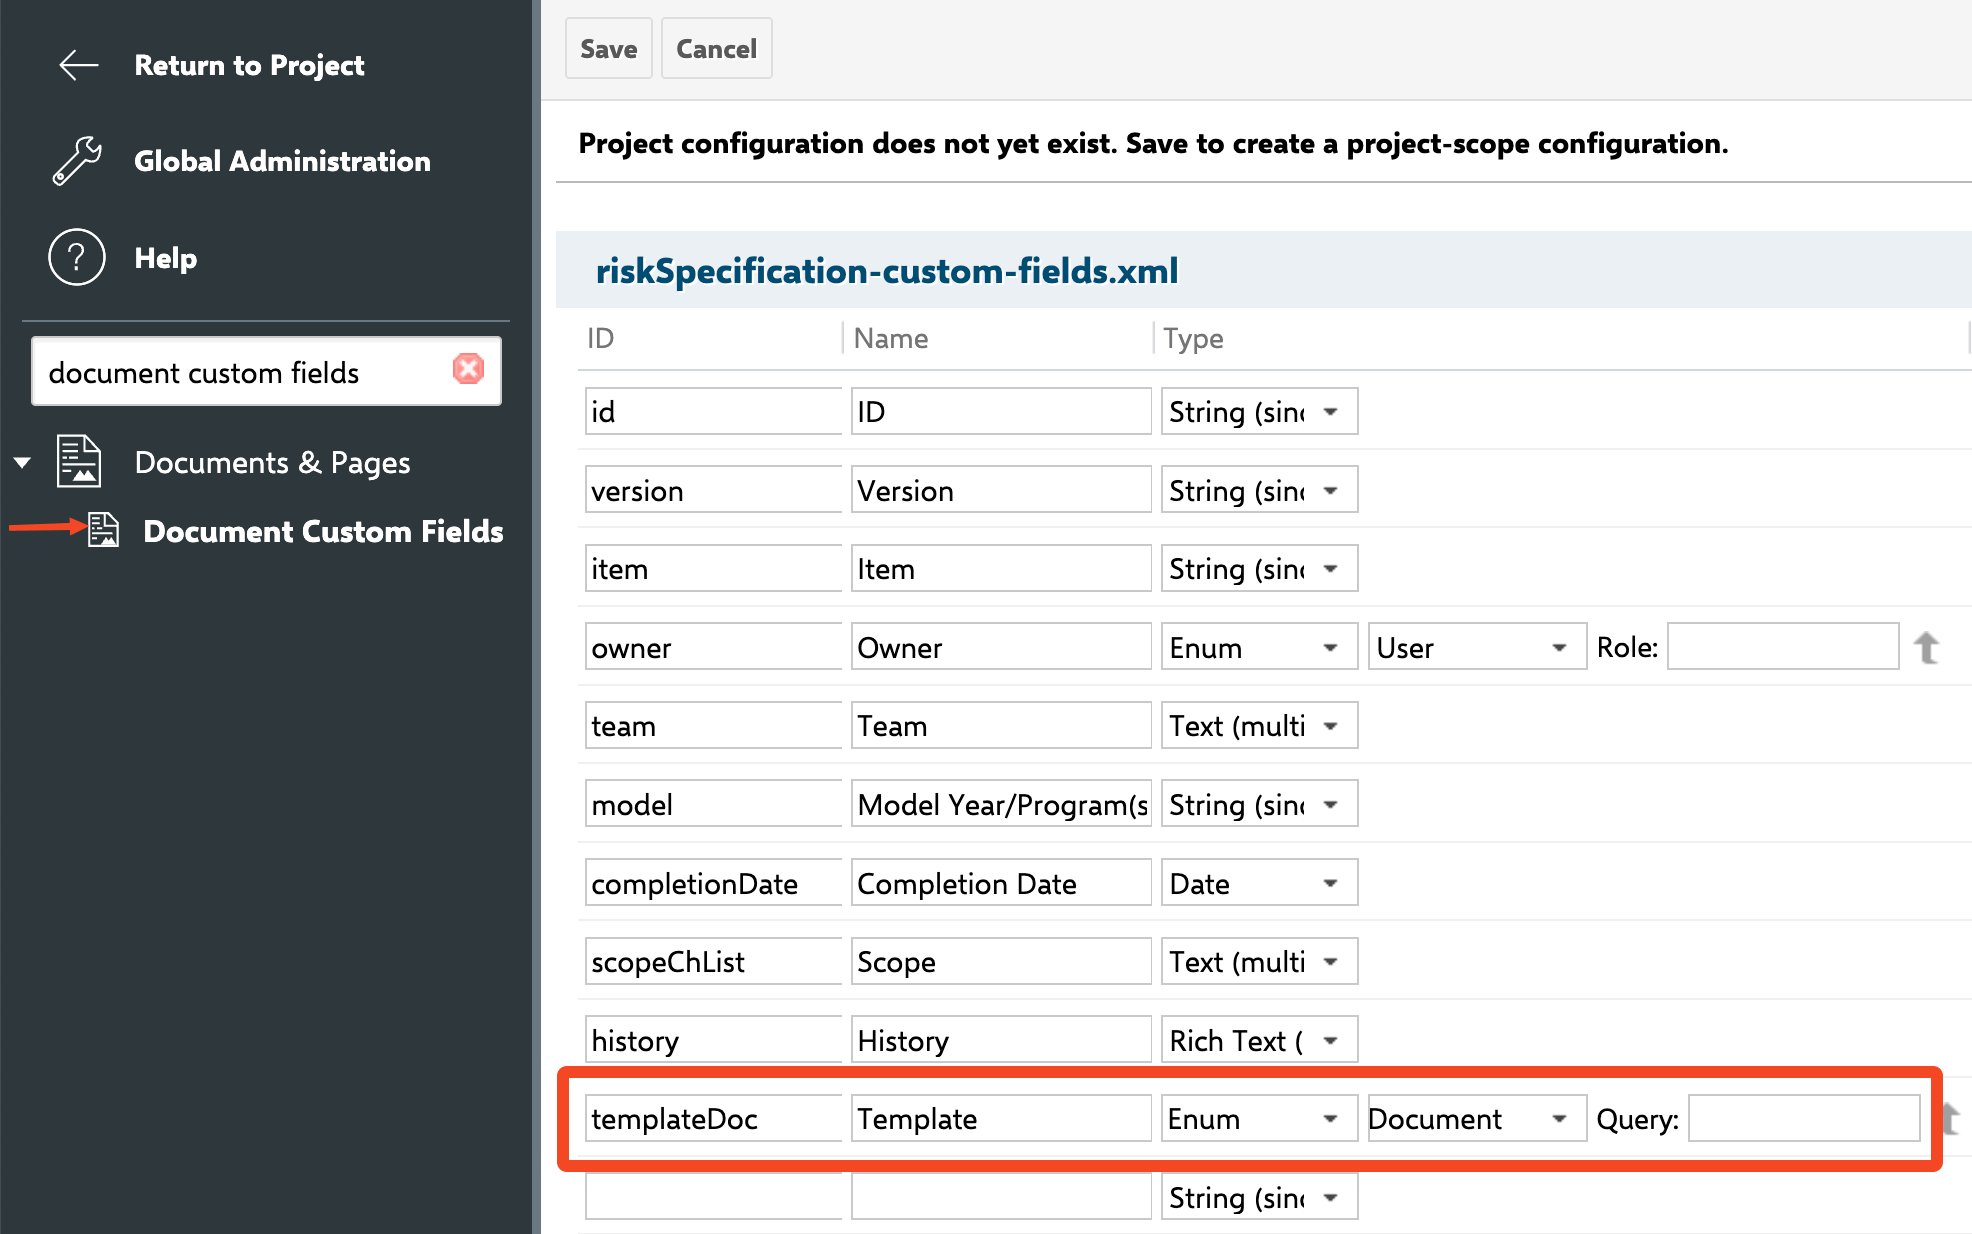
The
templateDoc custom field on individual Risksheet documents must be defined with type enum:@document — the special @document built-in enum that produces a document-reference picker. In the field definition this looks like <field id="templateDoc" name="Template" type="enum:@document"/>. Do not use a plain string or text type, and do not use a custom document-type enum — the picker behavior depends on the built-in @document enumeration. (The analogous user-reference field type is enum:@user, as used by fields such as owner.)4
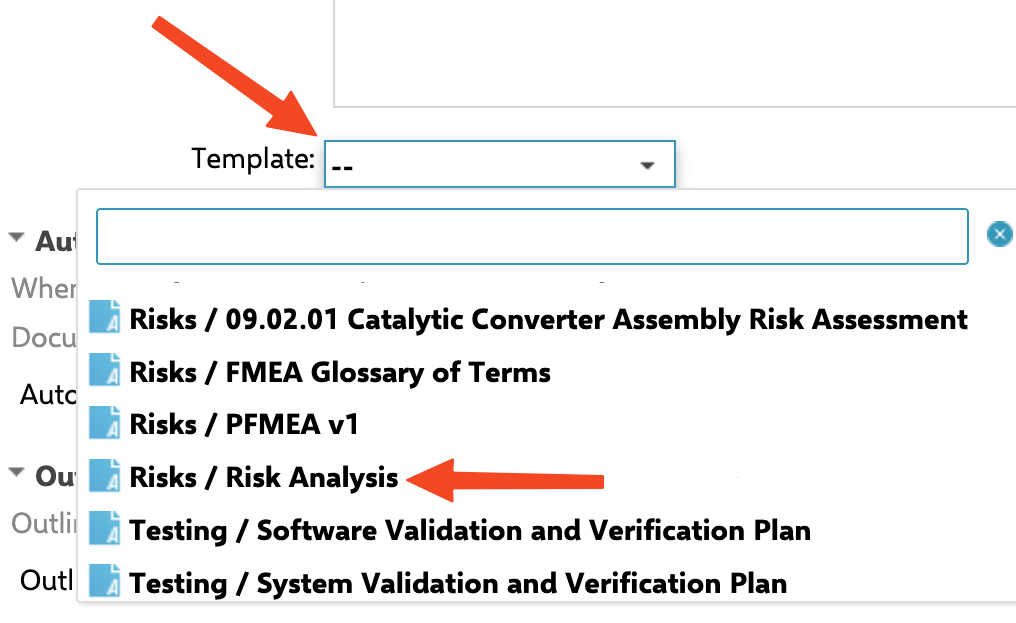
Configure Template Paths
Set up where users can create new Risksheet documents: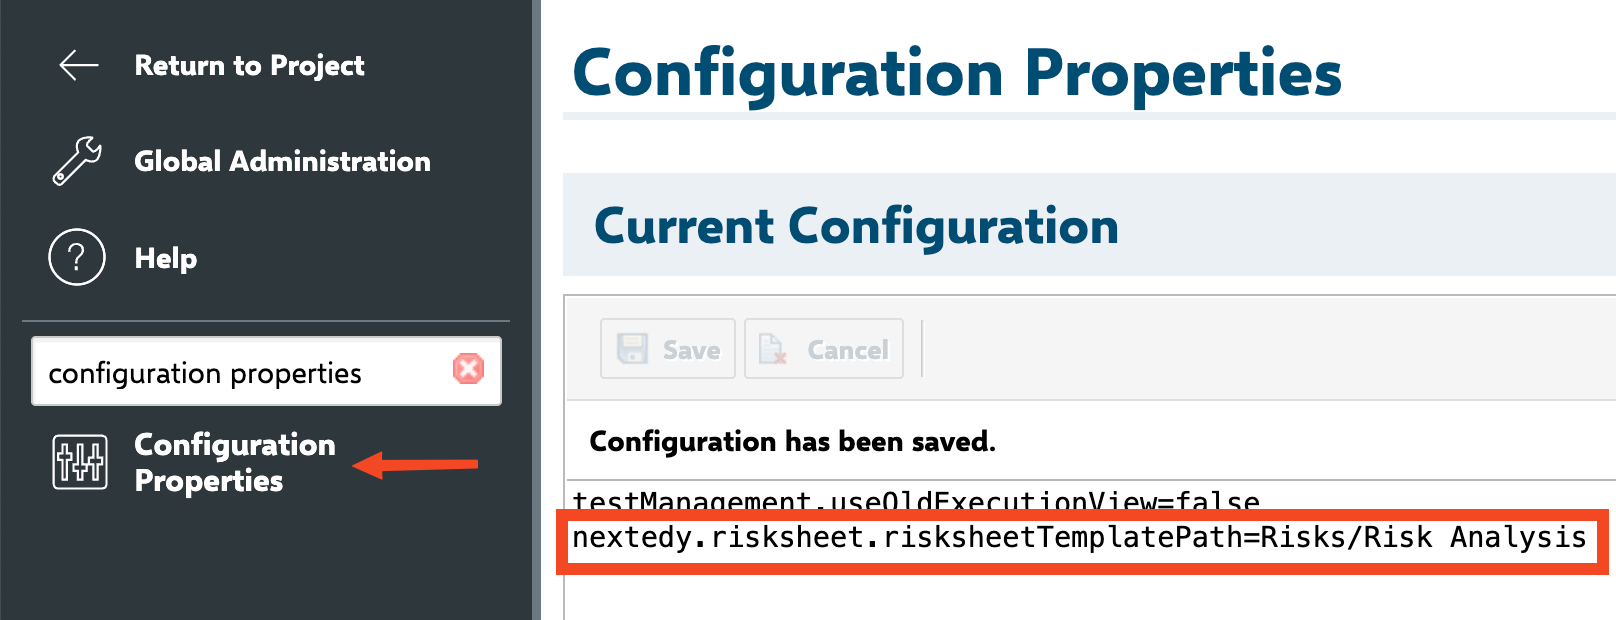
- Navigate to Administration > Nextedy Risksheet in your project.
- Configure the template path. The default value of
nextedy.risksheet.risksheetTemplatePathisRisks/Risk Specification. For a shared global template, use the formGlobalLibrary:Risks/Risk Specificationto reference a template stored in another project. - Multiple paths can be specified as comma-separated values.
5
Add the Risksheet Topic to Navigation
Add the Risksheet topic to your project’s sidebar navigation:
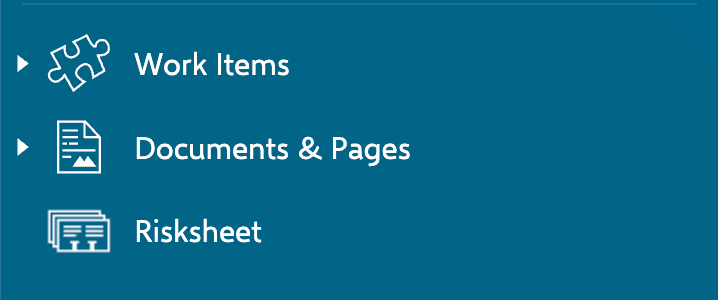
- Navigate to Administration > Topics in your project.
- Add
<topic id='risksheet'/>to the sidebar configuration for the relevant views and roles. - Save the configuration.
6
Customize Display Names
Optionally customize how Risksheet appears in your project. The following properties are available in Administration > Nextedy Risksheet:
Verification
- Navigate to your project’s sidebar and click the Risksheet entry.
- You should now see the Risksheet home page with folder navigation and a document creation option.
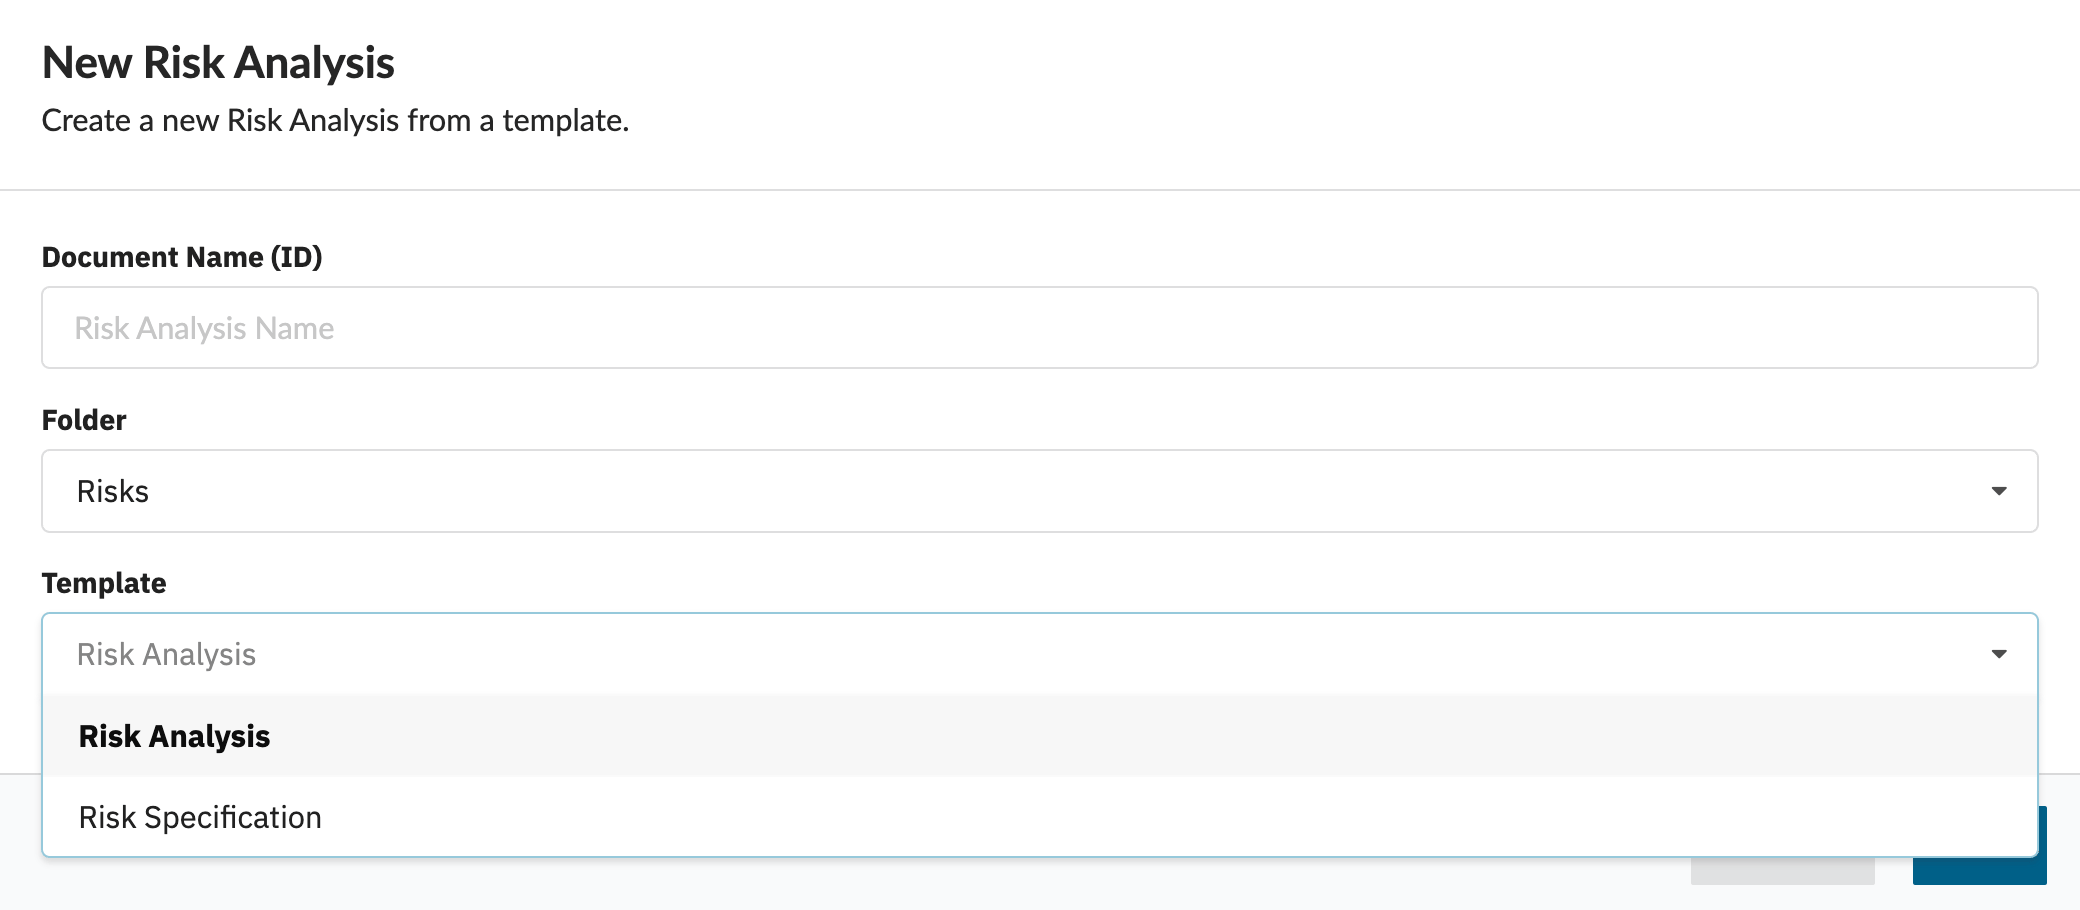
- Create a test risksheet document to verify the configuration. Pick the closest solution template for your industry or methodology rather than starting from a blank document — modify it to match your process from there.
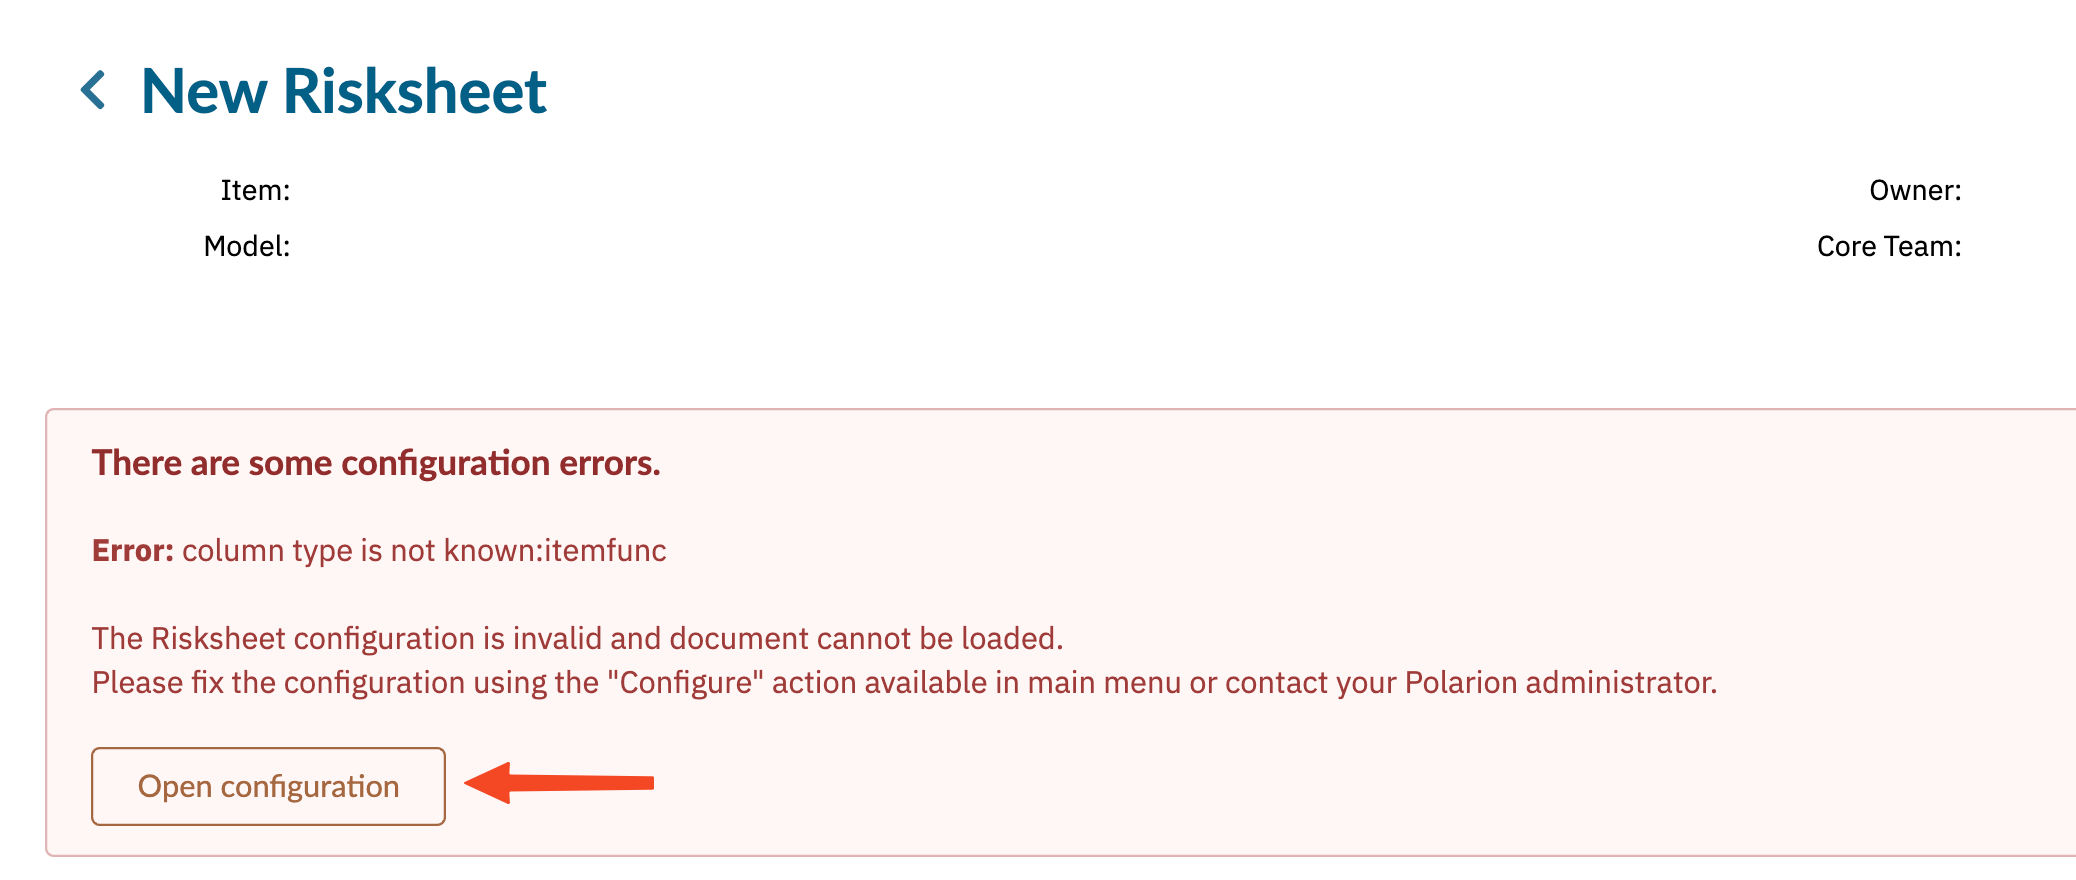
- Confirm the document loads with the correct template and column layout.

See Also
- Installation — initial plugin installation
- Configure Template Paths — advanced template path options
- Set Up Global Templates — share templates across projects
- Basic Configuration — customize your first risksheet