Prerequisites
- Gantt version 25.3.1 or later
- Access to the Gantt widget parameter configuration (editor or admin role)
1
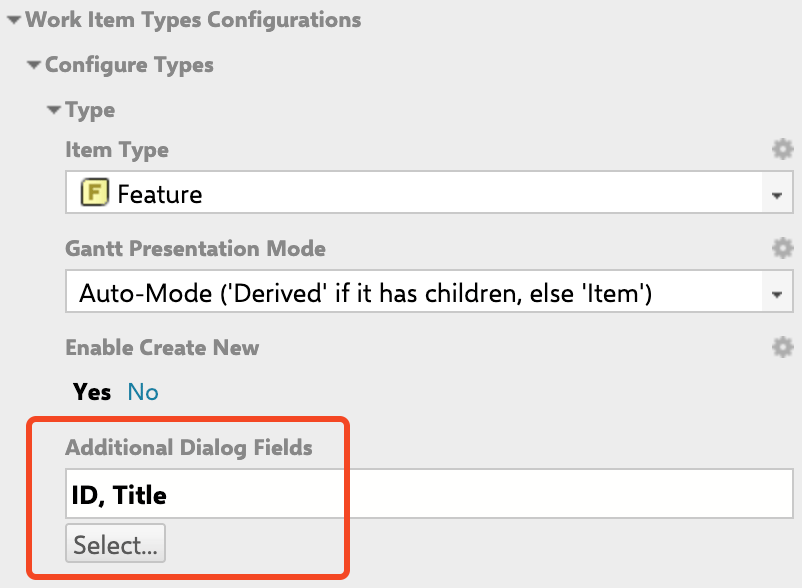
Open Work Item Types Configuration
- Open the Gantt page in edit mode.
- Open Parameters (click the ⚙️ settings icon in the toolbar or access the wiki page parameter editor).
- Navigate to Work Item Types Configurations.
- Select the Item Type you want to configure.
2
Add Fields to the Dialog
- Locate the Additional Dialog Fields section within the selected type configuration.

- Click to add fields. You can select from available Polarion custom fields defined in your project.
- Reorder fields by dragging them in the selection list. The order determines how fields appear in the dialog.
Supported Field Types
Currently unsupported: Rich-text, Dependent Enumerations, Priority, Time Point, and complex fields (comments, attachments, Linked Work Items, hyperlinks).
If you add an unsupported field type, the system displays a warning and ignores the field. You do not need to check compatibility manually.For example, adding the unsupported Priority field to the dialog configuration: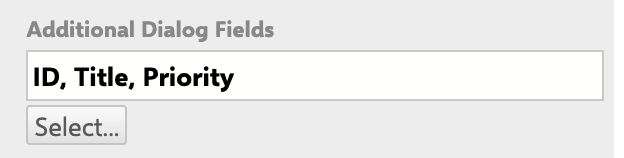

1
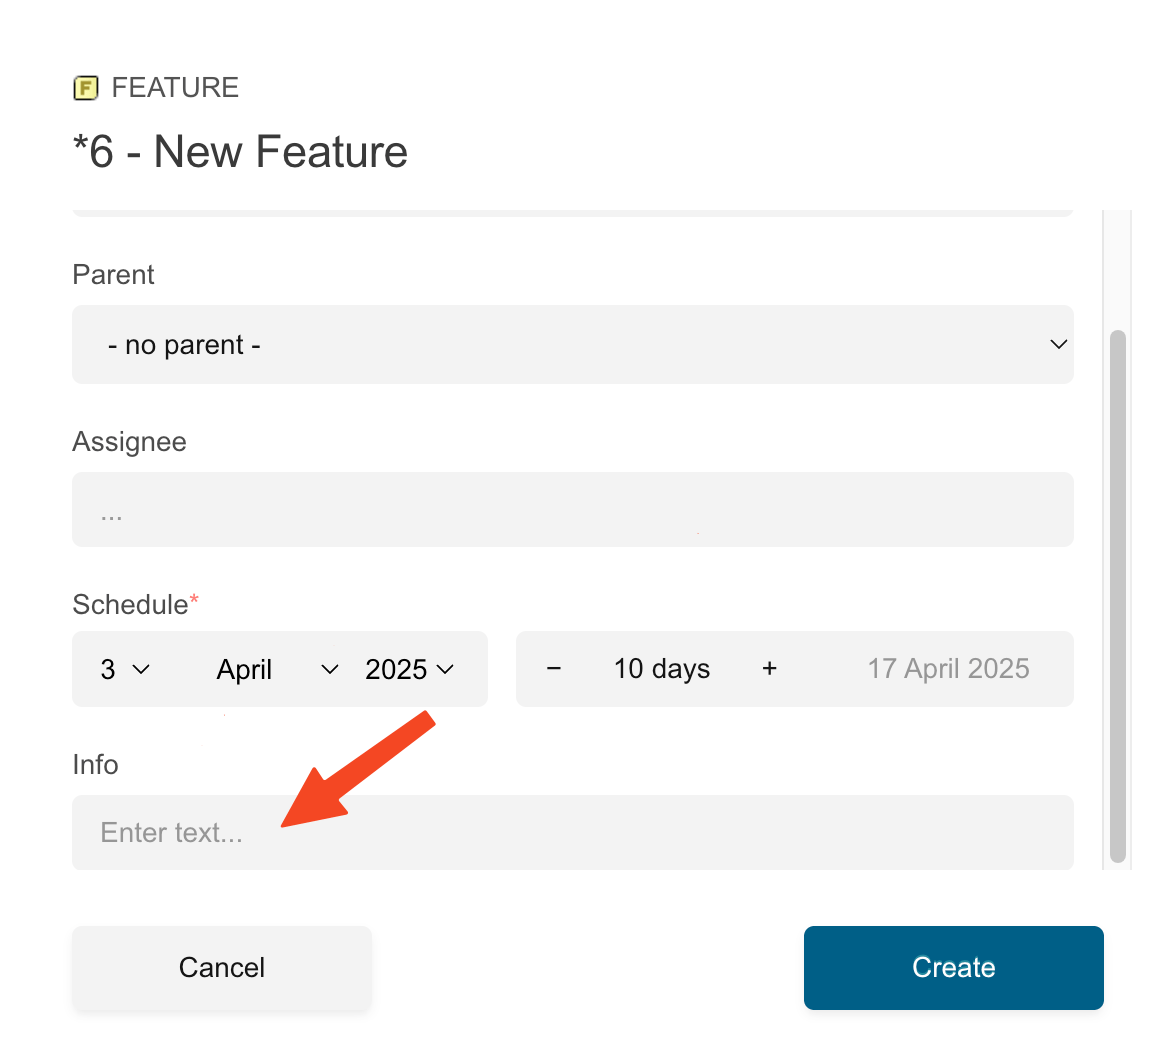
Handle Workflow-Required Fields
Starting with version 25.7.0, fields required by the initial workflow transition are enforced in the dialog. If a required field is missing from your Additional Dialog Fields configuration, a warning appears in the editor view.For example, an initial action named Set Area is added with the Area field marked as required: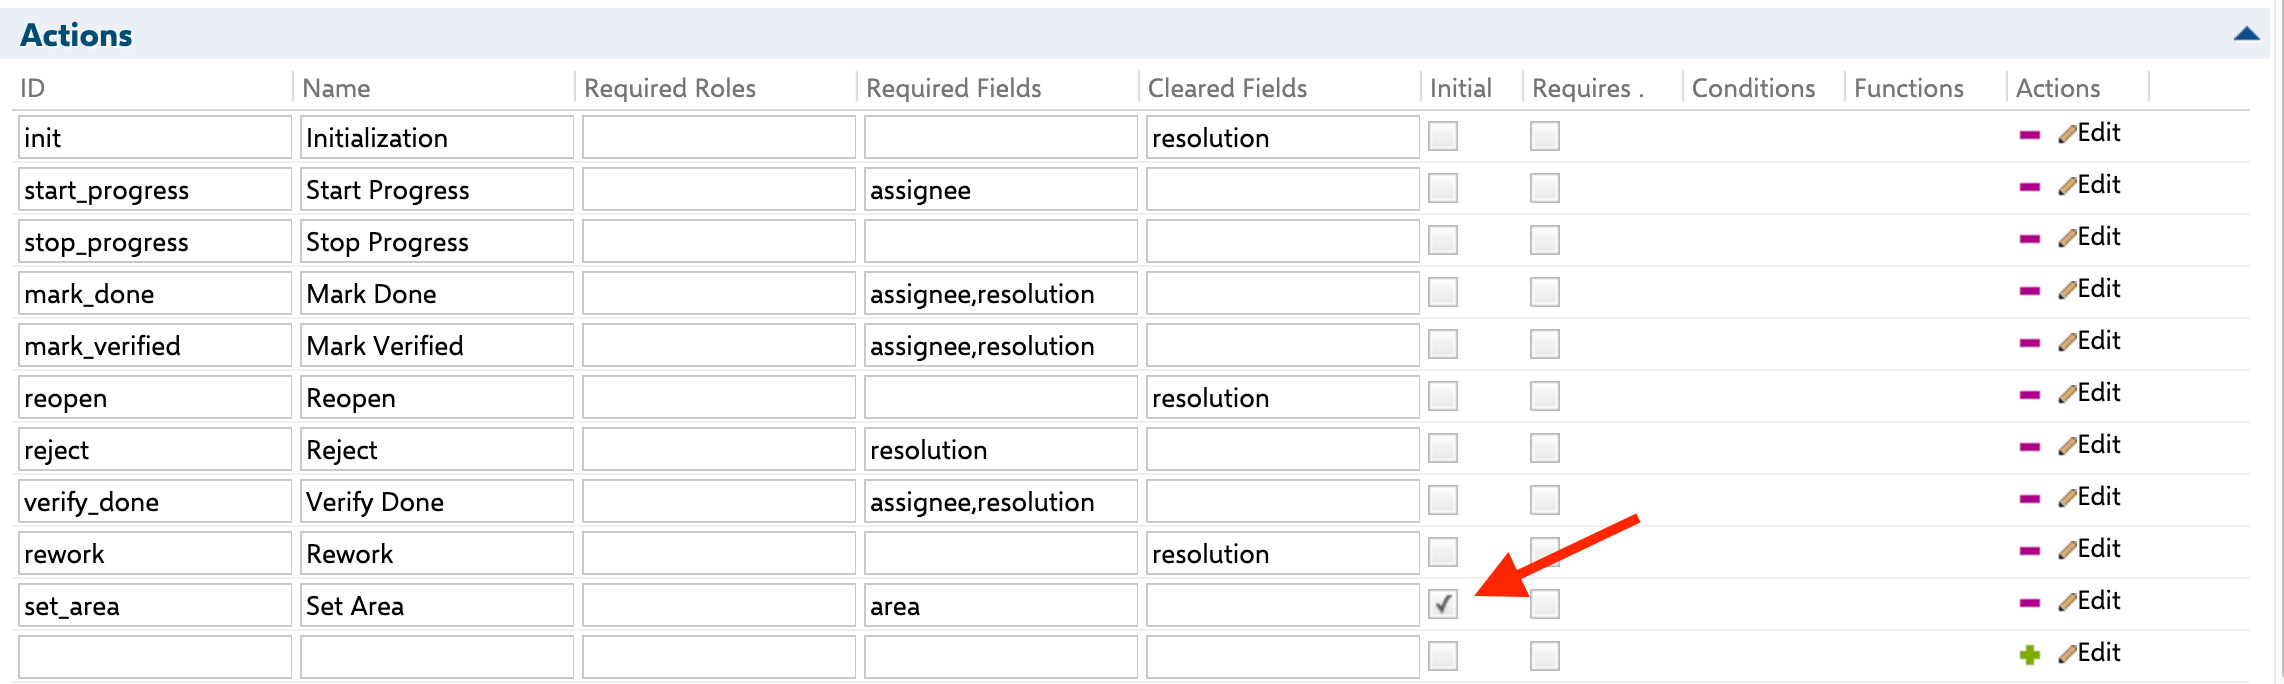

Fields already used in Data Mapping (such as 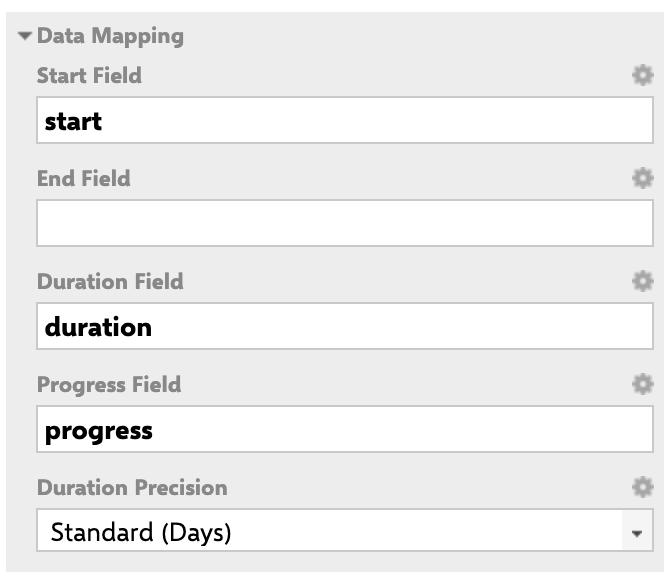

startField, endField, durationField, resourceField, or progressField) cannot be added to Additional Dialog Fields. The system prevents this and displays an error. Remove the field from Data Mapping first, or use a different field.For example, the Duration field is already used in the Data Mapping configuration:2
Configure Default Values
Custom fields in the dialog can have default values pre-populated when creating a new work item. Default values are supported for:
- Enum (select) fields: pre-selected option
- Text (textarea) fields: pre-filled text
- Float (input) fields: pre-filled numeric value
3
Understand Validation Behavior
The dialog enforces these validation rules: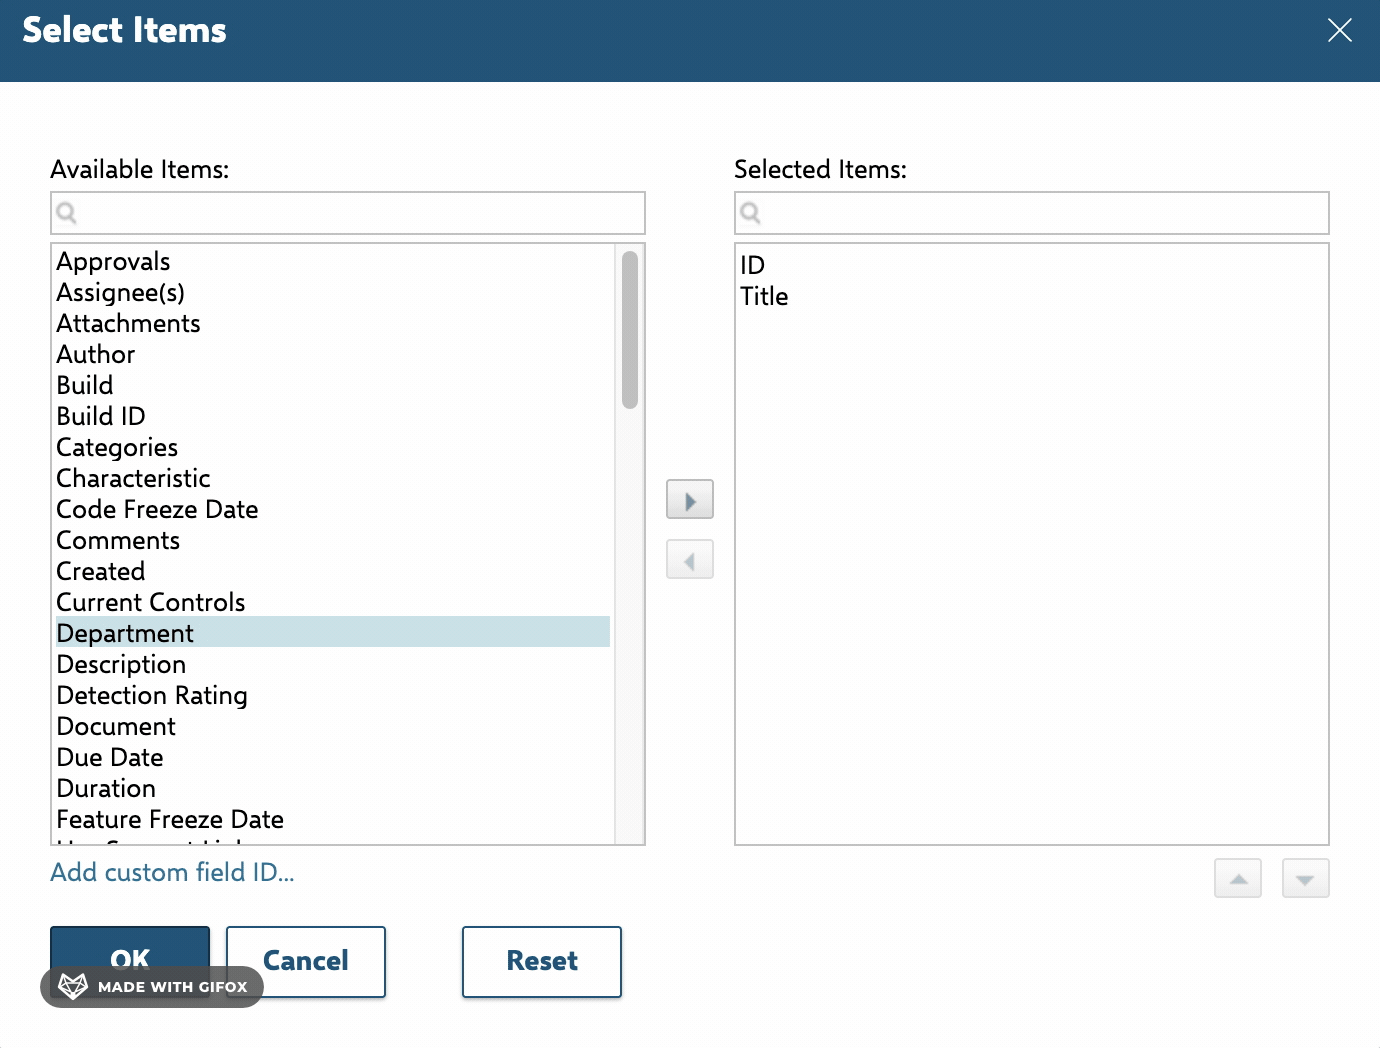
- Field permissions: Read-only or editable access is determined by Polarion role permissions, not dialog configuration.
- Required fields: Fields marked as required must be filled before saving. The save button is disabled until all required fields have values.
- Inline validation: Numeric fields (integer, float) show inline error text when non-numeric characters are entered.