> ## Documentation Index
> Fetch the complete documentation index at: https://learn.nextedy.com/llms.txt
> Use this file to discover all available pages before exploring further.
# Customize the Top Panel
> Add custom buttons, filters, document metadata, and JavaScript integrations to the area above the Nextedy RISKSHEET grid using a Velocity template.
export const LastReviewed = ({date}) => {
if (!date) return null;
const formatted = new Date(`${date}T00:00:00Z`).toLocaleDateString("en-US", {
year: "numeric",
month: "long",
day: "numeric",
timeZone: "UTC"
});
return
Last reviewed on {formatted}
;
};
Referred to as the **Risksheet attributes panel** in the Nextedy Support Portal. *Aliases: attributes panel, risksheet attributes panel.*
 ## Why a Separate Top Panel? The Two-File Pattern
Risksheet splits configuration across two files:
| File | Role |
| ---------------------------------------------------- | ----------------------------------------------------------------------------- |
| **Sheet configuration** (columns, levels, formulas) | Declarative — WHAT to show. Auditable structure, easy to diff. |
| **Top panel configuration** (`risksheetTopPanel.vm`) | Imperative — HOW to compute and render. Velocity + JavaScript, code-reviewed. |
This separation matters for regulated industries: when a risk matrix changes, only the top panel changes, so the declarative sheet configuration stays untouched and the change-control scope stays small. Tooling can validate the sheet configuration without parsing JavaScript, and the same sheet structure can pair with different calculation strategies by swapping the top panel.
For regulated environments, keep formula wrappers in the sheet configuration thin (for example, `initialRE: "(info) => { return getInitialRE(info); }"`) and put the real logic in `risksheetTopPanel.vm`.
## Prerequisites
* Administrator privileges for the Polarion project
* Familiarity with Velocity template syntax
* A Risksheet document or template where you can attach files
## Step 1: Create the Top Panel Template
1. Create a new file named `risksheetTopPanel.vm`
2. Write your Velocity template content (see examples below)
3. Attach the file to your Risksheet document or its template document
The recommended way to edit the top panel is directly from the Risksheet interface, via **Menu > Configuration > Edit Top Panel Configuration**:
## Why a Separate Top Panel? The Two-File Pattern
Risksheet splits configuration across two files:
| File | Role |
| ---------------------------------------------------- | ----------------------------------------------------------------------------- |
| **Sheet configuration** (columns, levels, formulas) | Declarative — WHAT to show. Auditable structure, easy to diff. |
| **Top panel configuration** (`risksheetTopPanel.vm`) | Imperative — HOW to compute and render. Velocity + JavaScript, code-reviewed. |
This separation matters for regulated industries: when a risk matrix changes, only the top panel changes, so the declarative sheet configuration stays untouched and the change-control scope stays small. Tooling can validate the sheet configuration without parsing JavaScript, and the same sheet structure can pair with different calculation strategies by swapping the top panel.
For regulated environments, keep formula wrappers in the sheet configuration thin (for example, `initialRE: "(info) => { return getInitialRE(info); }"`) and put the real logic in `risksheetTopPanel.vm`.
## Prerequisites
* Administrator privileges for the Polarion project
* Familiarity with Velocity template syntax
* A Risksheet document or template where you can attach files
## Step 1: Create the Top Panel Template
1. Create a new file named `risksheetTopPanel.vm`
2. Write your Velocity template content (see examples below)
3. Attach the file to your Risksheet document or its template document
The recommended way to edit the top panel is directly from the Risksheet interface, via **Menu > Configuration > Edit Top Panel Configuration**:
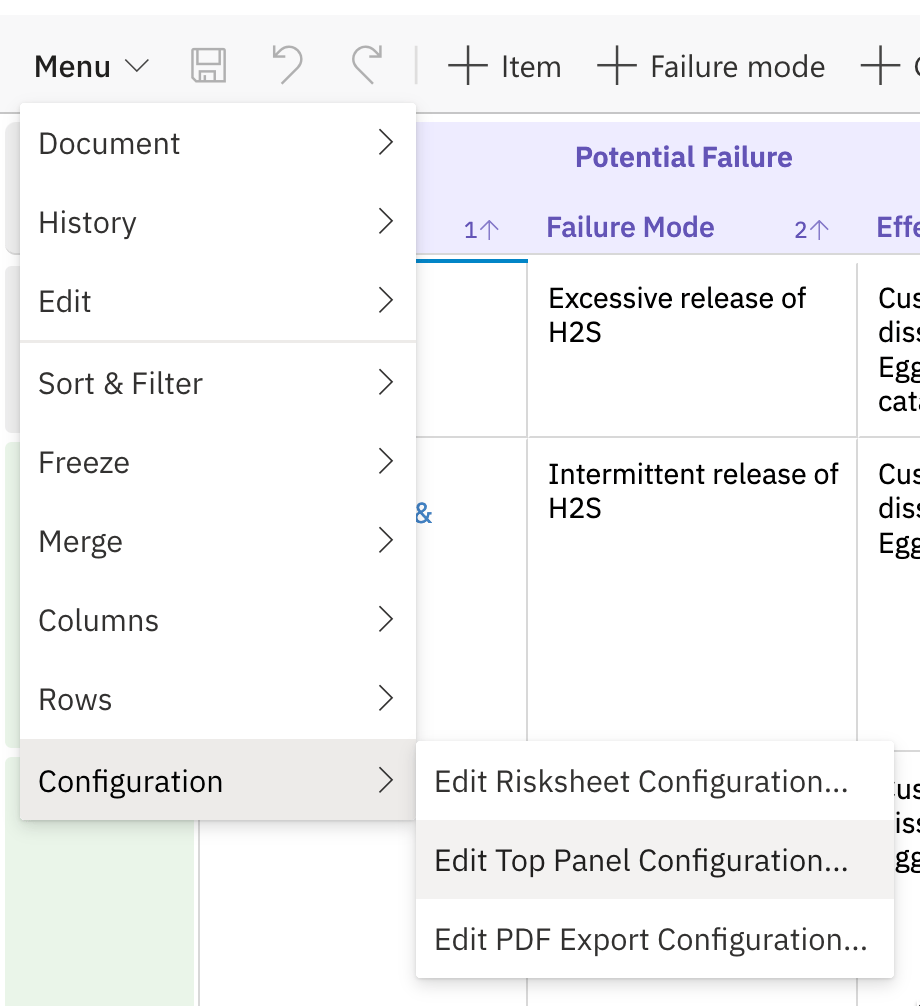
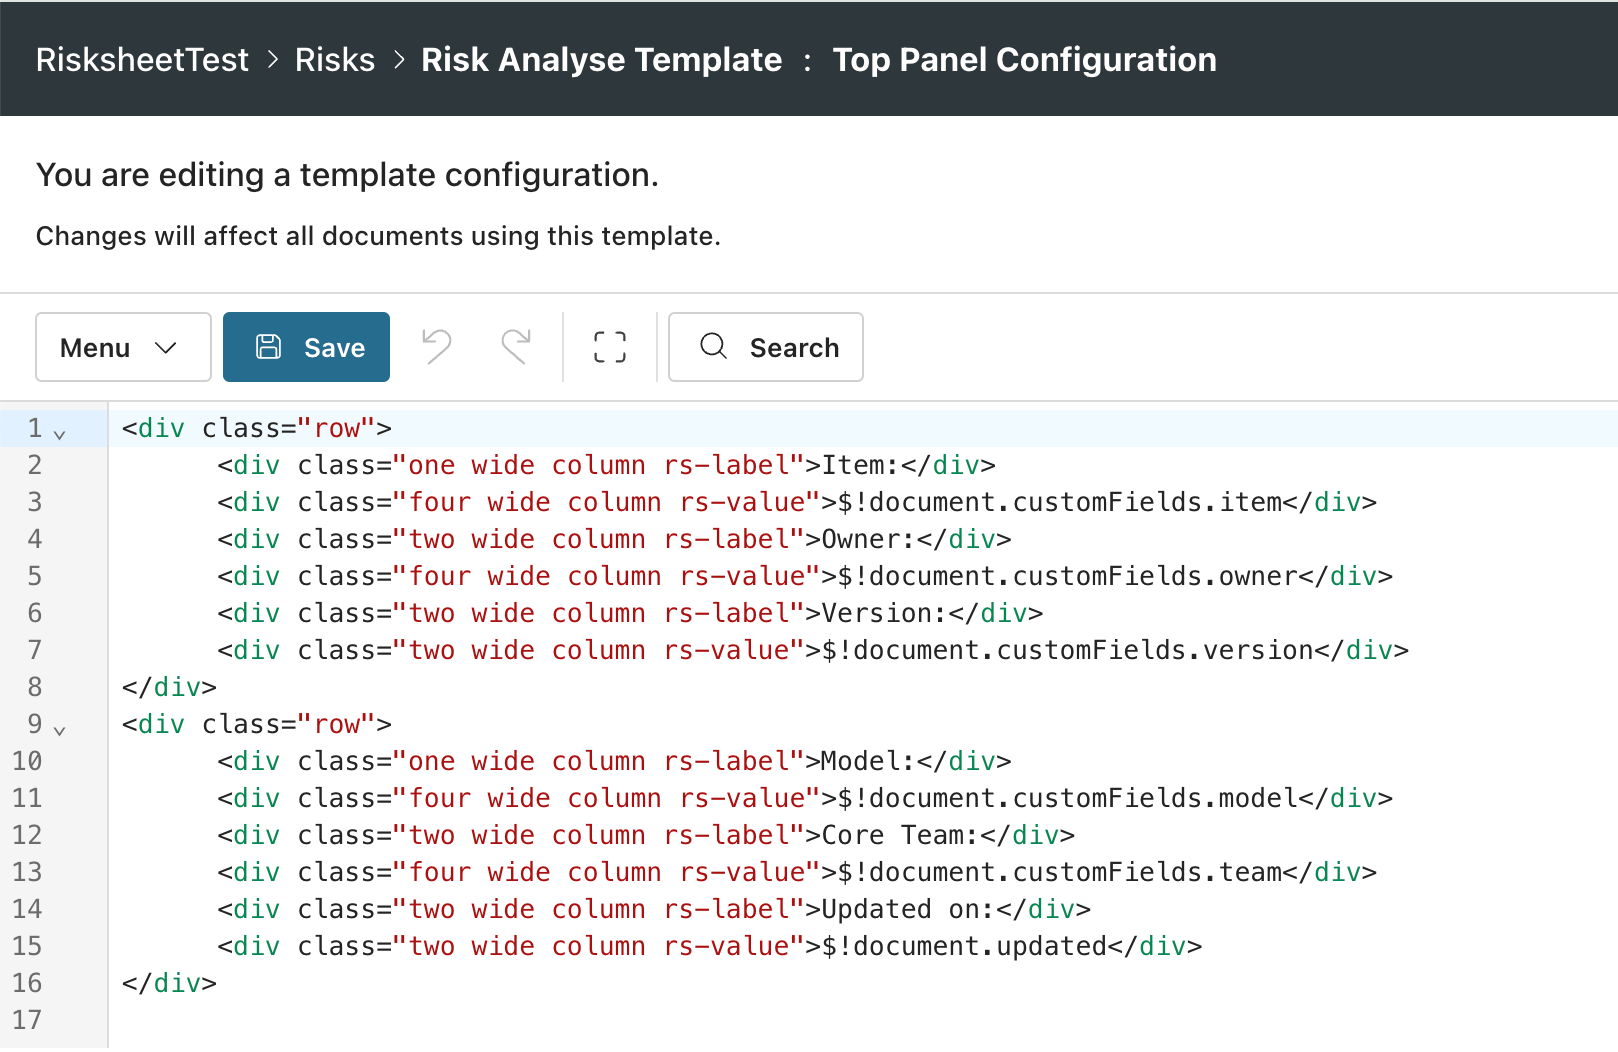 Alternatively, you can access the top-panel file from the document's attachments. Open **Menu > Document > Open Live Document** and find the Attachments section:
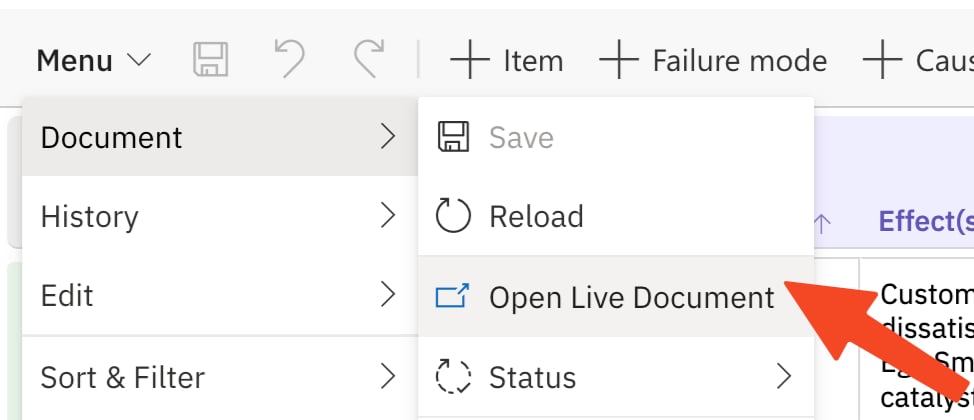
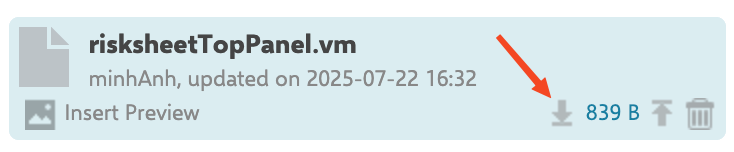 Risksheet renders the Velocity template as HTML and inserts it above the grid. The template has access to these Velocity context variables:
| Variable | Description |
| ------------------ | ------------------------------------------------- |
| `$document` | The current Polarion document object |
| `$doc` | Alias for the document with access to the old API |
| `$transaction` | The current Polarion transaction |
| `$securityService` | Polarion security service (current user, roles) |
| `$velocityTools` | Standard Velocity tools |
Risksheet renders the Velocity template as HTML and inserts it above the grid. The template has access to these Velocity context variables:
| Variable | Description |
| ------------------ | ------------------------------------------------- |
| `$document` | The current Polarion document object |
| `$doc` | Alias for the document with access to the old API |
| `$transaction` | The current Polarion transaction |
| `$securityService` | Polarion security service (current user, roles) |
| `$velocityTools` | Standard Velocity tools |
 ## Step 2: Display Document Custom Fields
Show document-level custom fields in the top panel using Velocity expressions:
```velocity theme={null}
## Step 2: Display Document Custom Fields
Show document-level custom fields in the top panel using Velocity expressions:
```velocity theme={null}
Product Family: $document.customFields.productFamily
Status: $document.customFields.approvalStatus
```
For custom fields that require the old API:
```velocity theme={null}
#set($productFamily = $doc.getOldApi().getValue("productFamily"))
Product Family: $productFamily
```
The top panel can display document custom fields but cannot modify them directly. Custom fields must be updated through Polarion's standard document editing interface.
## Step 3: Bridge Server-Side Data to Client-Side Formulas
Use the top panel to extract server-side data and make it available to client-side JavaScript. This is essential for formulas and query factories that need document-level context:
```velocity theme={null}
```
Then reference the value in your sheet configuration formula:
```yaml theme={null}
formulas:
filterByFamily: "function(info) { return window.risksheetContext.productFamily; }"
```
This is the canonical externalization pattern: the sheet configuration declares a named formula; the actual logic lives in the top panel script block. Only the top panel changes when the calculation evolves.
## Step 4: Filter Item Suggestions Using Top Panel Data
Combine the top panel Velocity script with a `queryFactory` function to dynamically filter linked items based on document-level custom field values:
```velocity theme={null}
```
Then reference this query factory from a column in your sheet configuration:
```yaml theme={null}
columns:
- bindings: linkedWorkItems
header: Requirements
type: itemLink
typeProperties:
queryFactory: filterByProductFamily
```
Note `bindings` (plural) — this is the correct property name for the Polarion field mapping on a column.
`queryFactory` only takes effect inside the column's `typeProperties` block (alongside `linkRole`/`linkTypes`). A `queryFactory` placed as a top-level column property is silently ignored — the engine neither keeps it nor moves it, so the filter never applies.
The top panel Velocity template runs on the server side, extracting document field values. It outputs JavaScript variables into the page. Client-side formulas and query factories then read those variables at runtime. This server-to-client bridge is the standard pattern for document-aware filtering.
## Maximize and Restore the Grid
The top panel includes a built-in toggle to maximize the grid viewing area:
* Click the **maximize** button to hide the top panel and expand the grid to full height
* Click the **restore** button to show the top panel again
This toggle is always available and requires no configuration.
## Error Handling
If the Velocity template contains errors, Risksheet renders a red message box in the top panel area. Common errors include:
* **Syntax errors in Velocity** -- missing `#end` directives or undefined variables
* **Missing custom field** -- referencing a document custom field that does not exist returns `null`
* **JavaScript errors** -- check the browser console for client-side script issues
The `risksheetTopPanel.vm` file follows the same inheritance rules as the sheet configuration. Risksheet first checks the current document, then searches the document's template hierarchy. If you use [Override Template Configuration](/risksheet/guides/configuration/document-config-override), you can have a document-specific top panel that differs from the template.
## Step 5: Verify the Top Panel
After attaching or updating your `risksheetTopPanel.vm`:
1. Open the Risksheet document
2. Verify the top panel area displays your custom content above the grid
3. Check that document custom fields render their current values
4. If using JavaScript bridging, open the browser console and verify `window.risksheetContext` (or your variable name) contains the expected data
You should now see your custom top panel content displayed above the Risksheet grid.
## See Also
* [Customize the Context Menu](/risksheet/guides/customization/context-menu) -- add custom right-click actions
* [Create Custom Renderers](/risksheet/guides/customization/custom-renderers) -- specialized cell display logic
* [Use Query Factory](/risksheet/guides/advanced/query-factory) -- dynamic query generation for autocomplete
* [Configure Queries](/risksheet/guides/advanced/query-configuration) -- item filtering configuration