> ## Documentation Index
> Fetch the complete documentation index at: https://learn.nextedy.com/llms.txt
> Use this file to discover all available pages before exploring further.
# First data model
export const LastReviewed = ({date}) => {
if (!date) return null;
const formatted = new Date(`${date}T00:00:00Z`).toLocaleDateString("en-US", {
year: "numeric",
month: "long",
day: "numeric",
timeZone: "UTC"
});
return
Last reviewed on {formatted}
;
};
## What you will achieve
By the end of this tutorial you will have:
* A working data model with two entity types (`UserNeed` and `SystemRequirement`)
* A many-to-many relationship connecting the two entity types via a Polarion link role
* Navigation properties (`direct` and `back`) that you can reference in sheet configurations
* A foundation you can extend with additional entity types like `DesignRequirement`, `Hazard`, or `RiskControl`
This tutorial uses `UserNeed` and `SystemRequirement` throughout, drawn from the shipped RTM example model. In your own configuration, replace `UserNeed` and `SystemRequirement` with entity types that match your domain — any names meaningful to your workflow (a risk-analysis model, for instance, might use `Hazard` and `RiskControl` instead).
## Prerequisites
* Nextedy Powersheet installed and licensed (see [Installing Powersheet](/powersheet/getting-started/installation))
* Navigation topic enabled — this registers Powersheet as a routable page so your configured sheets are reachable from the project sidebar (see [Setting Up Navigation](/powersheet/getting-started/setup-navigation))
* At least two Polarion work item types configured in your project (e.g., `user_need` and `sys_req`)
* A Polarion link role defined for connecting the two types (e.g., `decomposes`)
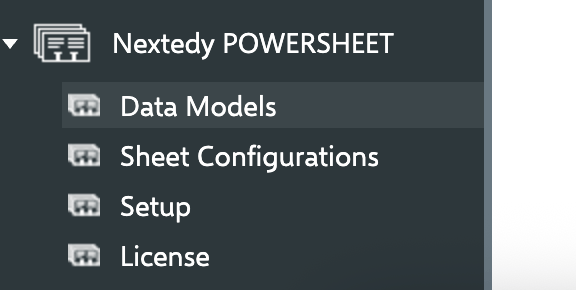
Navigate to **Administration > Nextedy Powersheet > Data Models**.
 The Data Models page lists existing models grouped by scope — **Global** models apply to all projects, while project-scoped sections (e.g., **RTM w/ Components**) hold models tied to a specific project.
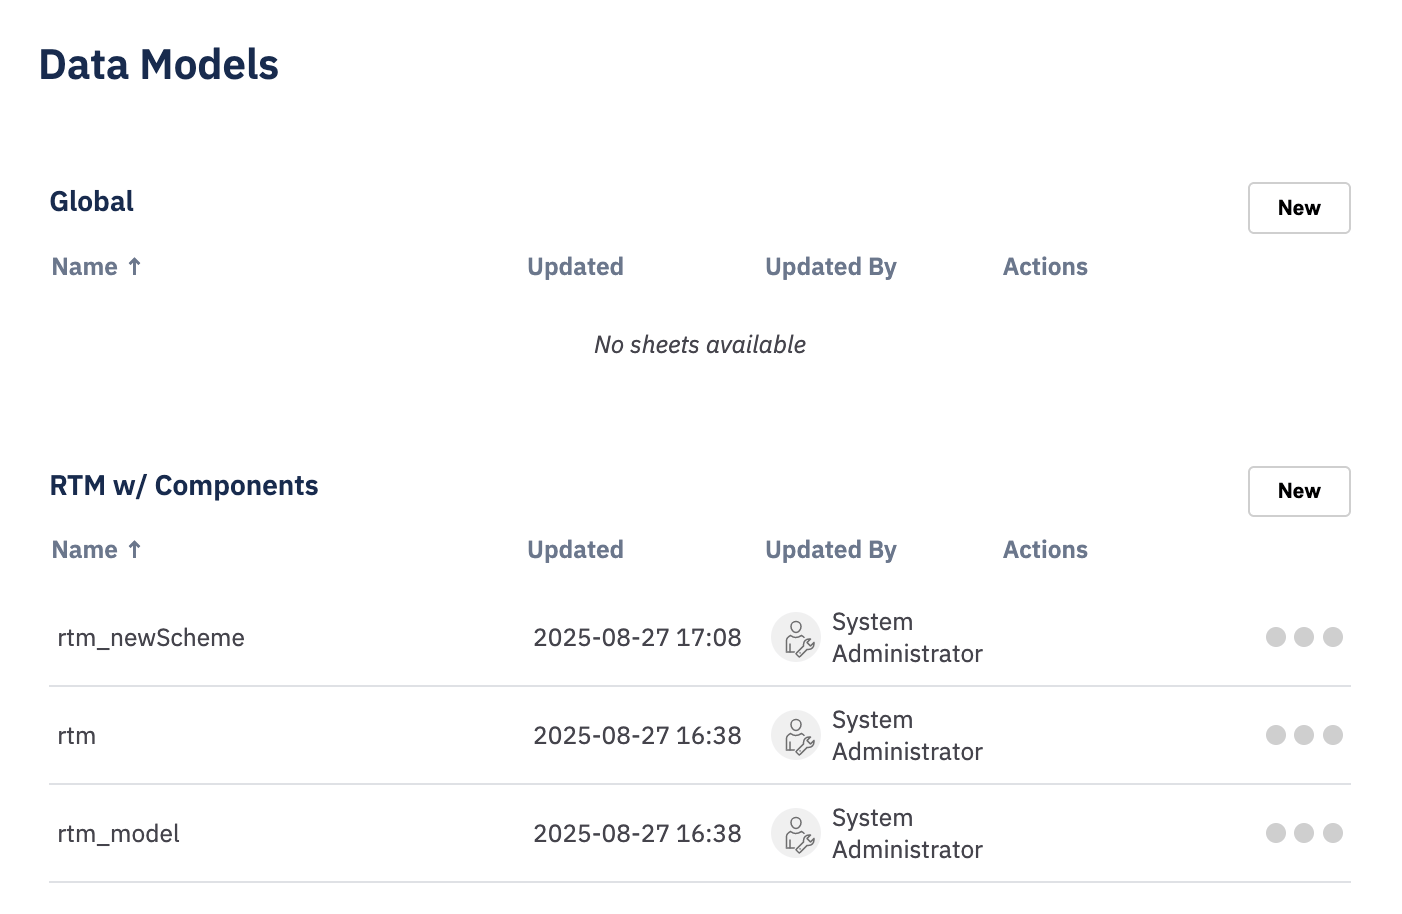 Click **New** to create a new data model at the project level. Select **System Default** as the base and give your model a name (e.g., `rtm`).
 **You should see:** A new row is added to the Data Models list for your project. Click **Open** on that row to launch the configuration editor — it opens in a **new browser tab**, preloaded with the default template content.
Saving a new model only adds a row to the Data Models list; it does not open the editor automatically. Click **Open** on the model row to launch the configuration editor in a separate browser tab, leaving the administration page open behind it. Save in the editor tab, then return to the administration tab to manage other models.
The **System Default** base preloads a rich template (around 270 lines defining many entity types such as `Document`, `Chapter`, and several requirement types). The minimal YAML shown in this tutorial is meant for learning the structure. For a real project, **extend** the template rather than wholesale-replacing it — and before you make sweeping changes, copy the original content aside (for example via **Menu > Download configuration**, see [Step 4](#step-4-review-the-complete-model)) so you can recover the entity definitions you would otherwise lose.
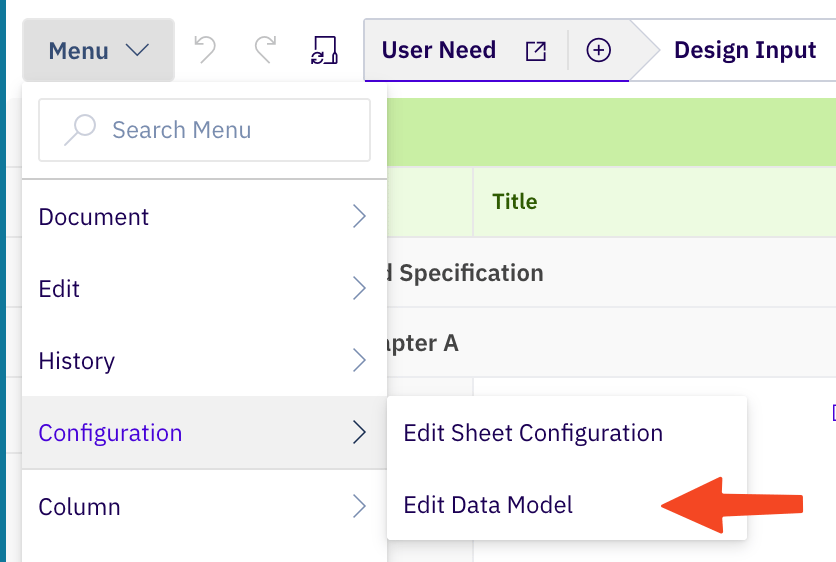
You can also reach the model editor directly from an open Powersheet document via **Menu > Configuration > Edit Data Model**.
**You should see:** A new row is added to the Data Models list for your project. Click **Open** on that row to launch the configuration editor — it opens in a **new browser tab**, preloaded with the default template content.
Saving a new model only adds a row to the Data Models list; it does not open the editor automatically. Click **Open** on the model row to launch the configuration editor in a separate browser tab, leaving the administration page open behind it. Save in the editor tab, then return to the administration tab to manage other models.
The **System Default** base preloads a rich template (around 270 lines defining many entity types such as `Document`, `Chapter`, and several requirement types). The minimal YAML shown in this tutorial is meant for learning the structure. For a real project, **extend** the template rather than wholesale-replacing it — and before you make sweeping changes, copy the original content aside (for example via **Menu > Download configuration**, see [Step 4](#step-4-review-the-complete-model)) so you can recover the entity definitions you would otherwise lose.
You can also reach the model editor directly from an open Powersheet document via **Menu > Configuration > Edit Data Model**.
 Data model files use YAML syntax. Indentation must use spaces (not tabs), and each nesting level uses two spaces. Most errors in data model setup come from incorrect indentation. For a complete introduction to YAML syntax, see the [YAML Primer](/powersheet/concepts/yaml-primer).
For this tutorial, set the data model content to the following minimal YAML (for a real project, add these definitions to the existing template rather than replacing it — see the warning in [Step 1](#step-1-open-the-data-models-administration)):
```yaml theme={null}
domainModelTypes:
UserNeed:
polarionType: user_need
properties:
description:
severity:
SystemRequirement:
polarionType: sys_req
properties:
description:
severity:
```
Each key under `domainModelTypes` defines an entity type name. The `polarionType` property maps the entity type to a Polarion work item type. The `properties` section lists which work item fields are exposed for use in sheet configurations.
Data model files use YAML syntax. Indentation must use spaces (not tabs), and each nesting level uses two spaces. Most errors in data model setup come from incorrect indentation. For a complete introduction to YAML syntax, see the [YAML Primer](/powersheet/concepts/yaml-primer).
For this tutorial, set the data model content to the following minimal YAML (for a real project, add these definitions to the existing template rather than replacing it — see the warning in [Step 1](#step-1-open-the-data-models-administration)):
```yaml theme={null}
domainModelTypes:
UserNeed:
polarionType: user_need
properties:
description:
severity:
SystemRequirement:
polarionType: sys_req
properties:
description:
severity:
```
Each key under `domainModelTypes` defines an entity type name. The `polarionType` property maps the entity type to a Polarion work item type. The `properties` section lists which work item fields are exposed for use in sheet configurations.
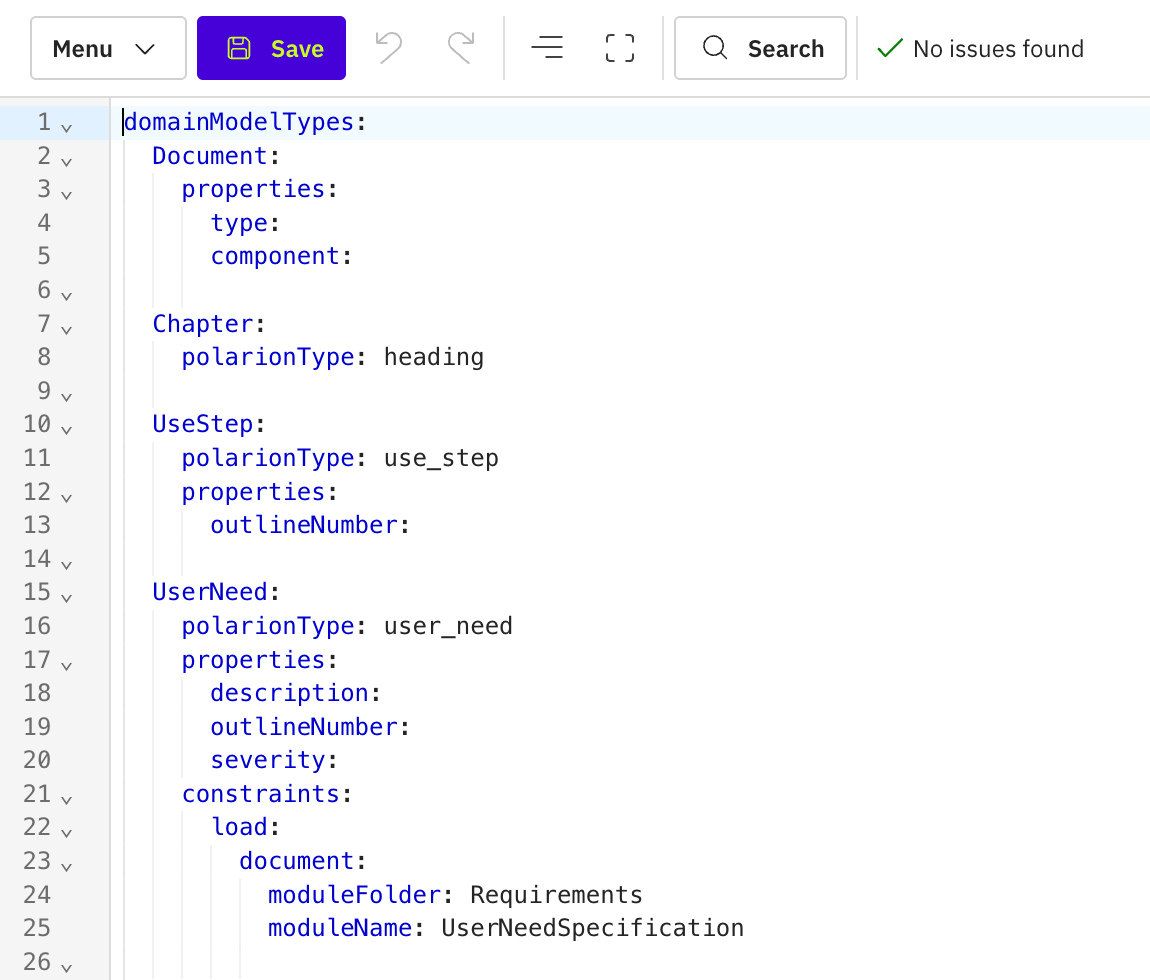 **You should see:** The YAML is accepted without errors in the editor.
Entity type names under `domainModelTypes` must be single words with no spaces or special characters. PascalCase (e.g., `UserNeed`, `SystemRequirement`) is the recommended naming convention, but it is not enforced by the system. The important rule is that these names are used consistently throughout your configuration — in relationships, sources, and column bindings.
The `polarionType` value must be the **exact** ID of a Polarion work item type configured in your project — and the match is **case-sensitive**. Polarion type IDs are commonly **snake\_case** (for example `user_need`, `sys_req`), not the camelCase or PascalCase you might assume. Writing `userNeed` when the real type ID is `user_need` does **not** raise an error: the model saves cleanly, and the mismatch only surfaces later as a sheet that renders **empty** with no diagnostic.
Look up the real IDs before you fill in `polarionType`: go to **Administration > Work Items > Types** and copy each type's **ID** value verbatim (the ID, not the display name). Note that the entity type name (the key, e.g. `UserNeed`) is separate — it is what you reference everywhere else in Powersheet configuration, while `polarionType` is the bridge to Polarion.
Add the `relationships` section below the entity types. Relationships use `direct` and `back` properties to define forward and reverse navigation:
```yaml theme={null}
relationships:
- from: SystemRequirement
to: UserNeed
cardinality: many-to-many
storage: linkedWorkItems
linkRole: decomposes
direct:
name: userNeeds
back:
name: systemRequirements
```
This defines a many-to-many relationship from `SystemRequirement` to `UserNeed`, stored using the Polarion `decomposes` link role.
* **`direct`** creates a navigation property on the `from` entity (`SystemRequirement`). The name `userNeeds` lets you navigate from a system requirement to its linked user needs.
* **`back`** creates a reverse navigation property on the `to` entity (`UserNeed`). The name `systemRequirements` lets you navigate from a user need to its linked system requirements.
The `decomposes` link role and a `SystemRequirement` → `UserNeed` relationship are already present in the System Default template. If you kept that template instead of starting from the minimal YAML above, do **not** add a second definition — adjust the existing relationship's `direct`/`back` names if needed rather than duplicating it.
**You should see:** The complete model now has both `domainModelTypes` and `relationships` sections.
The `from` and `to` values must match the entity type names defined in `domainModelTypes` — not the Polarion work item type IDs. For example, use `UserNeed` (the entity type name), not `user_need` (the Polarion type ID). Mismatching these is a common cause of data model errors.
Your complete data model should look like this:
```yaml theme={null}
domainModelTypes:
UserNeed:
polarionType: user_need
properties:
description:
severity:
SystemRequirement:
polarionType: sys_req
properties:
description:
severity:
relationships:
- from: SystemRequirement
to: UserNeed
cardinality: many-to-many
storage: linkedWorkItems
linkRole: decomposes
direct:
name: userNeeds
back:
name: systemRequirements
```
Save the model.
The configuration editor auto-indents on every Enter, and the indentation **accumulates** with each new line. If you type multi-line YAML by hand, the leading spaces compound and the structure quickly breaks (deeper-and-deeper indentation that no longer reflects the real nesting). Instead, **paste the whole block at once** — for example by copying the complete YAML above with the copy button on the code block — and verify the indentation matches what is shown here. If you do edit by hand, watch the leading spaces on each line rather than trusting the editor to indent for you.
**You should see:** The model saves without errors. The `direct.name` and `back.name` values become the navigation properties you reference in your sheet configuration — in source expand paths and column bindings.
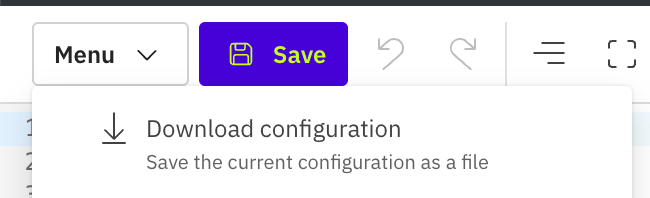
The model editor also offers a **Menu > Download configuration** action that saves the current YAML as a file on your machine. This is useful for backing up models, sharing them between projects, or version-controlling them outside Polarion.
**You should see:** The YAML is accepted without errors in the editor.
Entity type names under `domainModelTypes` must be single words with no spaces or special characters. PascalCase (e.g., `UserNeed`, `SystemRequirement`) is the recommended naming convention, but it is not enforced by the system. The important rule is that these names are used consistently throughout your configuration — in relationships, sources, and column bindings.
The `polarionType` value must be the **exact** ID of a Polarion work item type configured in your project — and the match is **case-sensitive**. Polarion type IDs are commonly **snake\_case** (for example `user_need`, `sys_req`), not the camelCase or PascalCase you might assume. Writing `userNeed` when the real type ID is `user_need` does **not** raise an error: the model saves cleanly, and the mismatch only surfaces later as a sheet that renders **empty** with no diagnostic.
Look up the real IDs before you fill in `polarionType`: go to **Administration > Work Items > Types** and copy each type's **ID** value verbatim (the ID, not the display name). Note that the entity type name (the key, e.g. `UserNeed`) is separate — it is what you reference everywhere else in Powersheet configuration, while `polarionType` is the bridge to Polarion.
Add the `relationships` section below the entity types. Relationships use `direct` and `back` properties to define forward and reverse navigation:
```yaml theme={null}
relationships:
- from: SystemRequirement
to: UserNeed
cardinality: many-to-many
storage: linkedWorkItems
linkRole: decomposes
direct:
name: userNeeds
back:
name: systemRequirements
```
This defines a many-to-many relationship from `SystemRequirement` to `UserNeed`, stored using the Polarion `decomposes` link role.
* **`direct`** creates a navigation property on the `from` entity (`SystemRequirement`). The name `userNeeds` lets you navigate from a system requirement to its linked user needs.
* **`back`** creates a reverse navigation property on the `to` entity (`UserNeed`). The name `systemRequirements` lets you navigate from a user need to its linked system requirements.
The `decomposes` link role and a `SystemRequirement` → `UserNeed` relationship are already present in the System Default template. If you kept that template instead of starting from the minimal YAML above, do **not** add a second definition — adjust the existing relationship's `direct`/`back` names if needed rather than duplicating it.
**You should see:** The complete model now has both `domainModelTypes` and `relationships` sections.
The `from` and `to` values must match the entity type names defined in `domainModelTypes` — not the Polarion work item type IDs. For example, use `UserNeed` (the entity type name), not `user_need` (the Polarion type ID). Mismatching these is a common cause of data model errors.
Your complete data model should look like this:
```yaml theme={null}
domainModelTypes:
UserNeed:
polarionType: user_need
properties:
description:
severity:
SystemRequirement:
polarionType: sys_req
properties:
description:
severity:
relationships:
- from: SystemRequirement
to: UserNeed
cardinality: many-to-many
storage: linkedWorkItems
linkRole: decomposes
direct:
name: userNeeds
back:
name: systemRequirements
```
Save the model.
The configuration editor auto-indents on every Enter, and the indentation **accumulates** with each new line. If you type multi-line YAML by hand, the leading spaces compound and the structure quickly breaks (deeper-and-deeper indentation that no longer reflects the real nesting). Instead, **paste the whole block at once** — for example by copying the complete YAML above with the copy button on the code block — and verify the indentation matches what is shown here. If you do edit by hand, watch the leading spaces on each line rather than trusting the editor to indent for you.
**You should see:** The model saves without errors. The `direct.name` and `back.name` values become the navigation properties you reference in your sheet configuration — in source expand paths and column bindings.
The model editor also offers a **Menu > Download configuration** action that saves the current YAML as a file on your machine. This is useful for backing up models, sharing them between projects, or version-controlling them outside Polarion.
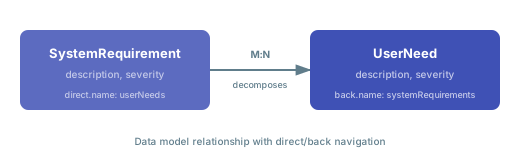 The navigation properties you defined (`userNeeds` and `systemRequirements`) are the bridge between your data model and your sheet configuration. Here is how they connect:
| Data model property | Used in sheet configuration | Purpose |
| ------------------------------- | ------------------------------------ | ----------------------------------------------------- |
| `direct.name: userNeeds` | `expand: - name: userNeeds` | Expands system requirements to show linked user needs |
| `back.name: systemRequirements` | `expand: - name: systemRequirements` | Expands user needs to show linked system requirements |
| `polarionType: user_need` | Resolved automatically | Maps entity to Polarion work item queries |
| `properties: description` | `columns: description:` | Exposes field for column display |
Begin with two entity types and one relationship. Once your sheet renders correctly, add more entity types (e.g., `DesignRequirement`, `Hazard`, `RiskControl`) and relationships incrementally. See [Incremental Configuration Approach](/powersheet/getting-started/incremental-configuration) for guidance.
By default, an entity loads every matching work item in the project. **Constraints** let you scope that behavior per relationship, using three actions that each take a Polarion query:
* **`load`** (`loadFromQueries`) — where the entity's items are **loaded from** (which items appear in the sheet).
* **`saveToQueries`** — where a **new item is created** when added through this relationship (for example, into a specific document or component). (This stage has no short `save` alias — the data-model editor rejects a bare `save`, unlike `load` and `pick`.)
* **`pick`** (`pickFromQueries`) — which items are offered **in the item picker** (the dropdown used to link existing items).
A constraint query can reference the current context — for example restricting items to the same component as the source document via `$context.source.document.component`. You typically add a `constraints` block to a relationship once the basic model works; it is not required to get a sheet rendering.
```yaml theme={null}
relationships:
- from: SystemRequirement
to: UserNeed
cardinality: many-to-many
storage: linkedWorkItems
linkRole: decomposes
constraints:
load: # alias for loadFromQueries
document: # scope by document — NOT a work-item type
moduleFolder: Requirements
moduleName: UserNeedSpecification
direct:
name: userNeeds
back:
name: systemRequirements
```
For the full syntax and worked examples, see [Configure Constraints](/powersheet/guides/data-model/configure-constraints).
A single entity type can map to **more than one** Polarion work item type (a "multi-type entity") — useful when, say, several discipline-specific requirement types should behave as one entity in the sheet. See [Map Multiple Polarion Types to One Entity](/powersheet/guides/data-model/create-entity-type#map-multiple-polarion-types-to-one-entity).
## Next steps
* [Creating Your First Sheet Configuration](/powersheet/getting-started/first-sheet-configuration) — use the navigation properties from your data model in column bindings
* [Creating Your First Powersheet Document](/powersheet/getting-started/first-document) — embed your configured sheet in a Polarion LiveDoc
* [Data Model Reference](/powersheet/reference/data-model/index) — full reference for `domainModelTypes`, `relationships`, `cardinality`, and `storage` options
* [Data Model Guides](/powersheet/guides/data-model/index) — add custom properties, set permissions, and extend your model
The navigation properties you defined (`userNeeds` and `systemRequirements`) are the bridge between your data model and your sheet configuration. Here is how they connect:
| Data model property | Used in sheet configuration | Purpose |
| ------------------------------- | ------------------------------------ | ----------------------------------------------------- |
| `direct.name: userNeeds` | `expand: - name: userNeeds` | Expands system requirements to show linked user needs |
| `back.name: systemRequirements` | `expand: - name: systemRequirements` | Expands user needs to show linked system requirements |
| `polarionType: user_need` | Resolved automatically | Maps entity to Polarion work item queries |
| `properties: description` | `columns: description:` | Exposes field for column display |
Begin with two entity types and one relationship. Once your sheet renders correctly, add more entity types (e.g., `DesignRequirement`, `Hazard`, `RiskControl`) and relationships incrementally. See [Incremental Configuration Approach](/powersheet/getting-started/incremental-configuration) for guidance.
By default, an entity loads every matching work item in the project. **Constraints** let you scope that behavior per relationship, using three actions that each take a Polarion query:
* **`load`** (`loadFromQueries`) — where the entity's items are **loaded from** (which items appear in the sheet).
* **`saveToQueries`** — where a **new item is created** when added through this relationship (for example, into a specific document or component). (This stage has no short `save` alias — the data-model editor rejects a bare `save`, unlike `load` and `pick`.)
* **`pick`** (`pickFromQueries`) — which items are offered **in the item picker** (the dropdown used to link existing items).
A constraint query can reference the current context — for example restricting items to the same component as the source document via `$context.source.document.component`. You typically add a `constraints` block to a relationship once the basic model works; it is not required to get a sheet rendering.
```yaml theme={null}
relationships:
- from: SystemRequirement
to: UserNeed
cardinality: many-to-many
storage: linkedWorkItems
linkRole: decomposes
constraints:
load: # alias for loadFromQueries
document: # scope by document — NOT a work-item type
moduleFolder: Requirements
moduleName: UserNeedSpecification
direct:
name: userNeeds
back:
name: systemRequirements
```
For the full syntax and worked examples, see [Configure Constraints](/powersheet/guides/data-model/configure-constraints).
A single entity type can map to **more than one** Polarion work item type (a "multi-type entity") — useful when, say, several discipline-specific requirement types should behave as one entity in the sheet. See [Map Multiple Polarion Types to One Entity](/powersheet/guides/data-model/create-entity-type#map-multiple-polarion-types-to-one-entity).
## Next steps
* [Creating Your First Sheet Configuration](/powersheet/getting-started/first-sheet-configuration) — use the navigation properties from your data model in column bindings
* [Creating Your First Powersheet Document](/powersheet/getting-started/first-document) — embed your configured sheet in a Polarion LiveDoc
* [Data Model Reference](/powersheet/reference/data-model/index) — full reference for `domainModelTypes`, `relationships`, `cardinality`, and `storage` options
* [Data Model Guides](/powersheet/guides/data-model/index) — add custom properties, set permissions, and extend your model