> ## Documentation Index
> Fetch the complete documentation index at: https://learn.nextedy.com/llms.txt
> Use this file to discover all available pages before exploring further.
# Setup into Existing Projects
> Learn how to add a Nextedy PLANNINGBOARD widget to an existing Polarion project so your team can start capacity-aware sprint and release planning without creating a new project.
## What you will achieve
By the end of this tutorial you will have a working Planningboard embedded in a LiveReport page inside your existing Polarion project, ready for you to configure Plans and swimlanes.
## Prerequisites
* Planningboard is installed on your Polarion server (see [Installation](/planningboard/getting-started/installation))
* A valid Planningboard license is applied (see [License Installation](/planningboard/getting-started/licensing))
* You have project administrator access to the target Polarion project
* The project contains at least one Plan with work items
***
Navigate to your existing project in Siemens Polarion ALM and open the **Documents & Pages** section from the left sidebar.
Choose a space where you want to host the Planningboard. For most teams the **Planning** space is a natural home, but you can use any space you have write access to.
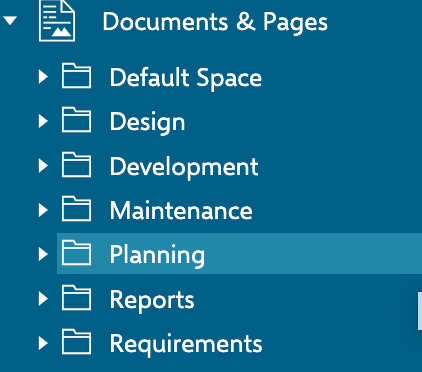 If your project has no dedicated planning space, create one now. A descriptive space name such as **Planning** makes it easy for team members to find the board later.
**What you should see:** The Documents & Pages tree for your project, listing existing spaces and pages.
***
Inside the chosen space, create a new **LiveReport Page** and give it a recognizable name such as `PlanningBoard`.
If your project has no dedicated planning space, create one now. A descriptive space name such as **Planning** makes it easy for team members to find the board later.
**What you should see:** The Documents & Pages tree for your project, listing existing spaces and pages.
***
Inside the chosen space, create a new **LiveReport Page** and give it a recognizable name such as `PlanningBoard`.
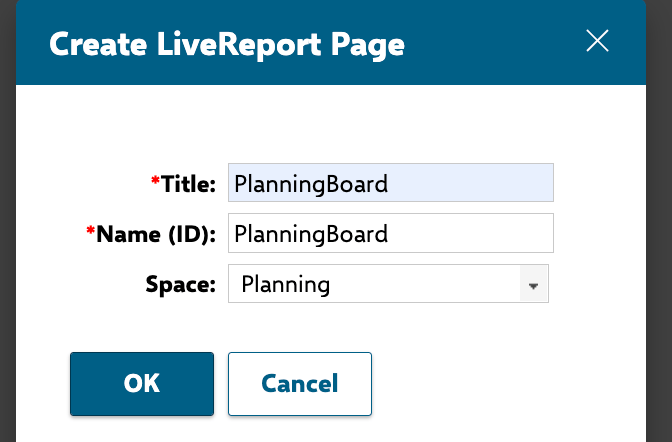 Planningboard runs as a widget embedded inside a LiveReport page. It cannot be placed on a plain Wiki page — you must use a LiveReport page type.
**What you should see:** A blank LiveReport page open in edit mode, ready for widgets to be added.
***
With the LiveReport page open in edit mode, open the widget picker. From the list of available widgets, select **Plans - Planningboard**.
Planningboard runs as a widget embedded inside a LiveReport page. It cannot be placed on a plain Wiki page — you must use a LiveReport page type.
**What you should see:** A blank LiveReport page open in edit mode, ready for widgets to be added.
***
With the LiveReport page open in edit mode, open the widget picker. From the list of available widgets, select **Plans - Planningboard**.
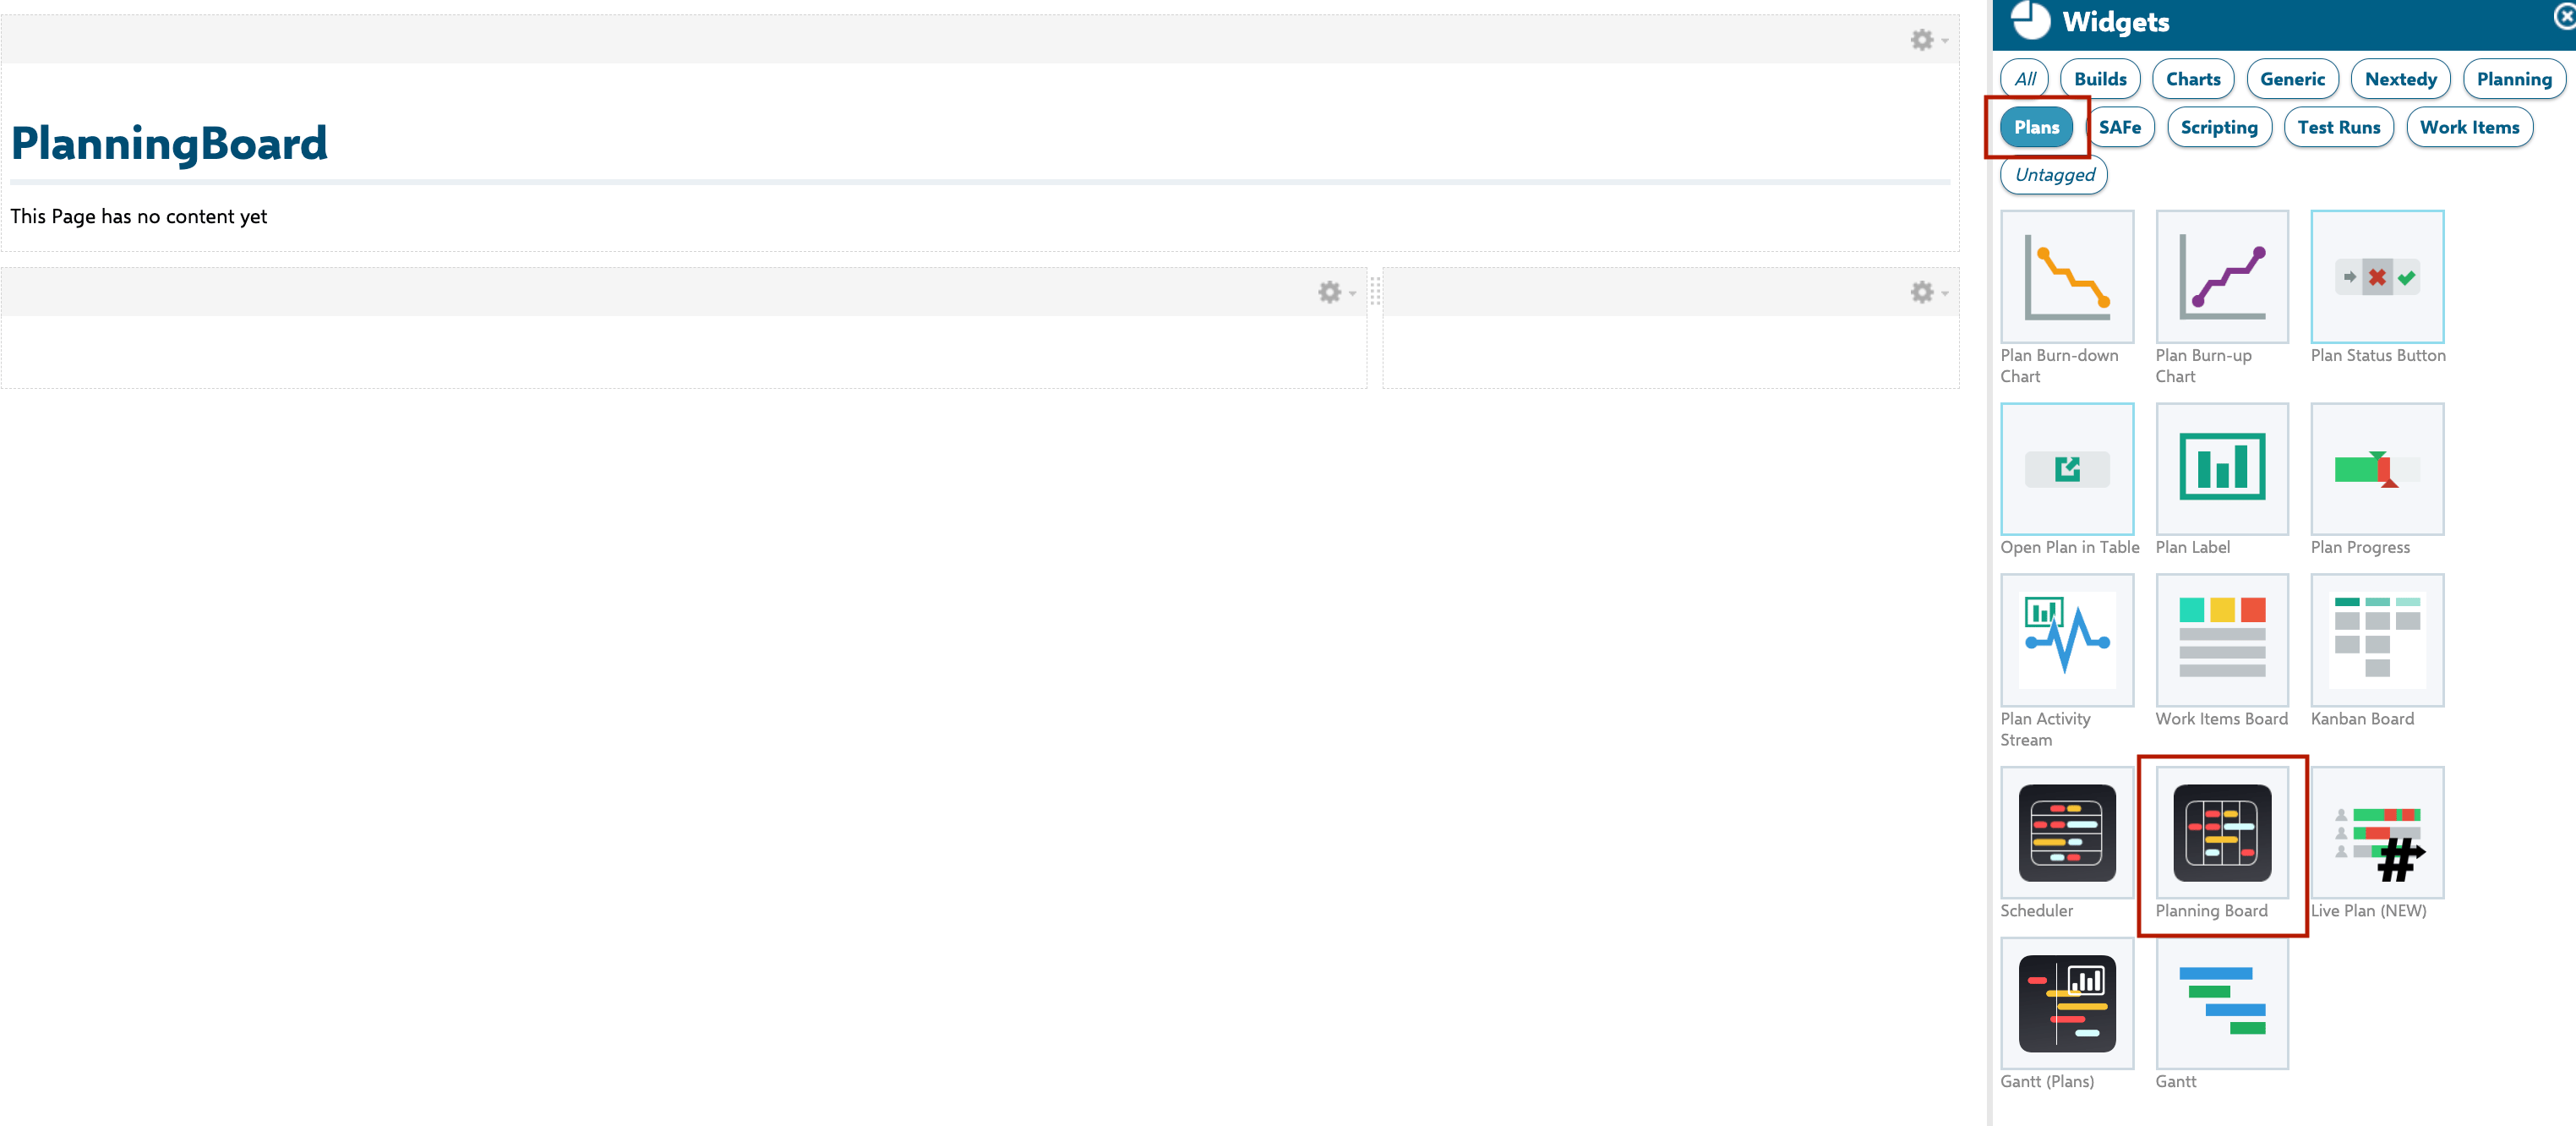 The widget is inserted into the page and loads the Planningboard using the project's existing Plan structure.
**What you should see:** The Planningboard widget renders on the page, displaying cards grouped into swimlanes based on the default configuration. Plans detected from the project appear as columns.
Only one Planningboard widget is supported per page. If you need boards for multiple teams or planning levels, create a separate LiveReport page for each board.
***
Save the page and view it in read mode. Confirm that:
* Plans appear as columns across the board
* Work items appear as cards within the swimlanes
* Swimlanes are populated (the default `assignmentMode` groups items by **assignee**)
If the board appears empty, your project's Plans may not match the default query. See Step 5 to configure the Plan query.
**What you should see:** A board with at least one Plan column and cards placed in swimlane rows corresponding to assignees.
***
Click the widget's settings icon to open its parameter panel. The two most important parameters for an initial setup are:
| Parameter | Purpose | Example value |
| ---------------- | ----------------------------------------------------------- | ------------------ |
| `plansQuery` | Lucene query selecting which Plans appear on the board | `type:releasePlan` |
| `wiType` | Work item type filter restricting which items load as cards | `story` |
| `assignmentMode` | How work items map to swimlanes | `ASSIGNEE` |
| `lastPlans` | Number of past Plans to show | `1` (default) |
| `nextPlans` | Number of future Plans to show | `5` (default) |
**Minimal example** — show release plans containing stories, grouped by assignee:
```properties theme={null}
plansQuery = type:releasePlan
wiType = story
assignmentMode = ASSIGNEE
lastPlans = 1
nextPlans = 5
```
Start with the defaults before tuning. The board is usable without any parameter changes if your project already has Plans and assigned work items.
**What you should see:** After saving the widget parameters, the board refreshes to show only the Plans and work items matching your filters.
***
## Setup flow at a glance
The widget is inserted into the page and loads the Planningboard using the project's existing Plan structure.
**What you should see:** The Planningboard widget renders on the page, displaying cards grouped into swimlanes based on the default configuration. Plans detected from the project appear as columns.
Only one Planningboard widget is supported per page. If you need boards for multiple teams or planning levels, create a separate LiveReport page for each board.
***
Save the page and view it in read mode. Confirm that:
* Plans appear as columns across the board
* Work items appear as cards within the swimlanes
* Swimlanes are populated (the default `assignmentMode` groups items by **assignee**)
If the board appears empty, your project's Plans may not match the default query. See Step 5 to configure the Plan query.
**What you should see:** A board with at least one Plan column and cards placed in swimlane rows corresponding to assignees.
***
Click the widget's settings icon to open its parameter panel. The two most important parameters for an initial setup are:
| Parameter | Purpose | Example value |
| ---------------- | ----------------------------------------------------------- | ------------------ |
| `plansQuery` | Lucene query selecting which Plans appear on the board | `type:releasePlan` |
| `wiType` | Work item type filter restricting which items load as cards | `story` |
| `assignmentMode` | How work items map to swimlanes | `ASSIGNEE` |
| `lastPlans` | Number of past Plans to show | `1` (default) |
| `nextPlans` | Number of future Plans to show | `5` (default) |
**Minimal example** — show release plans containing stories, grouped by assignee:
```properties theme={null}
plansQuery = type:releasePlan
wiType = story
assignmentMode = ASSIGNEE
lastPlans = 1
nextPlans = 5
```
Start with the defaults before tuning. The board is usable without any parameter changes if your project already has Plans and assigned work items.
**What you should see:** After saving the widget parameters, the board refreshes to show only the Plans and work items matching your filters.
***
## Setup flow at a glance
 ***
## Next steps
With the board running in your project, explore these topics to get more out of Planningboard:
* [Create Your First Planningboard](/planningboard/getting-started/first-planning-board) — walk through a complete planning session end-to-end
* [Basic Board Interactions](/planningboard/getting-started/basic-interactions) — drag cards, use the sidebar, and refresh the board
* [Concepts](/planningboard/concepts/index) — understand swimlanes, capacity bars, Plan queries, and normalization
* [Guides](/planningboard/guides/index) — task-oriented how-to guides for swimlane configuration, capacity setup, and more
**KB Articles**
* How to setup Planningboard into existing projects (based on E-library template)
* Install Planningboard
* Introduction to Planningboard
**Support Tickets**
* [#6174](https://support.nextedy.com/helpdesk/tickets/6174)
* [#5879](https://support.nextedy.com/helpdesk/tickets/5879)
* [#5796](https://support.nextedy.com/helpdesk/tickets/5796)
**Source Code**
* `Config.java`
* `PlanningBoardWidgetRenderer.java`
* `PlanningBoardSetupService.java`
* `capacityHelperData.cy.ts`
* `Item.java`
***
## Next steps
With the board running in your project, explore these topics to get more out of Planningboard:
* [Create Your First Planningboard](/planningboard/getting-started/first-planning-board) — walk through a complete planning session end-to-end
* [Basic Board Interactions](/planningboard/getting-started/basic-interactions) — drag cards, use the sidebar, and refresh the board
* [Concepts](/planningboard/concepts/index) — understand swimlanes, capacity bars, Plan queries, and normalization
* [Guides](/planningboard/guides/index) — task-oriented how-to guides for swimlane configuration, capacity setup, and more
**KB Articles**
* How to setup Planningboard into existing projects (based on E-library template)
* Install Planningboard
* Introduction to Planningboard
**Support Tickets**
* [#6174](https://support.nextedy.com/helpdesk/tickets/6174)
* [#5879](https://support.nextedy.com/helpdesk/tickets/5879)
* [#5796](https://support.nextedy.com/helpdesk/tickets/5796)
**Source Code**
* `Config.java`
* `PlanningBoardWidgetRenderer.java`
* `PlanningBoardSetupService.java`
* `capacityHelperData.cy.ts`
* `Item.java`