> ## Documentation Index
> Fetch the complete documentation index at: https://learn.nextedy.com/llms.txt
> Use this file to discover all available pages before exploring further.
# Adding the Gallery
> Add the Nextedy MEDIAKIT gallery to a Polarion work item form by editing the form layout for each work item type.
export const LastReviewed = ({date}) => {
if (!date) return null;
const formatted = new Date(`${date}T00:00:00Z`).toLocaleDateString("en-US", {
year: "numeric",
month: "long",
day: "numeric",
timeZone: "UTC"
});
return
Last reviewed on {formatted}
;
};
## What You Will Achieve
By the end of this tutorial the Mediakit gallery will appear as a section on the work item form, ready to accept files.
## Prerequisites
* Mediakit installed on your Polarion server — see [Installation](/mediakit/getting-started/installation)
* Administrator access to the project you want to configure
* A project with at least one work item you can open
**The gallery is added per work item type.**
Polarion keeps a separate form layout for each work item type. Adding Mediakit to the wrong layout does nothing at all — the form simply renders without the gallery, with no error and no warning to tell you why.
Add it to the layout of every type that should show the gallery. The **-- Unspecific --** layout applies only to types that have no layout of their own.
## Add the Gallery
In the project, go to **Administration → Work Items → Form Configuration**.
Scroll past **Form Filters** to the **Form Layouts** table. It lists one row per work item type, plus a **-- Unspecific --** row.
Pick the row for the type you want the gallery on and select **Edit**. A basic XML editor opens.
Add an `extension` element where you want the gallery to appear. Placing it after the `attachments` field puts the gallery directly below Polarion's own attachment list:
```xml theme={null}
```
The `label` is the section heading readers will see, so choose whatever suits your project. `mode` and `height` are optional — see [Form Extension](/mediakit/reference/form-extension) for what they accept.
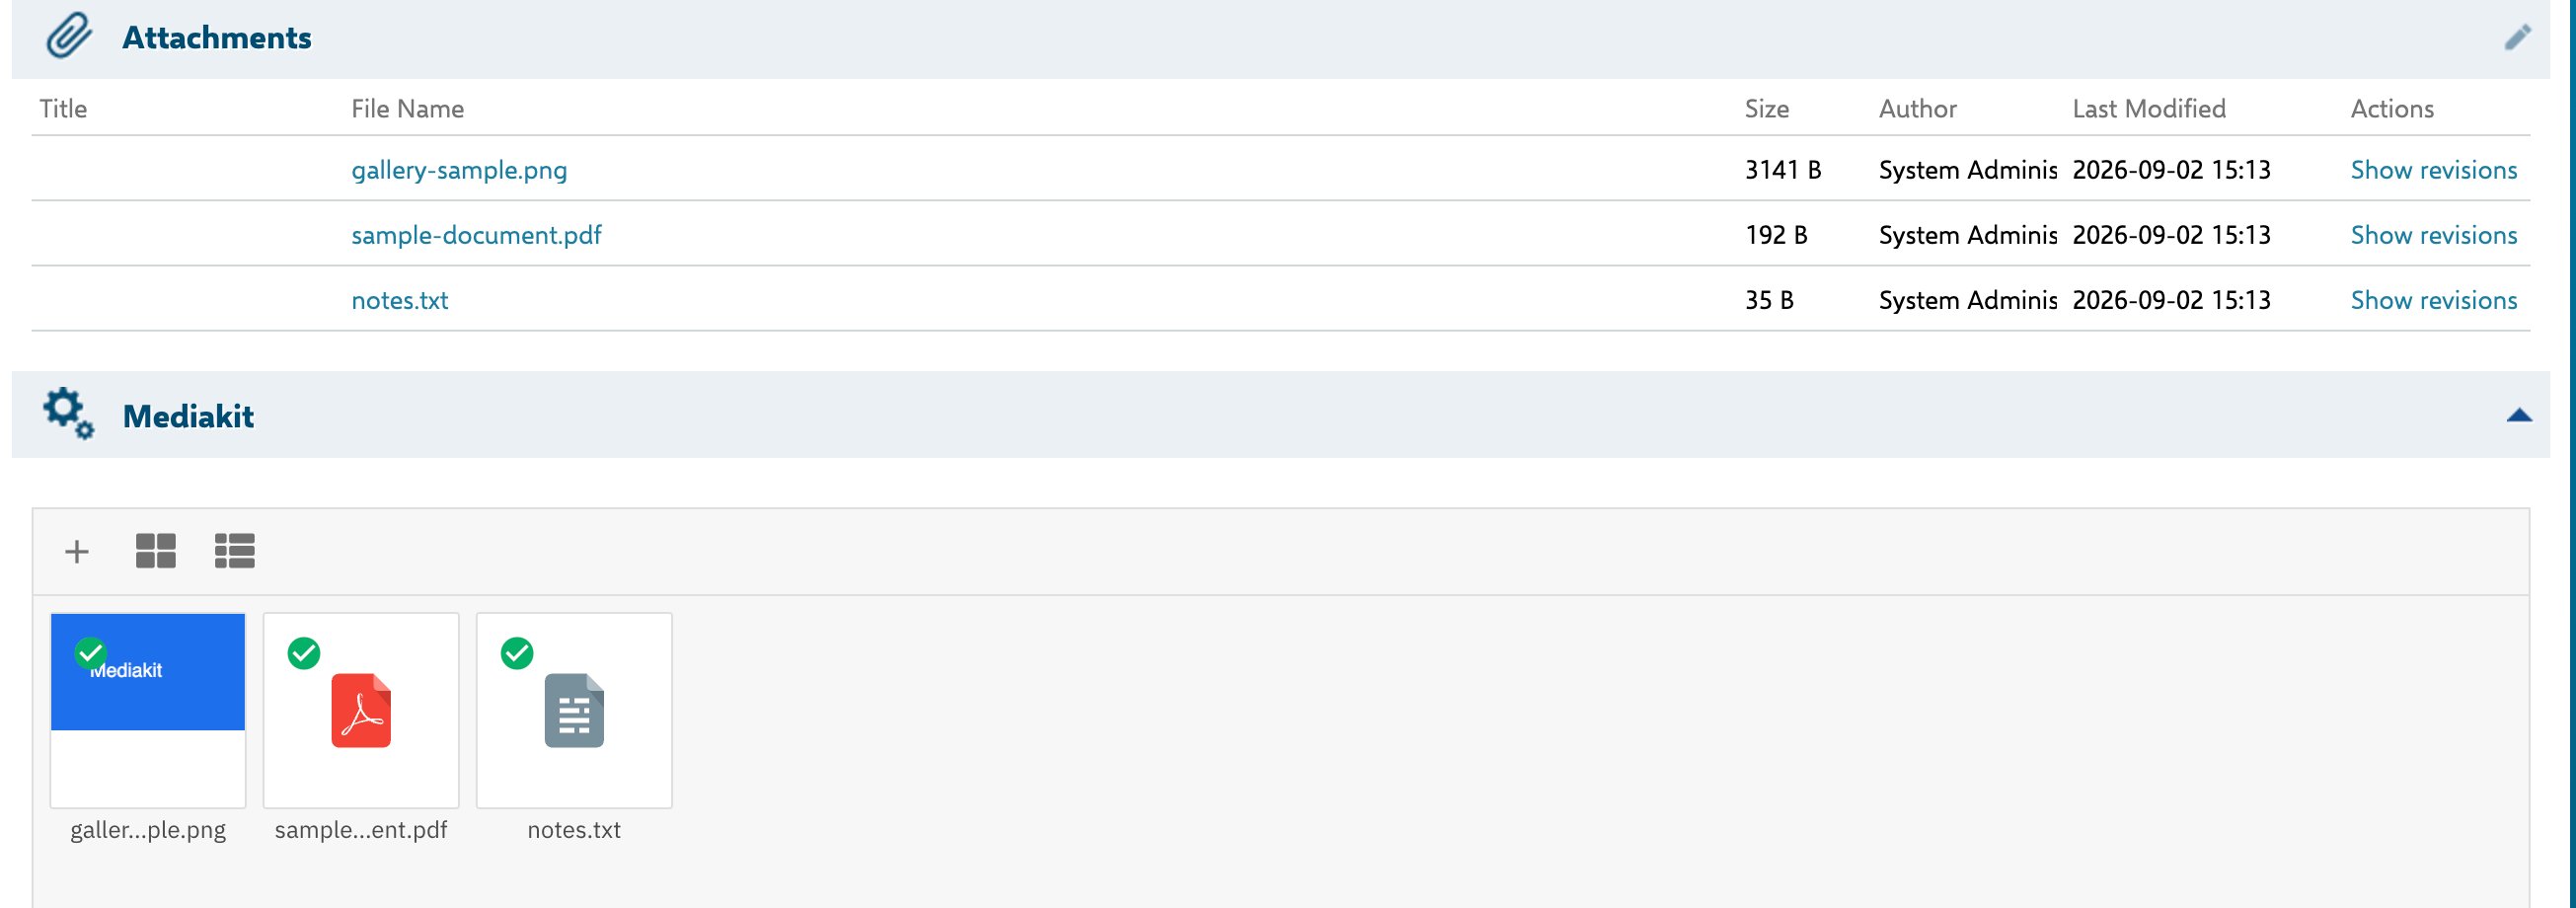
Save the layout, then open a work item of that type. The gallery appears as its own collapsible section, headed with the `label` you set.
 ## Repeat for Other Work Item Types
The gallery now appears only on the type whose layout you edited. To show it elsewhere, repeat the steps above for each additional type.
## Next Steps
Add files to the gallery and understand what happens when a name already exists.
Every attribute the extension element accepts, with defaults.
## Repeat for Other Work Item Types
The gallery now appears only on the type whose layout you edited. To show it elsewhere, repeat the steps above for each additional type.
## Next Steps
Add files to the gallery and understand what happens when a name already exists.
Every attribute the extension element accepts, with defaults.